The configurations presented in this article will replace your Android device's home screen with the ITESLIVE display. This will stop users from easily closing the app and opening others on the device.
| available with: |
| Android Player: Starter, Pro, Premium |
In the event that you wish to dedicate your Android exclusively to the use of the ITESLIVE display, there are optional configurations that can be applied to the device to do so. These configurations are much more restrictive in nature than the configurations completed in the base installation procedure for the ITESLIVE application.
Dedicated device configuration in the Studio
Note: The first step is to a configuration that must be applied in the ITESLVIE Studio, by default, the ITESLIVE application can be used like any other Android application. This means that the application can be minimized or closed with the regular Android menu options. The following configuration makes it so that once the ITESLIVE application is displayed, it is much more difficult to use the Android device for anything other than the display itself.
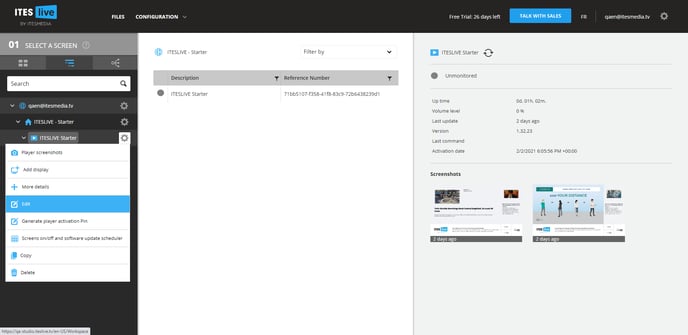
Log in to the ITESLIVE Studio, once you are connected, click the gear icon to the right of your Android player and select " Edit ".
In the « Player Edition » window, activate the « Dedicated device » setting and click « Save ».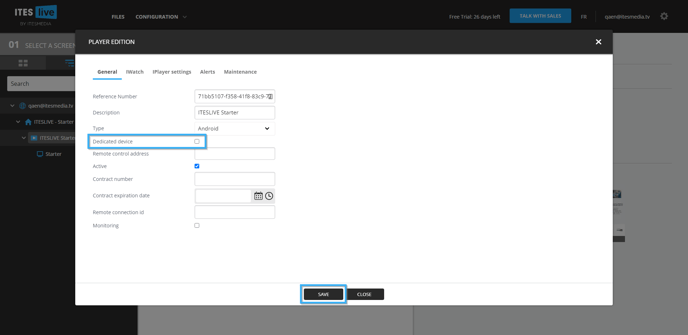
Remove lock screen
Note: By default, when the Android player boots it will display a lock screen. This is a page that requires a user interaction to continue onto the home screen, it may require a PIN or one of the other possible configurations. The following steps will allow you to bypass the lock screen and access Android directly when your device boots.
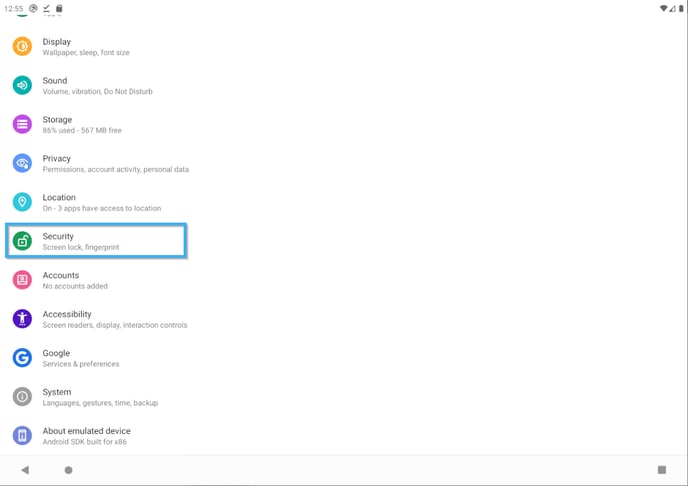
In the « Settings » application, select the entry named " Security ».
Once you are in the " Security ", select the entry named "Screen lock".

Select the entry named " None ".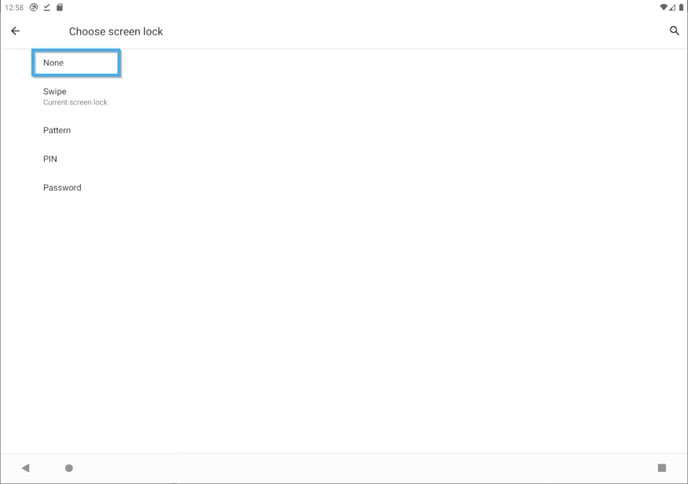
Disable the screen saver
Note: Seeing that the objective here is to dedicate the Android player to the ITESLIVE display, we want to ensure that the screen saver is not displayed. The first configuration done in the ITESLIVE Studio will make it so that the display will be. « Pinned » on screen and makes it impossible for the device to broadcast the screen saver as long as the display is being broadcast. What we want to avoid here is having the screen saver being activated while you apply changes to the device's settings (in the event that you need to) in the future.
In the " Settings " application, select the entry named " Display ".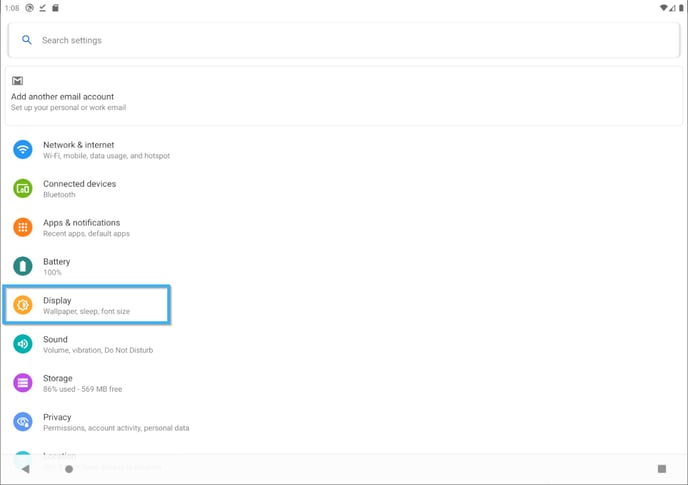
Once you are in the " Display " menu, select the entry named " Advanced ".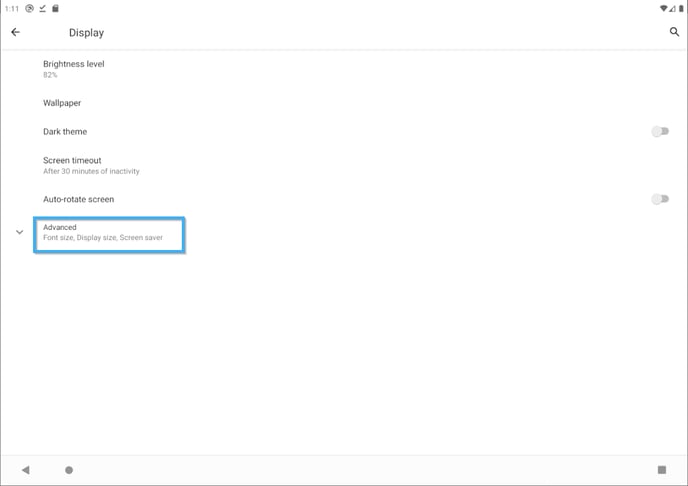
When the advanced settings are displayed, click on the entry named "Screen saver".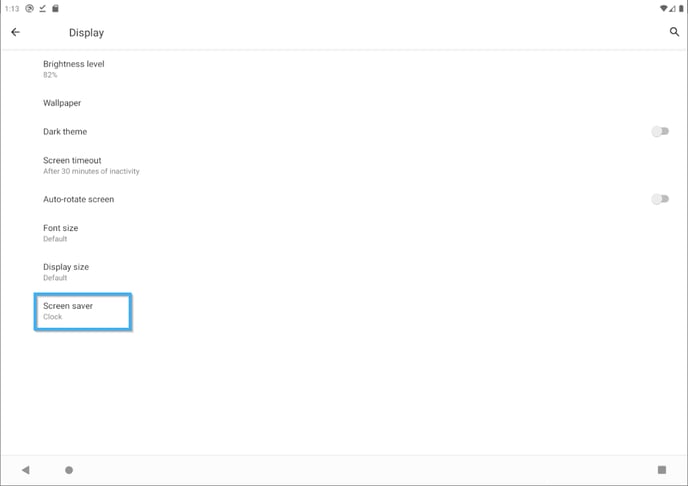
In the " Screen saver " menu, select the entry named " When to start ".
In the list displayed in the " When to start menu ", select the entry named " Never ".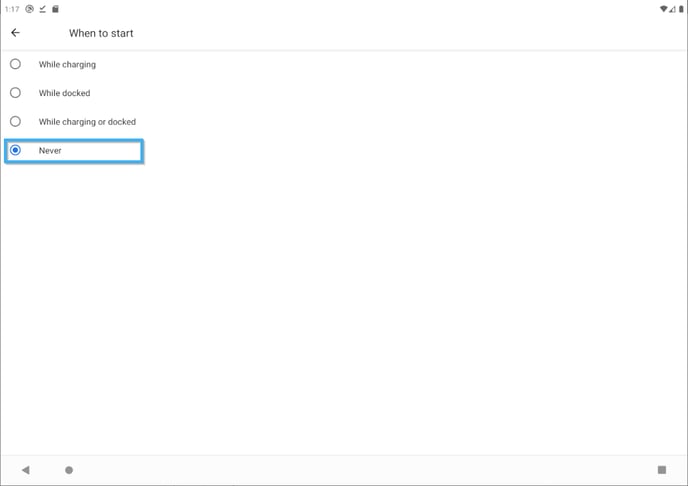
Configure the Android player to start the ITESLIVE application automatically
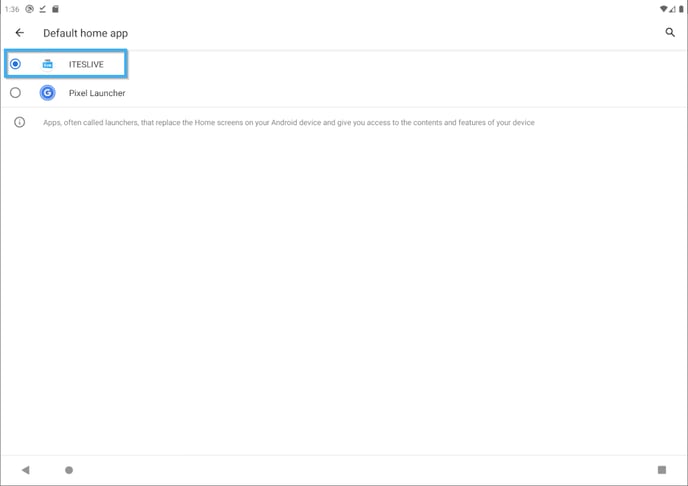
Note: By default, the home application for your Android player will be the device's application launcher (the application's name may change according to your Android device's make and model). To ensure that the display's audience does not have the option to start an application other than the ITESLIVE display, we must replace the home application by the ITESLIVE application. This configuration will make it so that the ITESLIVE display will be started automatically when your Android device starts.
In the " Settings " menu, click on the entry named " Apps & notifications ".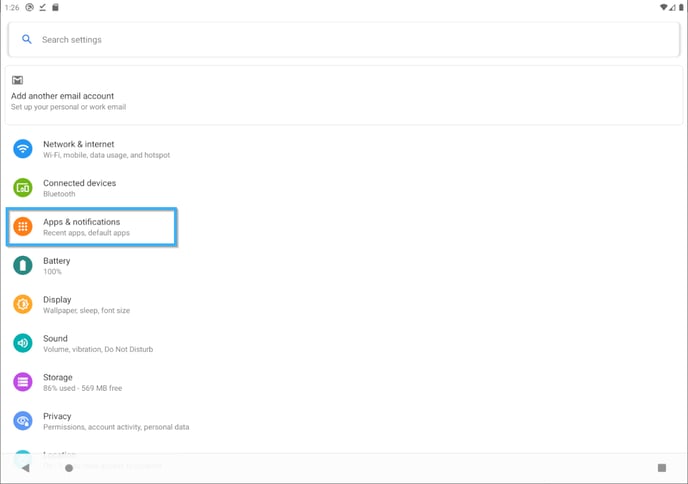
In the " Apps & notifications ", click the entry named " Default apps ".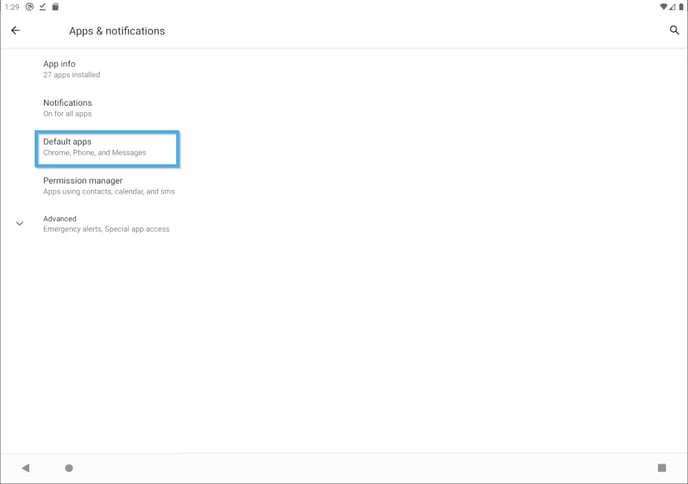
Once you are in the " Default apps " menu, click the entry named " Home app ".
Click the button to the left of the ITESLIVE application in the application list to make it the default home app.