Here are the mandatory technical configurations for using Office 365 clips
| available with: |
| Windows Player : Pro, Premium Web Player : Pro, Premium LG webOS Signage Player : Pro, Premium Samsung SMART Signage Platform (SSSP / Tizen) Player : Pro, Premium Brightsign Player: Pro, Premium Android Player: Pro, Premium Linux Player: Pro, Premium macOS Player: Pro, Premium |
Notes: Microsoft requires a configuration (called an "APP registration") to be generated by a user with administrator privileges on Microsoft Azure to display your documents in your ITESLIVE displays. This configuration allows you to attribute privileges that will limit the document's use to the expected actions.
Important: You are likely going to require the help of your IT team to complete the following procedure. We strongly suggest that you consult them before proceeding.
Microsoft Azure Configurations
Navigate to the following URL in a web browser.
https://portal.azure.com/
The landing page will ask you to connect to your Microsoft account.
Important: Please note that the Microsoft account you will use must have administrator privileges for your organization.

Click on the "More services" on the Microsoft Azure home page.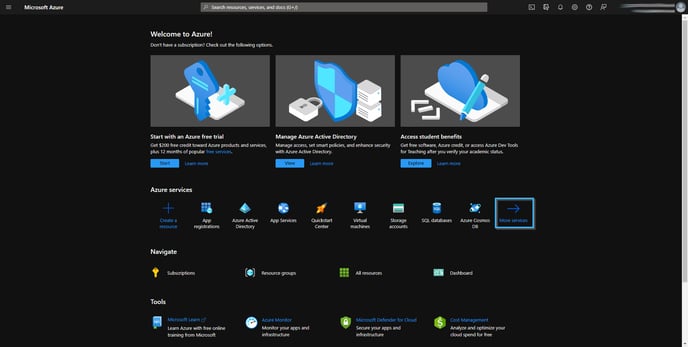
The button is located under the "Azure services" header.
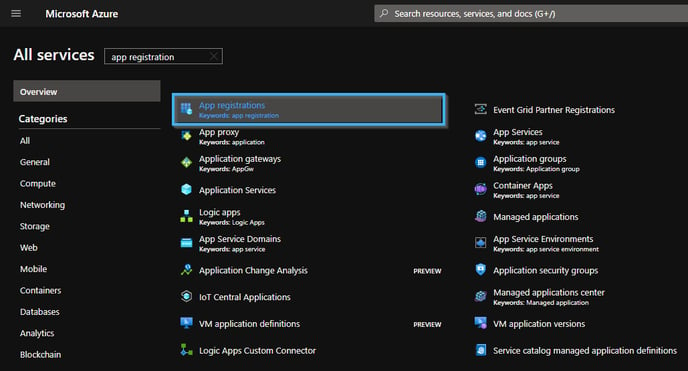
Write "App registration" in the search bar next to the "All services" header.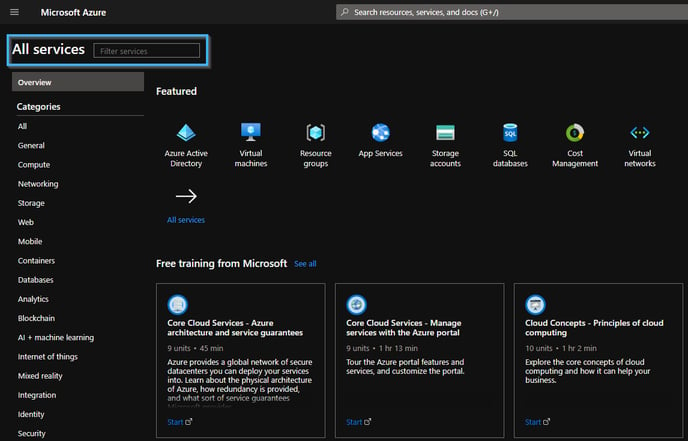
Click the result called "App registrations".
Click the button called "New registration" in the "App registrations" page.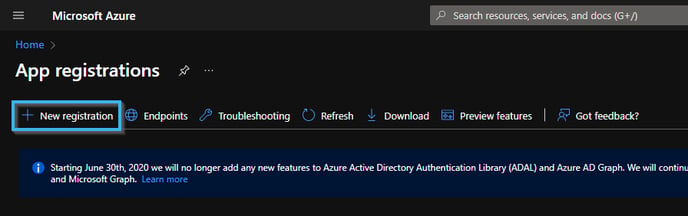
The name you write for the application under the "Name" header will represent it in the Microsoft Azure portal.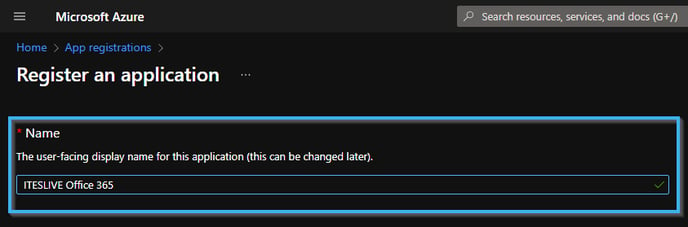
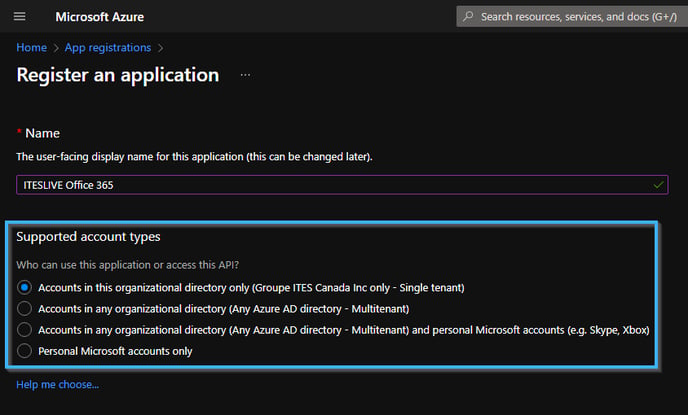
Ensure that the "Supported account types" radial button is using the following value.
Accounts in this organizational directory only (Your organization name only - Single tenant)
Select the "Web" entry un the "Redirect URL (optional)" header and enter the following URL in the text box.
https://studio.iteslive.tv
Once the required information has been entered, click the "Register" button.

Once on the page that bears your application's name, click the "Authentication" button.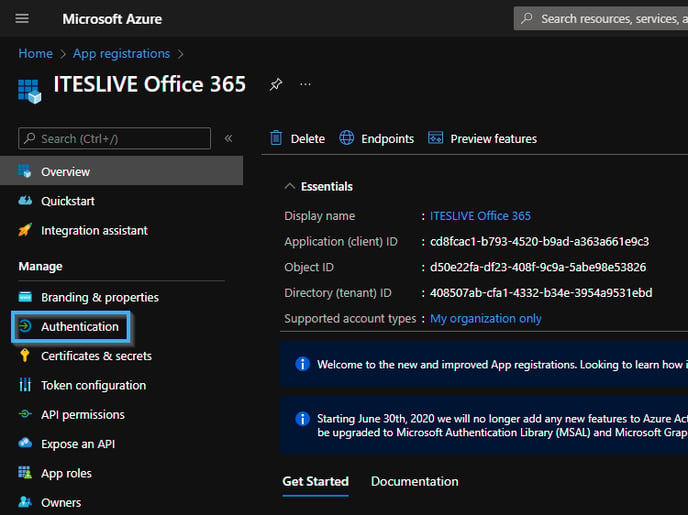
Activate the "Access Tokens (used for implicit flows)" checkbox under the "Implicit grant and hybrid flows" header.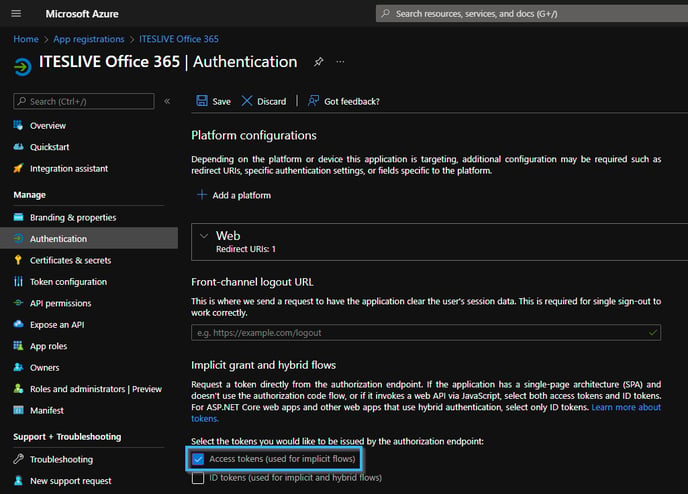
Activate the configuration called "Allow Public client flows" under the "Advanced settings" header and click the save button in the top of the page.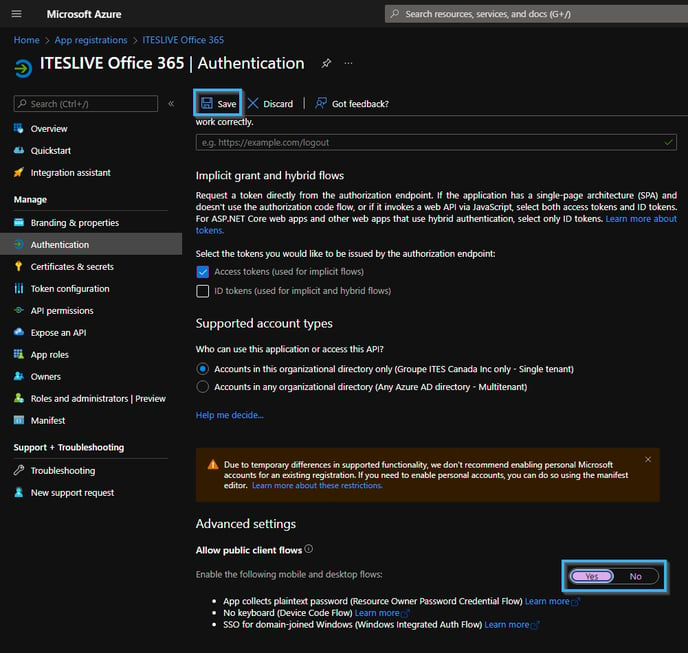
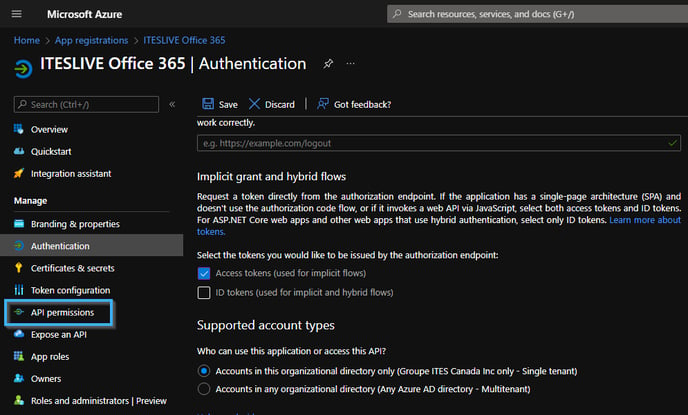
Click the button called "API permissions" on the left side of the page.
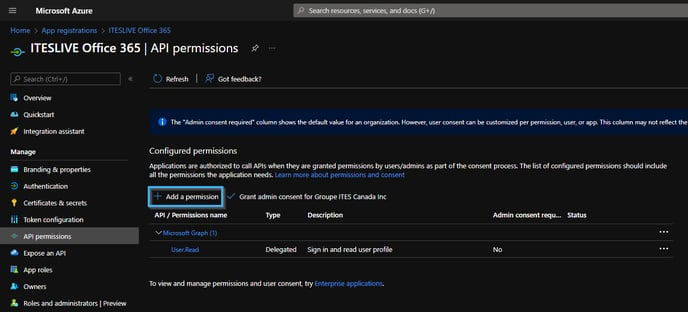
Once on the "API permissions' page click the button called "Add a permission".
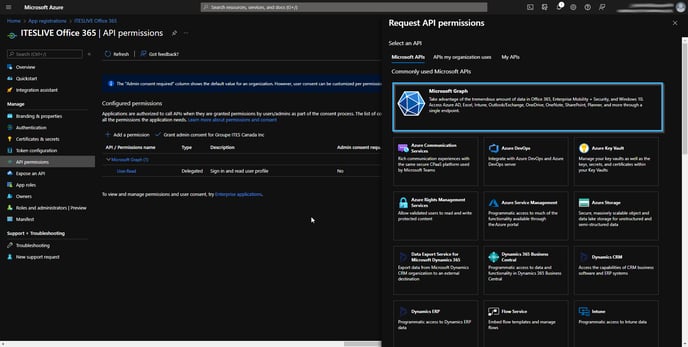
Click the button called "Microsoft Graph".
Click on the "Application permissions" button.
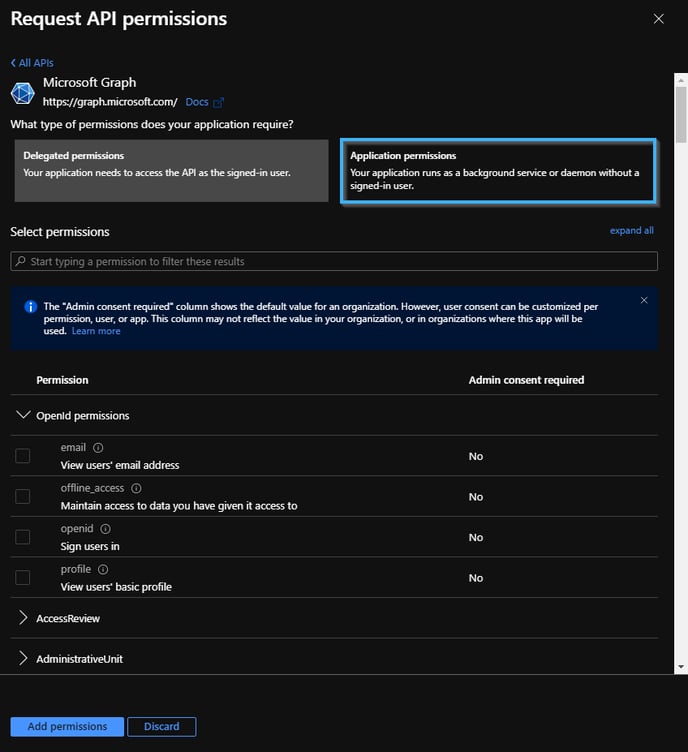
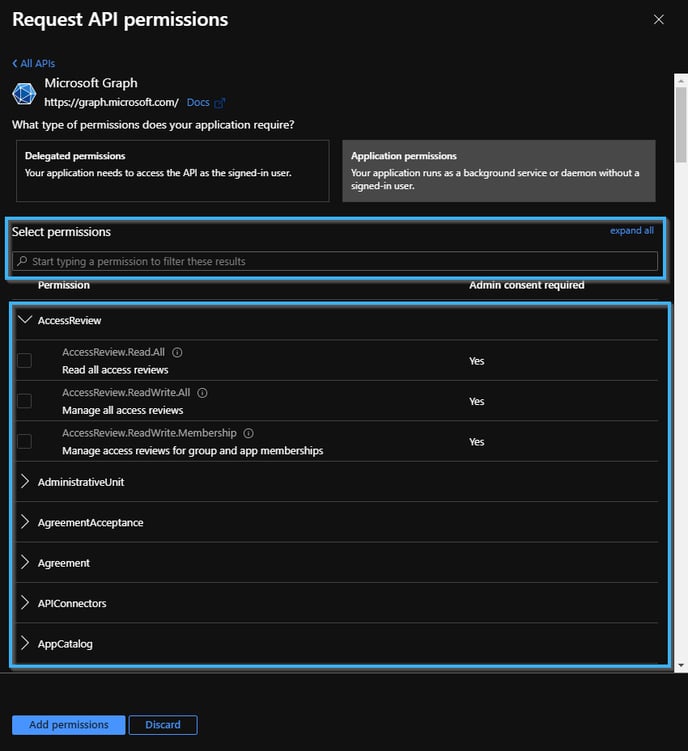
You can use the search bar or the permissions list to activate the following permissions.
- Permission group : Calendars - Permission à activer : Calendars.Read
- Permission group : Directory - Permission à activer : Directory.ReadWrite.All
- Permission group : Files - Permission à activer : Files.Read.All
- Permission group : Place - Permission à activer : Place.Read.All
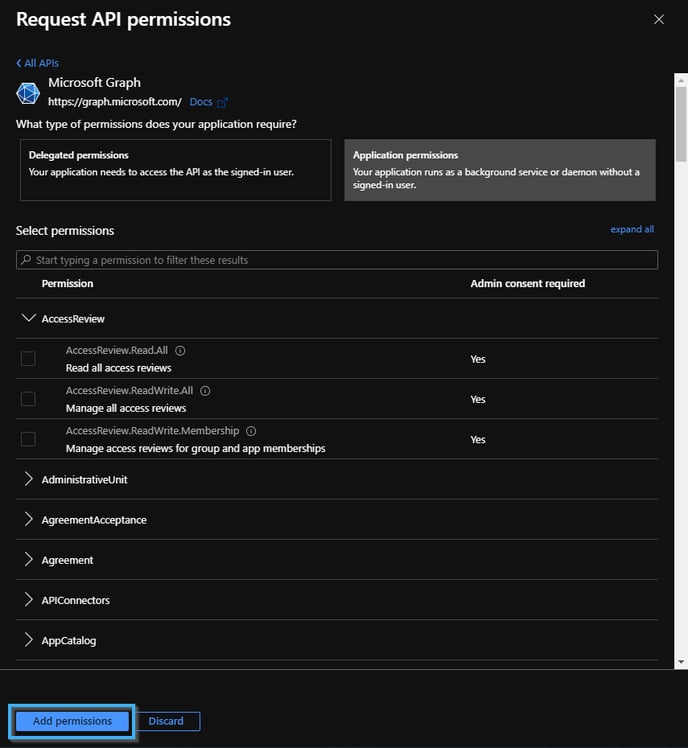
Click on the "Add permissions" button to apply the permissions that you activated.
Click the "Grant admin consent for (your organization name)".
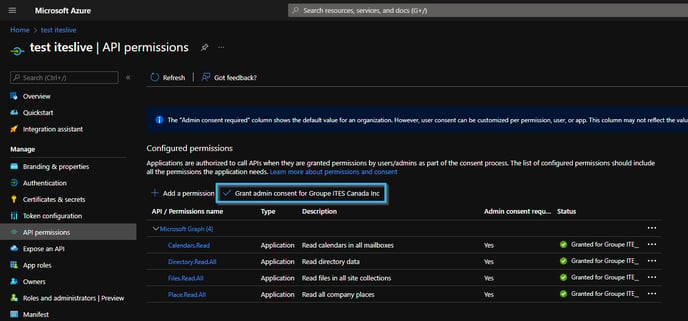
Confirm that you wish to grant administrator consent.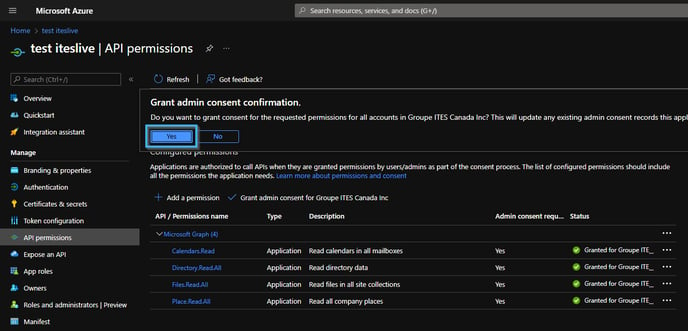
Click the "Overview" button in the top left corner of the page.
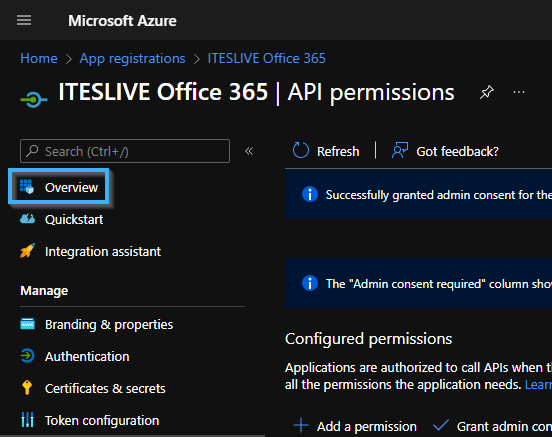
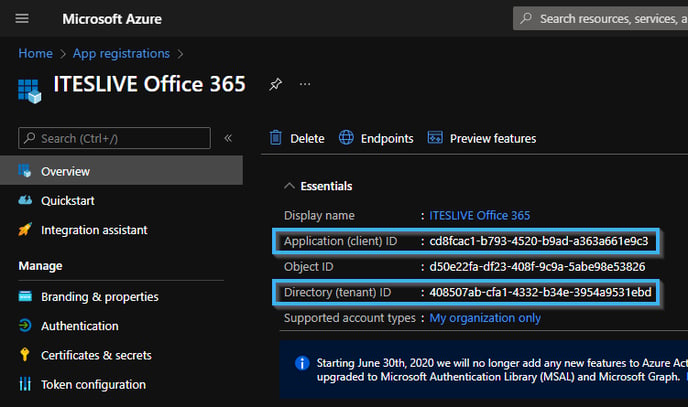
Once on the "Overview" page, copy the following information.
- Application (client) ID
- Directory (tenant) ID
Then click the "Add a certificate or secret" button.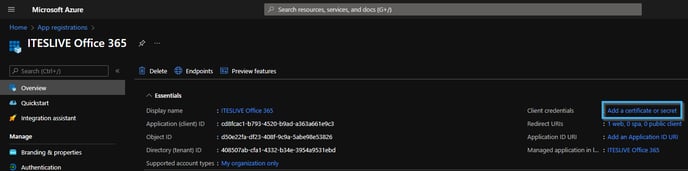
Click the "New client secret" button.

You can enter a description and an end date for the client secret, once these configurations have been applied click the "Add" button.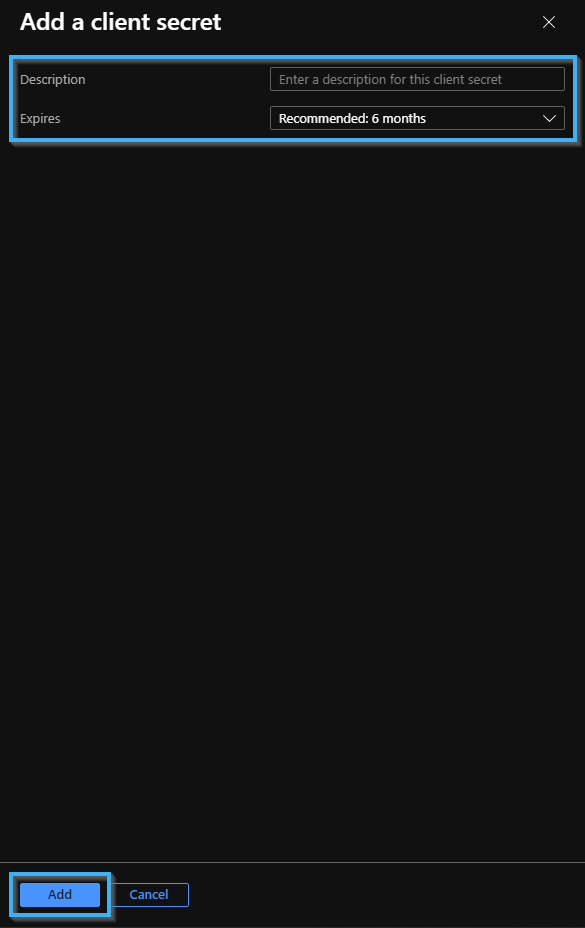
Finally, copy the client secret's value.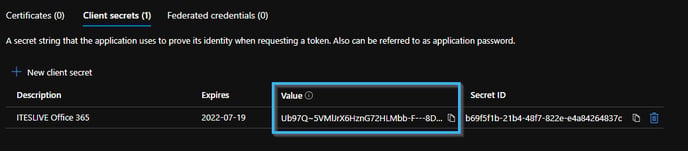
ITESLIVE Studio configurations
Login to your account on the ITESLIVE and click the gear to the right of your account group. When the dropdown menu opens click the "Edit group" entry. 
In the "Edit group" window, clicl the "Azure app Settings" tab.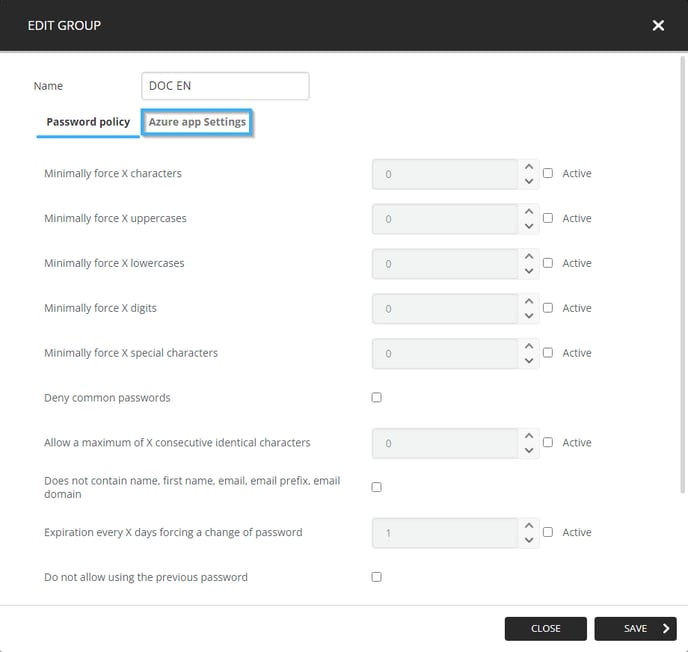
Paste the information you copied earlier in the following fields.
- Application (client) ID = Client ID
- Directory (tenant) ID = Tenant ID
- Client secret = Client secret
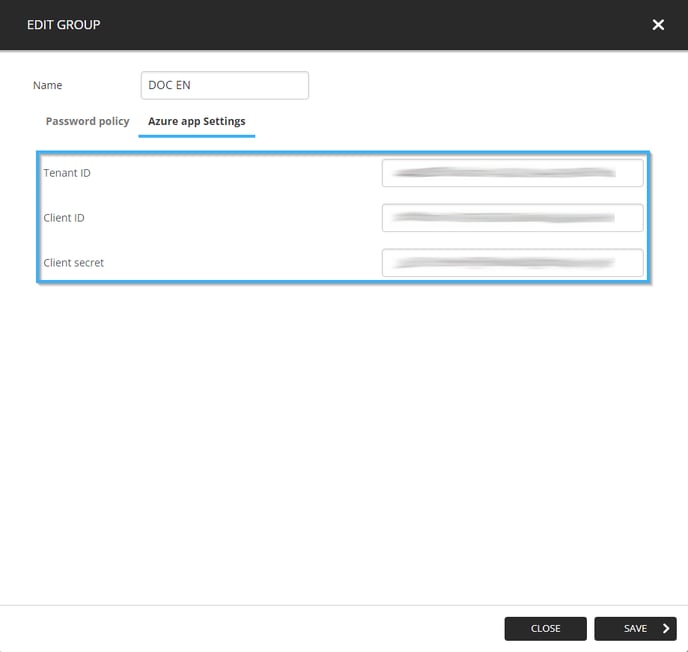
You can now save the changes to your account group on the Studio, click the "Save" button.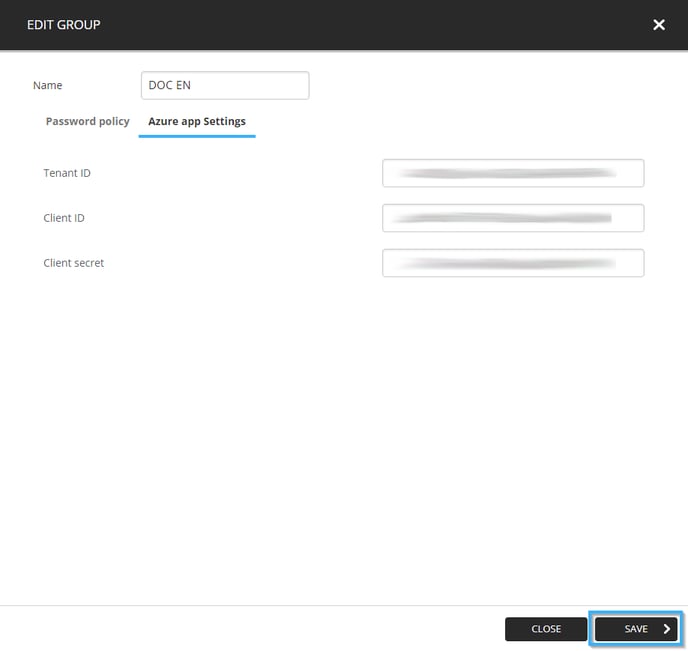
Your users can now use the Office 365 type clips on your digital signage network.