| AVAILABLE WITH: |
| Windows Player: Starter, Pro, Premium |
| Web Player: Starter, Pro, Premium LG webOS Signage Player: Starter, Pro, Premium Samsung SMART Signage Platform (SSSP / Tizen) Player: Starter, Pro, Premium Brightsign Player: Starter, Pro, Premium Android Player: Starter, Pro, Premium Linux Player: Starter, Pro, Premium macOS Player: Starter, Pro, Premium |
Access your clip settings
Select the clip you want to access the settings for, then click the gear icon. The settings window will open.


Clip settings
A number of items can be programmed for each clip. If you do not know how to access your clip settings, go here. Settings include:
-
Properties
- Recurrence
- Options
PROPERTIES

Active
The active configuration determines whether or not a clip will be broadcast. If the configuration is active (displayed with the green square) it will be displayed, if it is inactive (displayed with a grey square) it will not be displayed.
Note: It is also possible to remove clips from your displays using the calendar.
Play length
Play length indicates the amount of time (seconds, minutes, hours) your clip will appear on screen.
When the “Does not end” box is selected, the clip will continue to play in a loop without proceeding to the next clips in the playlist. If there are other clips before this one in the playlist, they will run first before the looped content. But once this clip is started, it will run indefinitely.
Note: If the template used for the clip contains a list tool, the "Page play length" will become available in the clip settings.
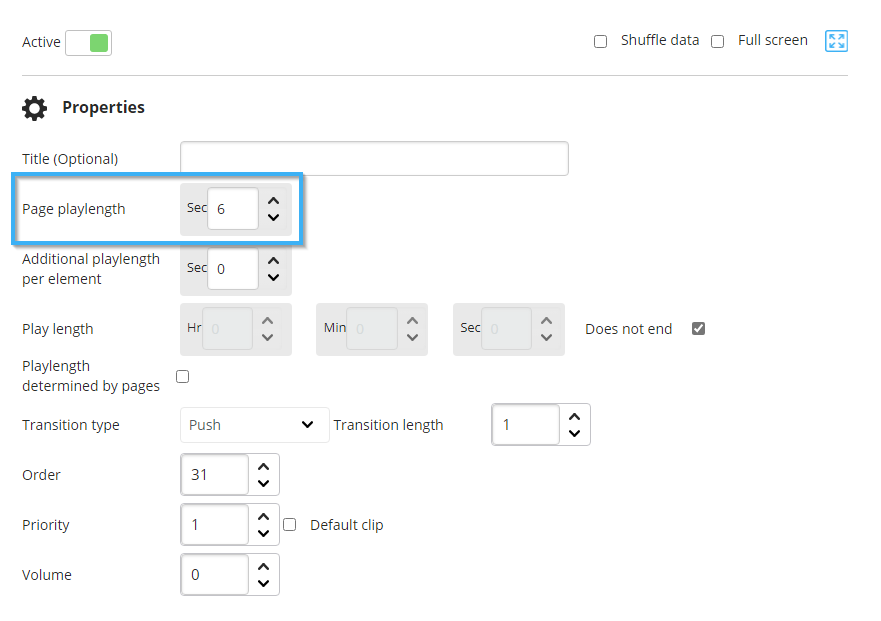
Title
This text box lets you enter the name of your choosing for your clip. This name will be displayed in the playlist. If you do not enter a name here, the system will automatically assign a name, based on the type of clip it is. For example, if it is an image, the clip name will be the file name. If it is a message, the name of the template will appear.
Tip: Although you are not required to use titles, we suggest you make it a habit to do so to help keep your playlists organized.
Transition
A transition is the style of animation used when a clip appears on screen. Transitions can also be programmed directly in a playlist.
Note: If there is no programmed transition for a given clip, the system will use the playlist transition by default.
Priority
This feature lets you determine the display priority of certain clips by assigning a value of between 1 (high priority) and 99 (low priority). The default value (0) indicates the lowest possible priority level. If a higher-priority clip becomes invalid (because of calendar, recurrence or real-time display settings), the system will move on to the next highest priority, and the next highest priority after that, and so on until the default 0 setting is reached.
Tip: You can use priorities to create an additional display condition for your content. This is particularly helpful when used in conjunction with calendar, recurrence and real-time data settings. You can therefore use the priority feature to play content based on precise time slots.
Volume
Certain types of clips allow you to display videos, these videos can come from a variety of sources the volume in each of these can vary when they are broadcast. You can adjust the volume of a video that is playing too loudly by changing the value in this field, it contains a numerical value from 0 to 100. When the value is 0, the video will play any audio even if it contains audio and if it is at 100 the audio will play at maximum capacity.
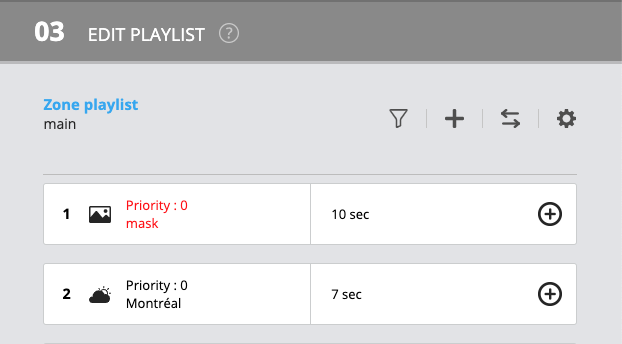
Calendar

Using the calendar, you can indicate a specific date and time for playing a clip. Inactive clips are shown in red in the playlist.
RECURRENCE
This section lets you indicate how often you want a clip to repeat. Recurrences can be yearly, monthly, weekly or daily. There won't be any recurrences by default, you will need to click the "+" to add one.

Once you have clicked the "+", you will need to enter a name to represent your recurrence.
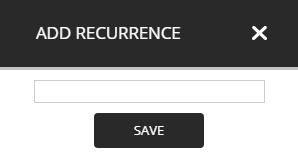
Once you have entered a name, the recurrence section can be configured.
Note: It is possible to add several recurrences this way.
Note that the established playlist order takes precedence over “Play This Clip Every.” In other words, a clip will run if it is its turn in the playlist and if it matches the settings in the “Play This Clip Every” field.
Example:
If your playlist consists of five 10-second clips and your second clip is programmed to run every 20 seconds, the clip will play at the 10-second mark the first time and the 60-second market the second time.
Clip 1 (plays from 0 to 10 seconds)
Clip 2 (plays from 10 to 20 seconds)
Clip 3 (plays from 20 to 30 seconds)
Clip 4 (plays from 30 to 40 seconds)
Clip 5 (plays from 40 to 50 seconds)
Clip 1 (plays from 50 to 60 seconds)
Clip 2 (plays from 60 to 70 seconds)
As the above example shows, despite being programmed to run every 20 seconds, there is a 50-second interval between the first and second play.
FULL SCREEN

The “Full Screen” option can be enabled at the top right-hand corner of the window. If the box is not ticked, the clip will play in its selected zone. If the box is ticked, however, the clip will take up the entire screen and will be the only information visible. For best results, make sure the aspect ratio for the clip to be played in full-screen mode matches the monitor settings. For example, if your screen has an aspect ratio of 9:16, make sure the clip’s is the same.
Note: After the full-screen clip has played, the content will revert to whatever settings have been programmed for the other zones. In other words, there is no danger of a clip being omitted from the playlist.
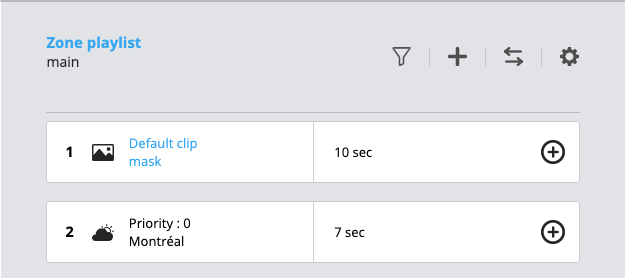
DEFAULT CLIP
The “Default Clip” option lets you indicate what should be shown on screen if ever your playlist content is invalid (based on calendar, recurrence and real-time data settings). This default clip will not be displayed as long as there is active content running. You may program more than one default clip.
Default clips are indicated in blue in the playlist.
Tip: You can add a playlist clip within your main playlist and indicate it as the default. This will allow you to centrally manage your default content.
Access to clip settings
You can access the settings of any clip in two ways:
1. When adding a new clip to a playlist.
2. By changing a clip that is already in a playlist.