| Available with: |
| Windows Player: Starter, Pro, Premium Web Player: Starter, Pro, Premium LG webOS Signage Player: Starter, Pro, Premium Samsung SMART Signage Platform (SSSP / Tizen) Player: Starter, Pro, Premium BrightSign Player: Starter, Pro, Premium Android Player: Starter, Pro, Premium Linux Player: Starter, Pro, Premium macOS Player: Starter, Pro, Premium |
1. Select the zone where you wish to add an image
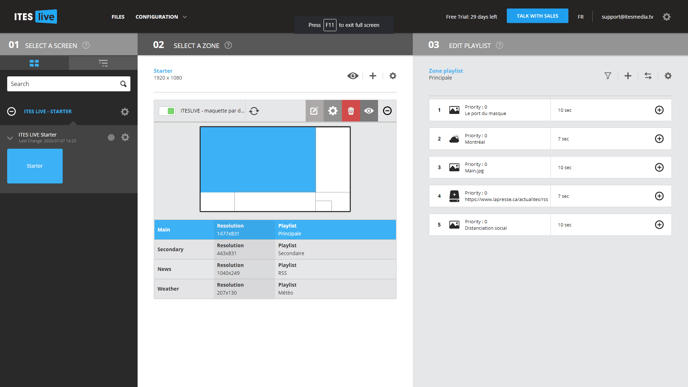
2. Click the “+” above the content of your playlist.

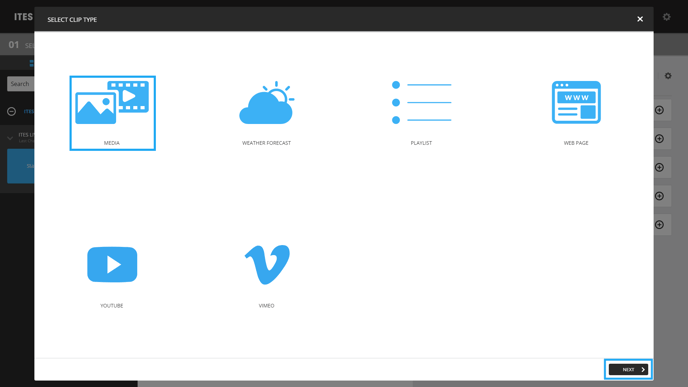
3. Click “Media”
4. Select the desired image.
In the “Select a File” window, browse to the desired visual and click the corresponding file. You will see a preview of the image on the right of the screen, along with the file name and resolution.
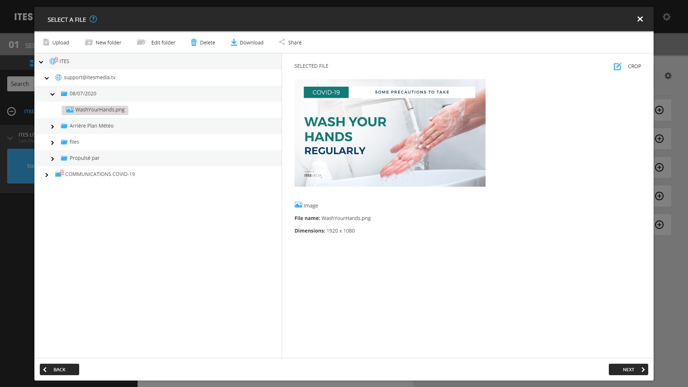
Note: You can also manage your directories in this window or upload a new image. Click here for a list of accepted file formats.
If the resolution does not match the required aspect ratio for the selected zone, you have two choices:
1) Crop the image using the built-in tool.
2) Use the image as is. It will fill as much space as possible without distorting the aspect ratio.
Click “Next” to adjust your clip settings.
5. Crop the image (optional)
Click the “Edit” button above the image to open the cropping tool.
If you are adding an image to a specific zone, the selection box will automatically maintain the aspect ratio of the selected zone. In other words, the tool will adjust whatever section of the image you use to the required ratio. After selecting the portion of the image you wish to use, click “Crop.”
You now have two choices:
1. “SAVE” to overwrite the original image file.
2. “SAVE AS” to create a new file.