| available with: |
| Windows Player : Starter, Pro, Premium Web Player : Starter, Pro, Premium LG webOS Signage Player : Starter, Pro, Premium Samsung SMART Signage Platform (SSSP / Tizen) Player : Starter, Pro, Premium Brightsign Player: Starter, Pro, Premium Android Player: Starter, Pro, Premium Linux Player: Starter, Pro, Premium macOS Player: Starter, Pro, Premium |
Important: You must contact your IT team to complete this procedure, because the resource completing the required manipulations must be an administrator of your Microsoft Entra ID.
After having created a login provider that associates your ITESLIVE Studio accounts to your Microsoft Entra ID, click on the "Configuration" tab and select "Login Provider Management".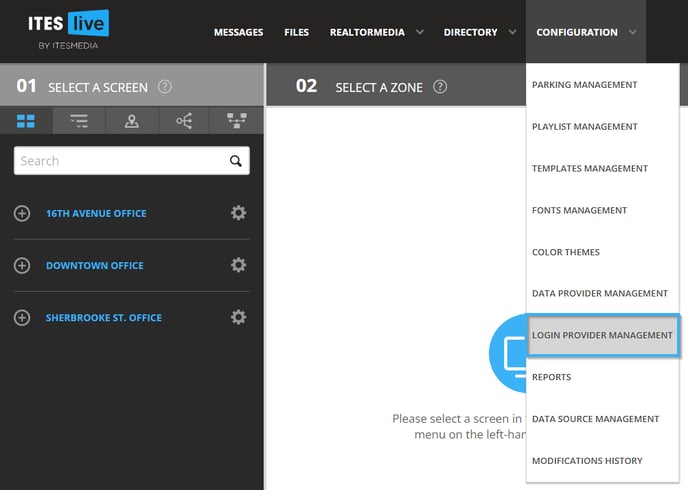
Navigate the tree view in the login provider management and select the desired login provider.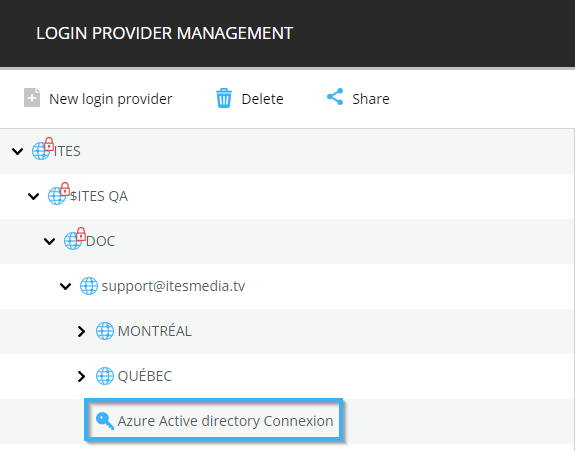
Ensure that the " Use groups from providers " checkbox is enabled and click the floppy disk icon to save the login provider.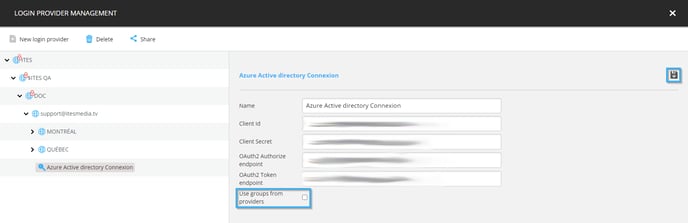
Log in to your account on the Microsoft Azure portal and click on the "More services" button.
Once on the "All services" page, select "Microsoft Entra ID".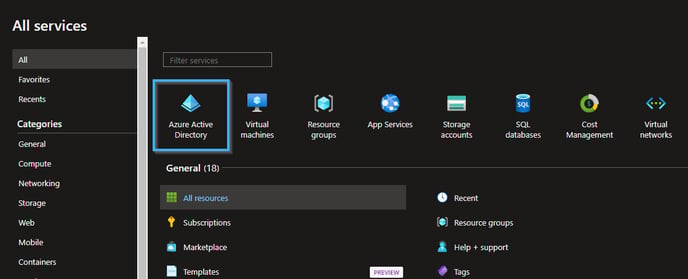
Click on the "App registration" entry in the list on the left-hand side of the window.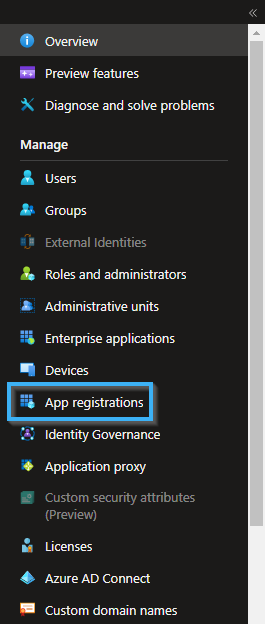
Select your "App registration" from the list.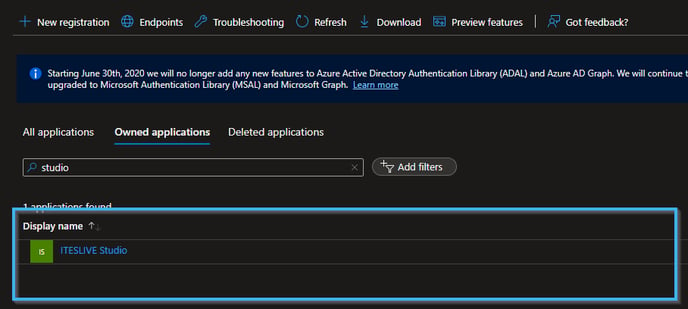
Click on the "Token configuration" in the list on the left-hand side of the window.
Click on the "Add groups claim" button.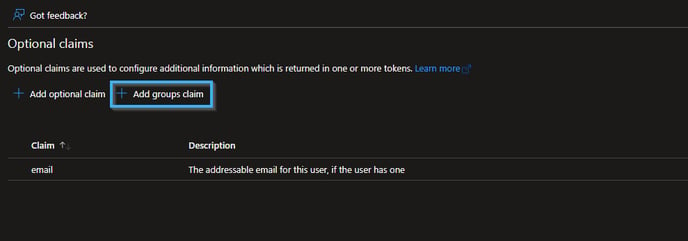
Select the desired group type.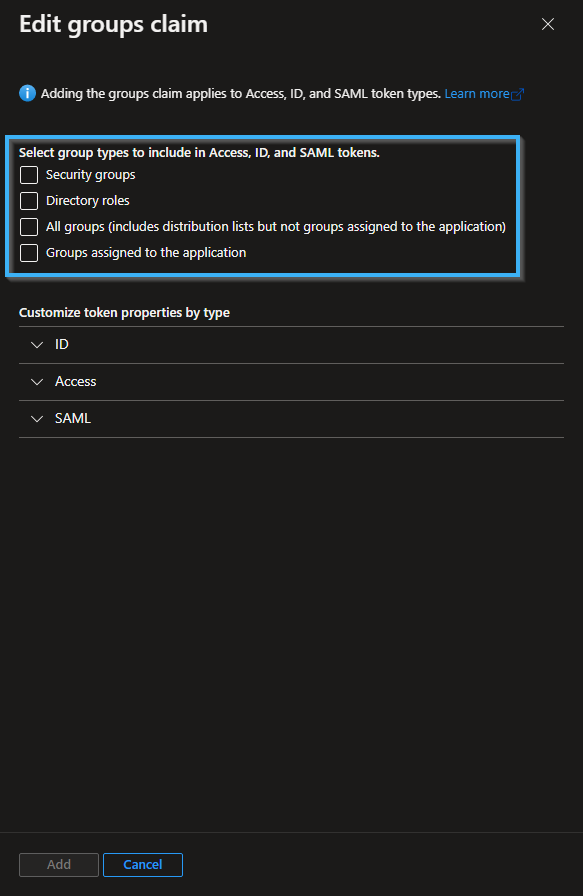
Once the desired group type(s) has been selected, click on the "ID" button then select "Group ID" and click the "Add" button.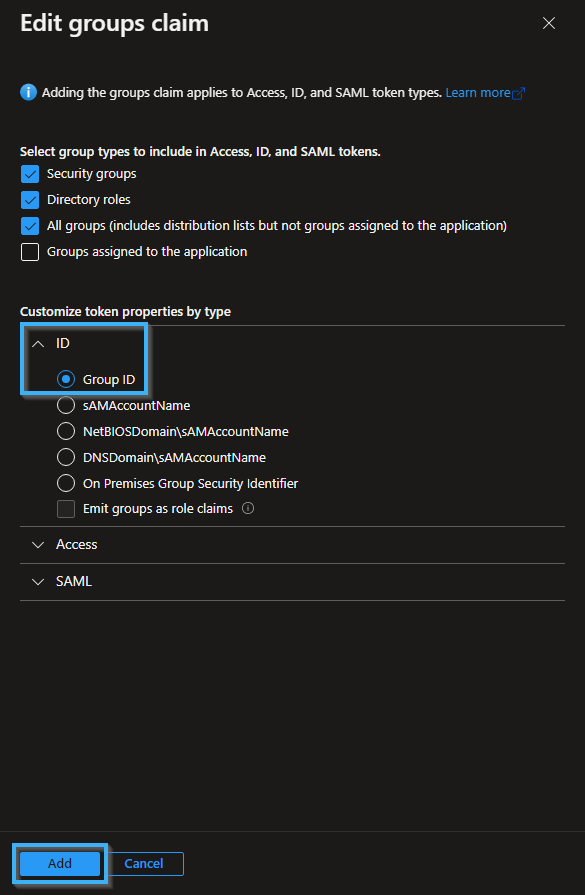
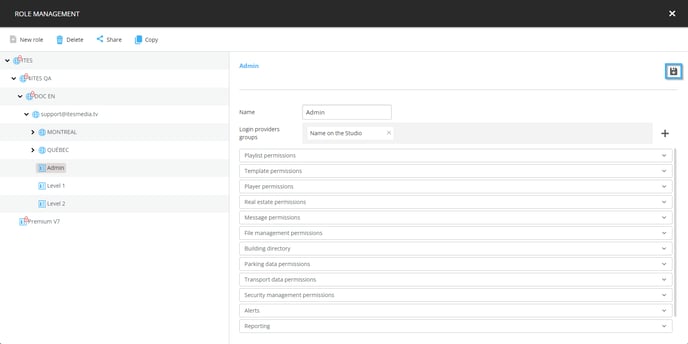
You can now return to the ITESLIVE Studio, click on the "Admin" tab and select "Role management".
Navigate to the account group that contains the role you wish to edit. Select the desired role from the list, then click on the "+" icon to the right of the "Login provider groups" configuration.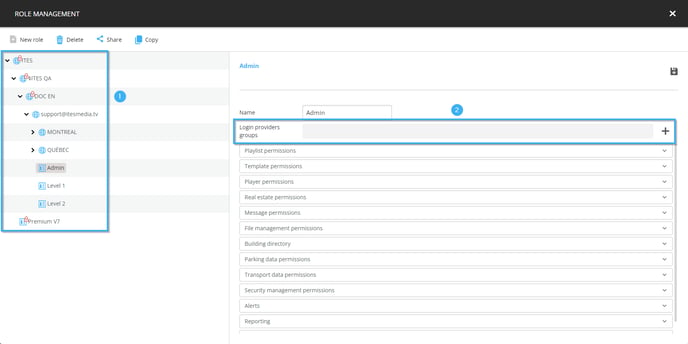
Copy and paste the "Object Id" of the desired Microsoft Entra ID group in the "Value" field, then determine the name that will represent the group on the Studio and click in the "Save" button.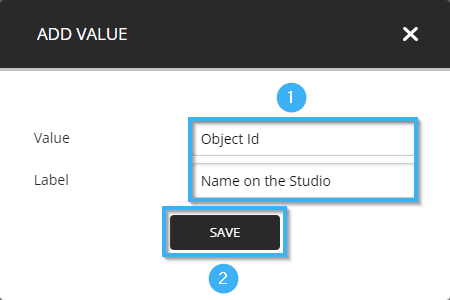
Once you can see the name you assigned in the list of "login provider groups", click on the floppy disk icon to save the role.