| available with: |
| Windows Player : Starter, Pro, Premium Web Player : Starter, Pro, Premium LG webOS Signage Player : Starter, Pro, Premium Samsung SMART Signage Platform (SSSP / Tizen) Player : Starter, Pro, Premium BrightSign Player: Starter, Pro, Premium Android Player: Starter, Pro, Premium Linux Player: Starter, Pro, Premium macOS Player: Starter, Pro, Premium |
It is possible to create an automated scrolling feed using an RSS template, that being said, it is also possible to create a scrolling feed that will be created by your users on the ITESLIVE Studio. Follow the following steps that allow you to create this type of feed.
New template creation
On the ITESLIVE Studio click on the configurations tab and select the entry named template management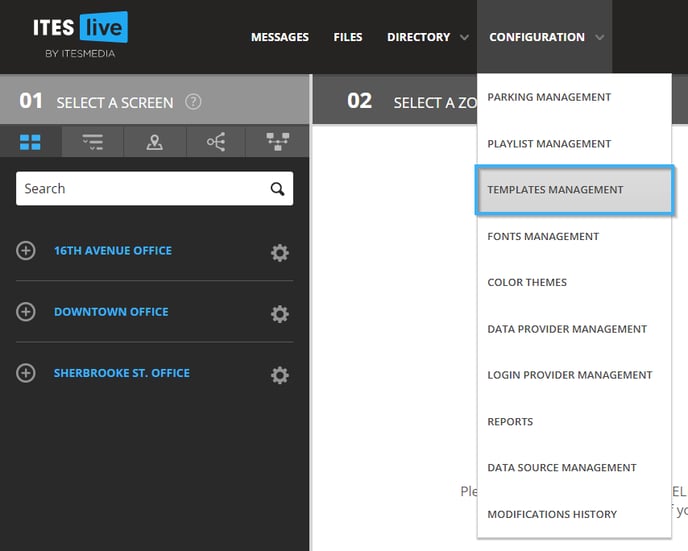
Navigate to the folder in which you wish to create the template and click on the "New template" button.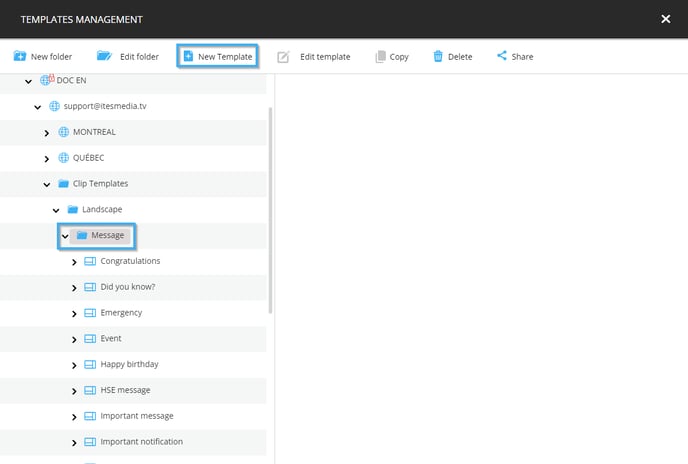
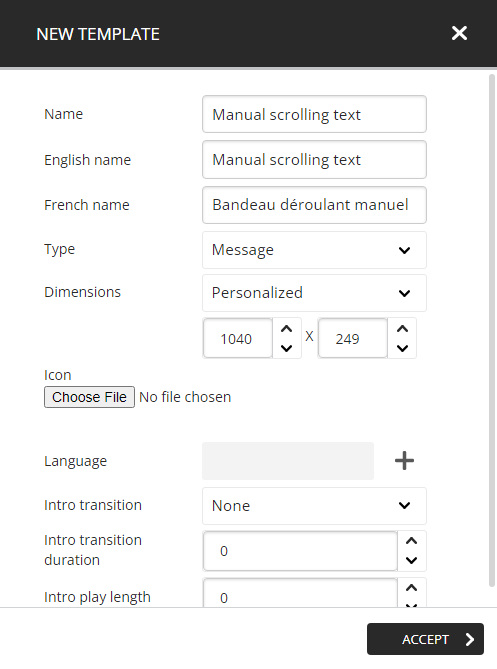
Before creating the visual aspects that will be used in the template, you must provide the following details.
- Name: Unique identifier for the template
- English name: The name that will be displayed for this template when the Studio is used in English
- French name: The name that will be displayed for this template when the Studio is used in French
- Type: In this case, we will be using the Message template type
- Dimensions: The resolution of the template must be identical to the resolution of the zone in which you will be using it
- Icon: A file you can select that will be used as a "Thumbnail" for the template
- Language: Determines the languages that will be available in the template
- Intro transition (optional): The animation for the transition for the template if it has an introduction
- Intro transition duration (optional): The length in seconds for the transition of the intro
- Intro play length (optional): The total play length for the introduction
Once the required information has been entered, click the "accept" button.
Create the editable field
Click on the button to access the definition editor.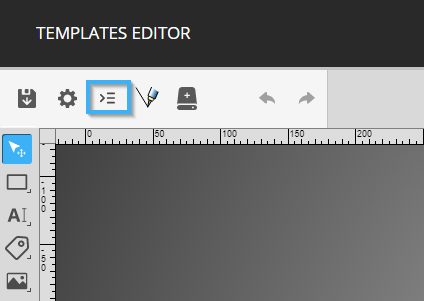
Click the "+" icon in the top of the window to add the a field.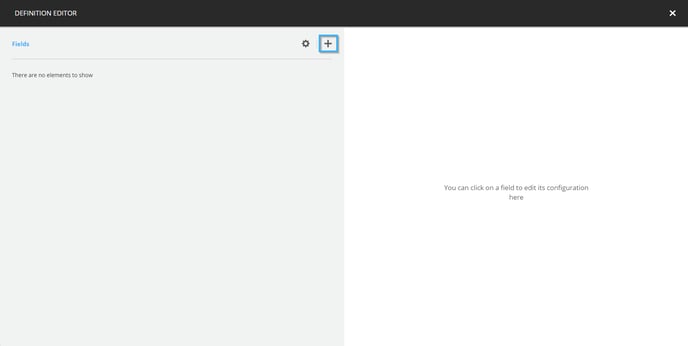
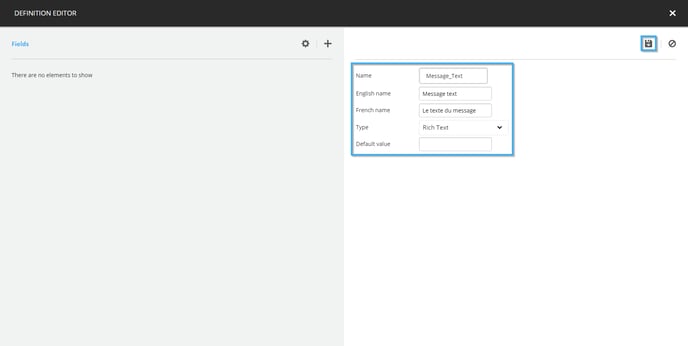
Enter the information for the field that will be edited by the users in the message group and click the icon that resembles a floppy disk to save the field.
The following is the information used for this example.
- Name : Texte_Message
- English name : Message text
- French name : Le texte du message
- Type : Rich text
- Default value : You can enter a default text if you wish, this text will be available in the field during the message creation.
When the name of the field is visible on the left side of the window, click the "x" in the top right-hand corner of the window.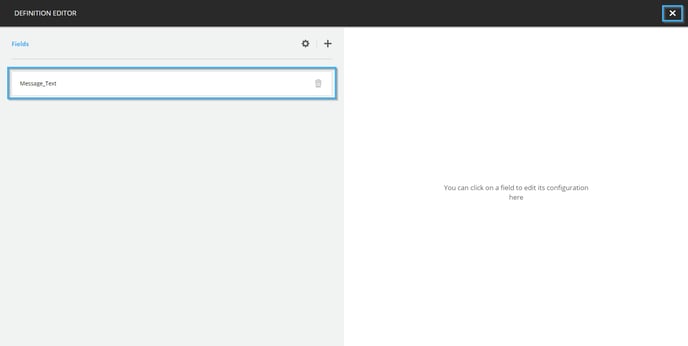
Creating the template's visual aspects
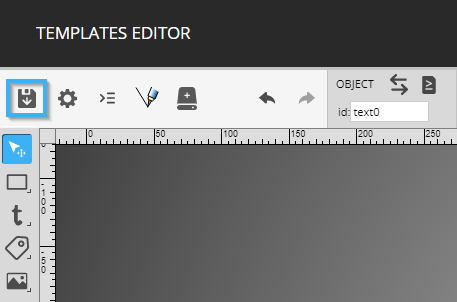
Click on the shape tool that is located in the list on the left-hand side of the template editor.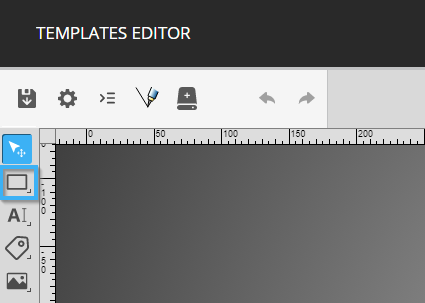
Click and drag in the template's white space to place the tool.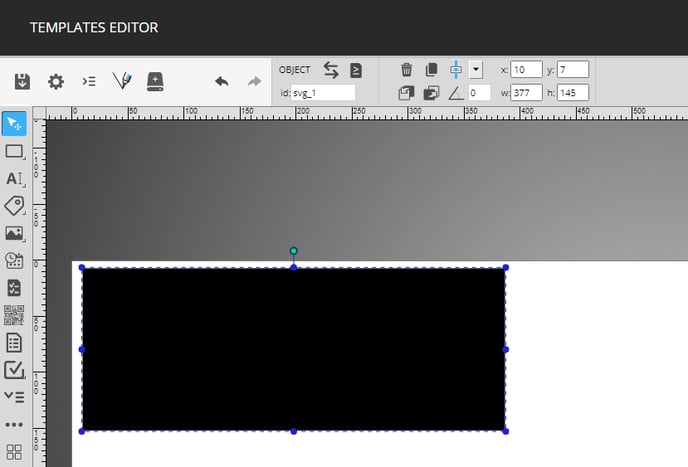
You can use the circles around the shape or the controls for the position and size of the tool.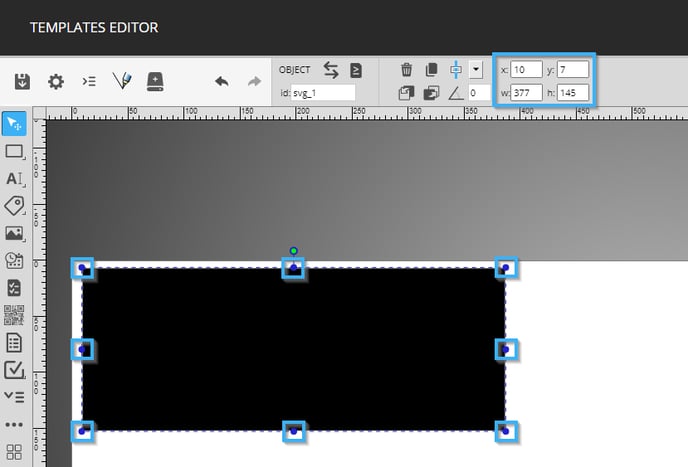
Once the tool has been placed, click on the control for the shape's colour in the bottom-left corner of the editor and specify the shape's colour.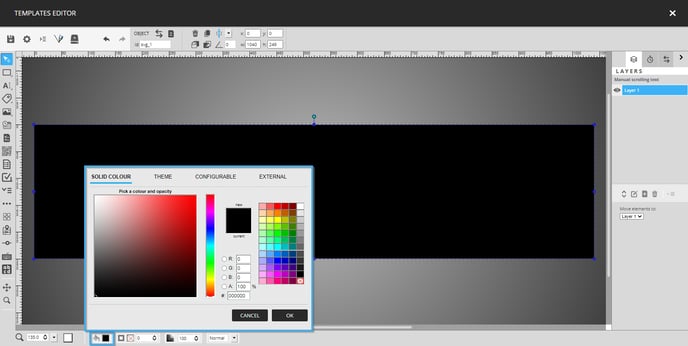
To display the desired information, you must configure a text tool. Click the text tool in the list on the left-hand side in the template editor, hold your click and select the "Ticker".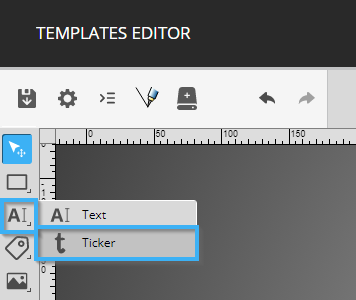
Click and drag in the template to place the tool.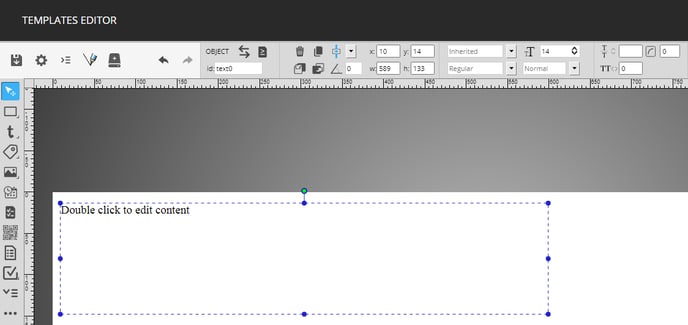
You can use the circles around the shape or the controls for the position and size of the tool.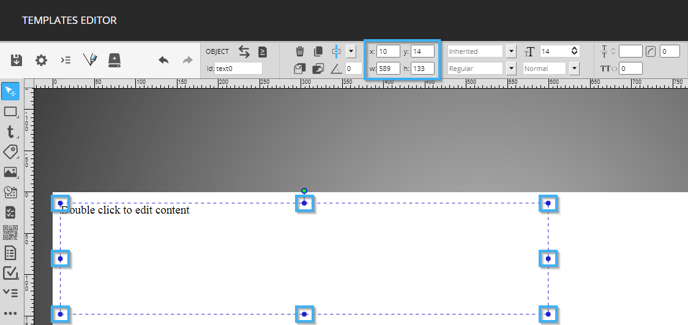
Once the tool has been placed, double-click on it to configure its content.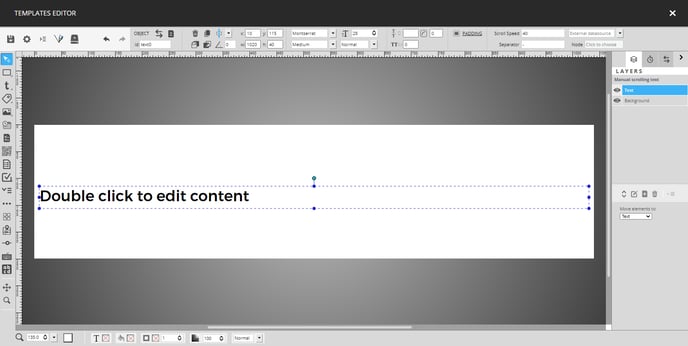
Click on the drop-down list named "insert field" and select the field created earlier (message_text).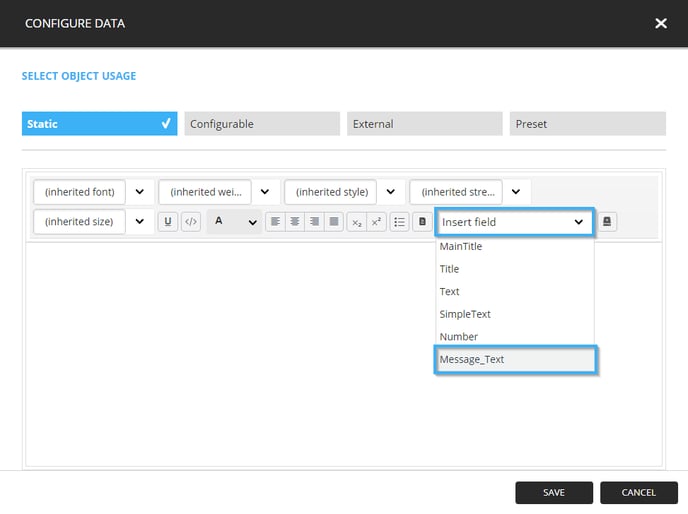
Once the text is visible in the configuration window, click the "Save" button.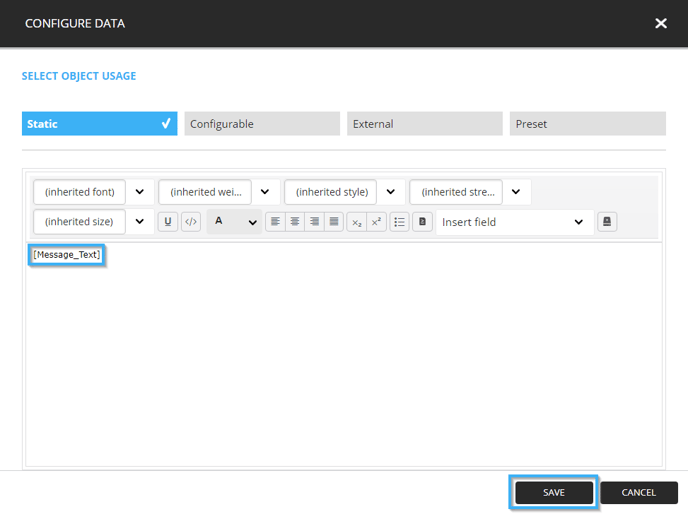
Once the content of the tool has been configured, add the desired font configurations in the top of the template editor. The following configurations were used for this example.
- Position x: 10
- Position y: 115
- Width w: 1020
- Height h: 40
- Font: Montserrat
- Font style: Medium
- Font size: 28 point
- Text transformation: Normal
- Speed (in pixels per second) : 40
- Seperator : -
Once you have completed these changes, click on the icon that resembles a floppy disk to save the template.
Here is an example of the template being broadcast in a message group type clip.