| avilable with: |
| Windows Player : Pro, Premium Web Player : Pro, Premium LG webOS Signage Player : Pro, Premium Samsung SMART Signage Platform (SSSP / Tizen) Player : Pro, Premium Brightsign Player: Pro, Premium Android Player: Pro, Premium Linux Player: Pro, Premium macOS Player: Pro, Premium |
Note: A role is a group of permissions that can be attributed to a user instead of attributing permissions to the user one at a time.
After logging into the ITESLIVE Studio, click the "Admin" tab and select the "Role management" entry.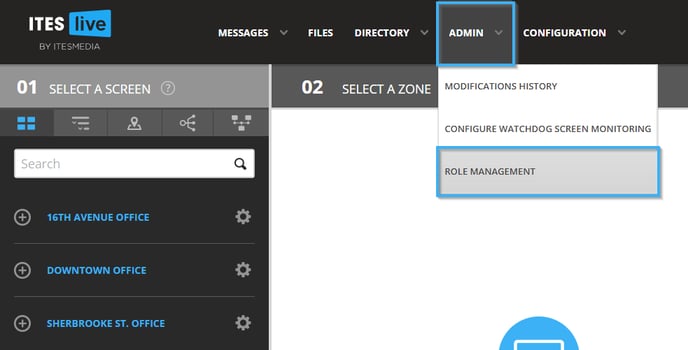
Navigate to the account group in which you wish to create a role on the left-hand side of the window, click on the desired account group and click on the "New role" button.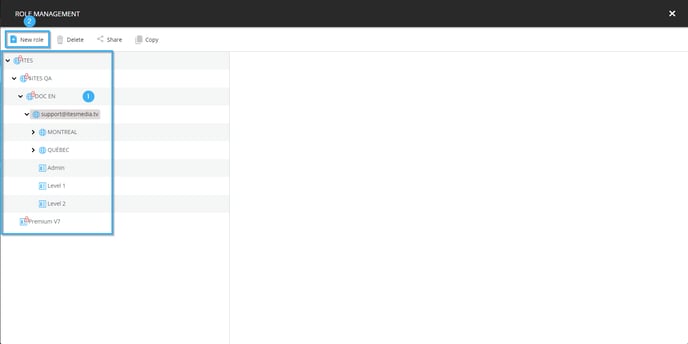
You can give the role a custom name and attribute permissions to the role by activating the checkboxes in the list on the right-hand side of the window.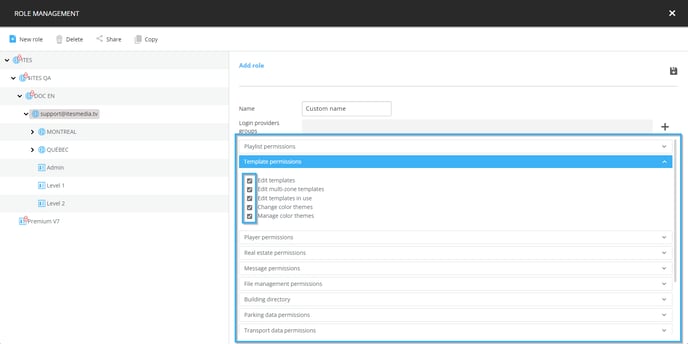
Once you are satisfied with the permissions attributed to the role, you can click on the icon that resembles a floppy disk in the top right-hand corner of the window.
Once the role has been saved, it will appear in the list on the left-hand side of the window
Note: Roles can be used to create different permission levels for your users that can be easily attributed to them during the user creation process. For instance, you can create a role named "Super Administrator" that contains all available permissions, one named "Publishing" that contains the permissions for content creation and create a role named "Operator" that contains the content creation and monitoring permissions.

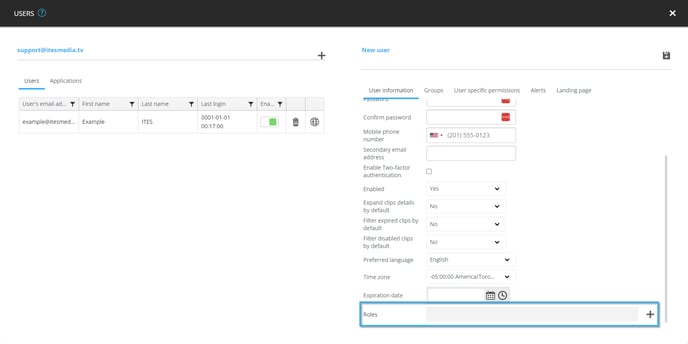
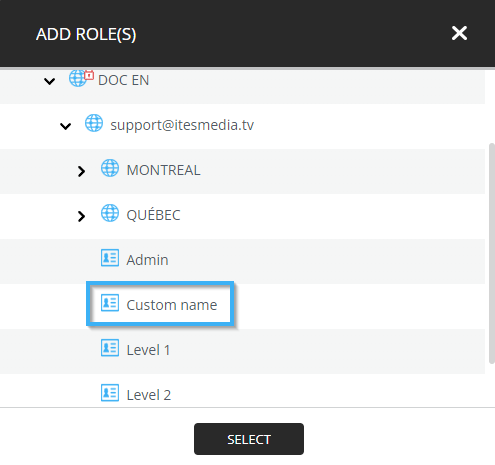
When the desired roles have been created and are visible in the list, they will be available the next time you create a user in the ITESLIVE Studio.