| available with: |
| Windows Player : Starter, Pro, Premium Web Player : Starter, Pro, Premium LG webOS Signage Player : Starter, Pro, Premium Samsung SMART Signage Platform (SSSP / Tizen) Player : Starter, Pro, Premium Brightsign Player: Starter, Pro, Premium Android Player: Starter, Pro, Premium Linux Player: Starter, Pro, Premium macOS Player: Starter, Pro, Premium |
Create a new template
Add a weather data source
Creating the template's visual elements
Create a new template
On the ITESLIVE Studio click on the "Configuration" tab and select the "Template editor" entry.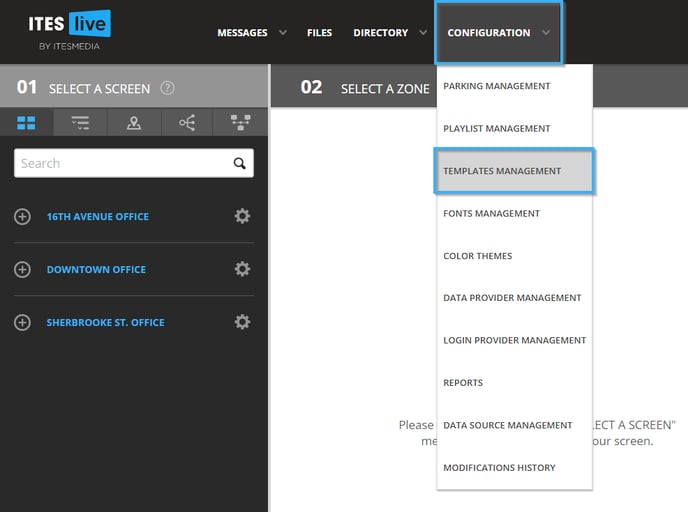
Navigate to the folder in which you wish to create the template and click the "New template" button.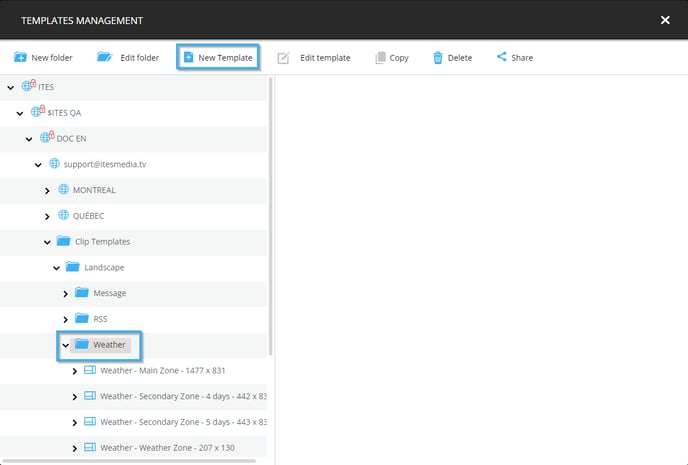
Before the creation of the template's visual elements, we must enter the following information for the template.
- Name: Unique identifier used for this template
- English name: The name that will be displayed when the Studio is used in English
- French name: The name that will be displayed when the Studio is used in French
- Type: In this case, you need to select the "Weather" clip type
- Weather icon set : Click the "Select" button and select the icon style that will be used to display the expected weather conditions
- Dimensions: This is the templates resolution, it must be identical to the resolution of the zone
- Icon: A file that you can select that will be used as a thumbnail for the template
- Language: Determines the number of languages included in the template
- Intro transition (optional): The animation of the transition used by the template if it has an introduction
- Intro transition duration (optional): The play length for the intro's transition animation
- Intro play length (option): The playlength for the introduction
Once this information has been completed, click on the accept button.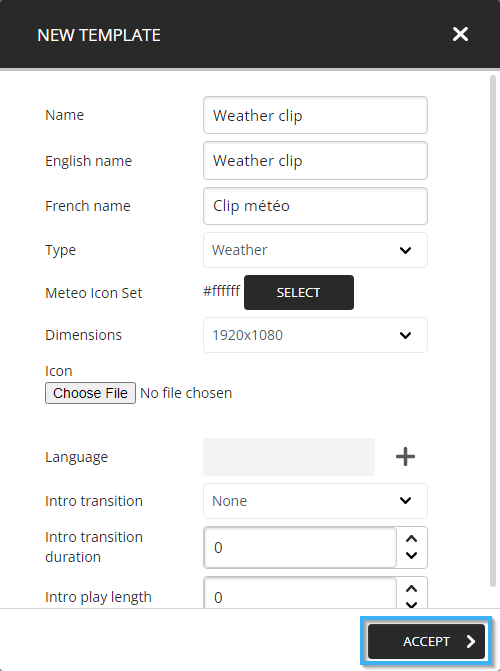
Add a weather data source
Once the initial configurations have been applied, the ITESLIVE Studio will automatically open the template editor. Click on the icon that represents a hard disk in the top left corner of the template editor.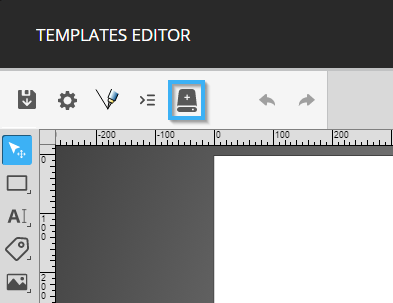
In the data source selection window, click on the "+" icon to add a new data source.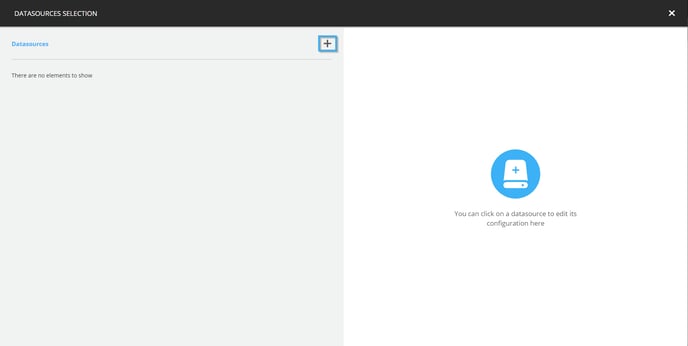
Select the desired data source and click on the "Select" button.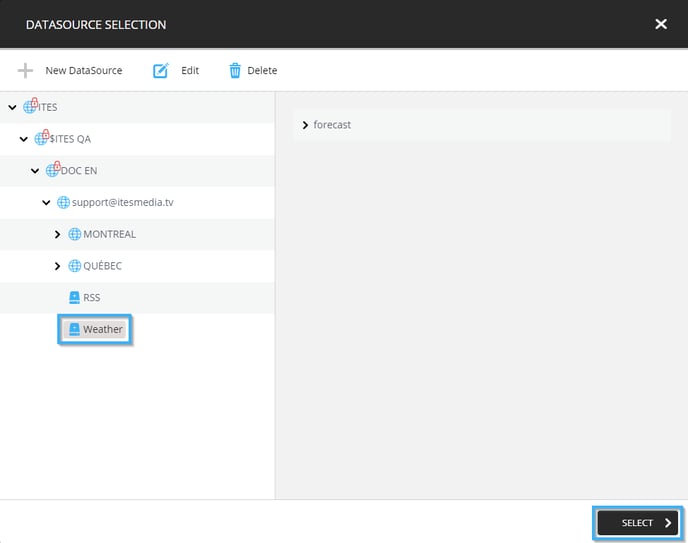
The selected data source will be displayed on the right-hand side of the window, you need to complete the following configurations that will be used to process this data source.
- Is optional: If this checkbox is active, the weather clip will be broadcast even if there is no avilable data. Thus, it is preferable for this configuration to remain inactive to avoid displaying an empty weather forecast.
- Items per slide: In this example, you will be creating a clip that will broadcast the weather forecast for the next 3 days, in this case you will need to activate the "All" checkbox.
- Empty list handling: You can simply leave this configuration as is, the default "Inherit" configuration will give the template the automatically managed behavior in the event that there are no data in the weather service feed.
- Main data node: The main data node represents the location in the data where the infromation you wish to broadcast is located. Navigate the data source and select the following field.
forecast -> Days
Once these configurations have been applied, click on the icon that represents a flppy disk in the top right corner of the window.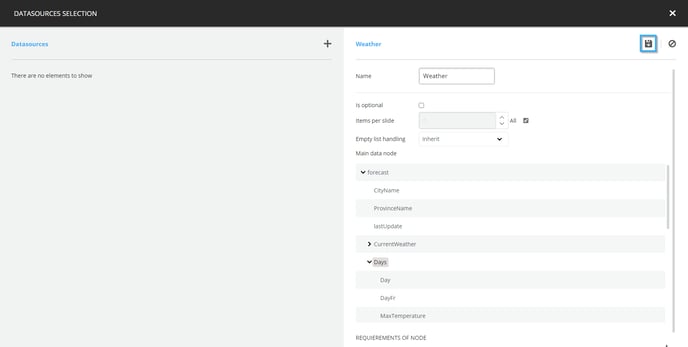
Once the data source is visible on the left-hand side of the window, click on the icon that represents an "x" in the top right-hand corner of the window.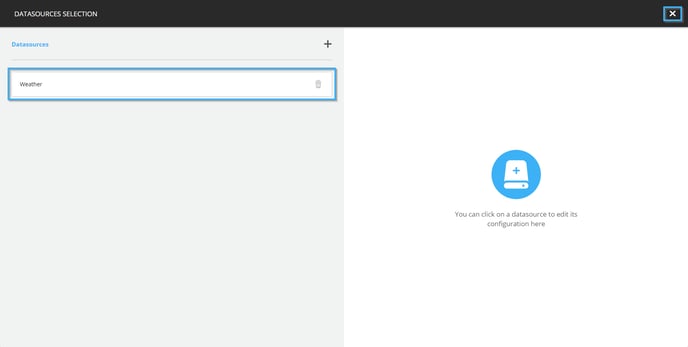
Creating the template's visual elements
Creating the template's background
Click on the image tool on the list on the left-hand side of the template editor.
Click and drag your mouse in the template's empty space to place teh tool.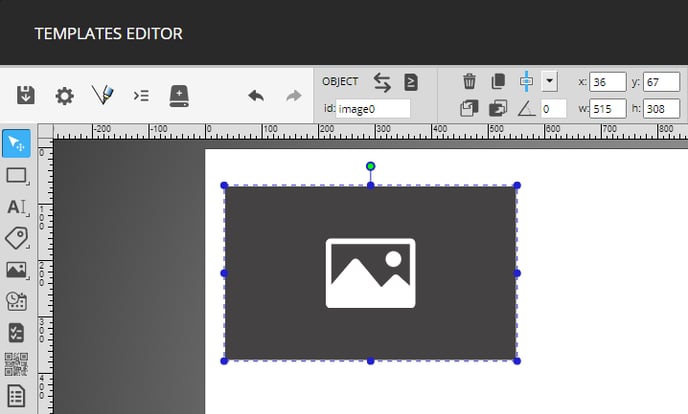
You can use the circels around the image tool or the position and size configurations for the tool. The following are the configurations used in this example.
- x: 0
- y: 0
- w (width): 1920
- h (height): 1080
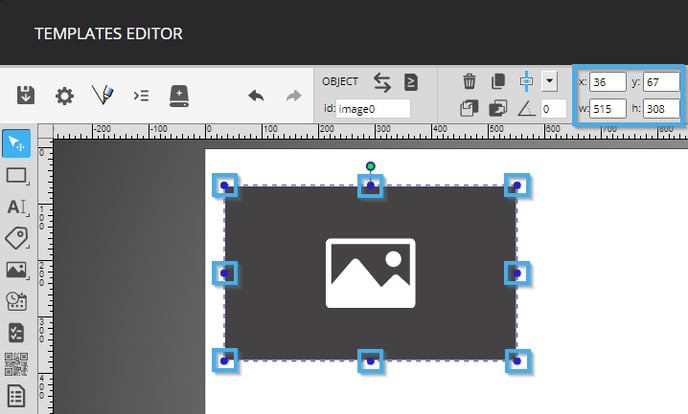
Once the tool has been placed, double click it to configure its content.
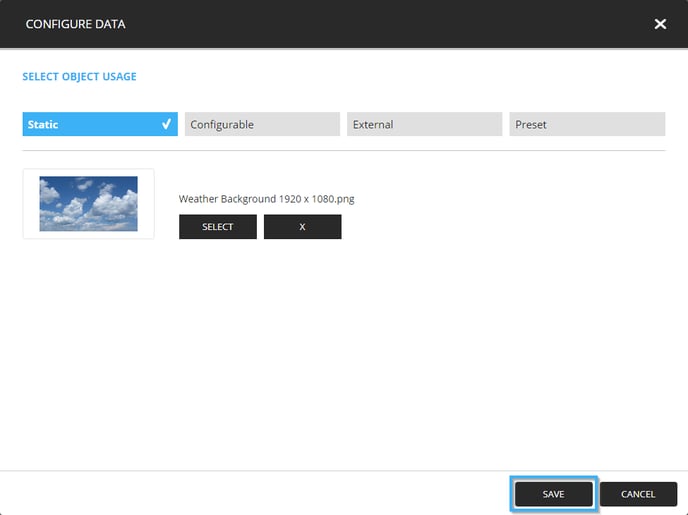
In the configuration window, click on the "Static" tab then click the "Select" button.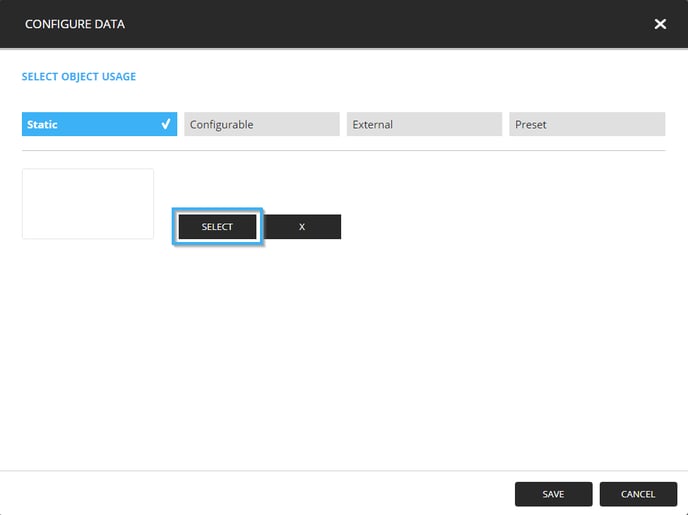
Select the image that you wish to use as the template's background and click the "Select" button.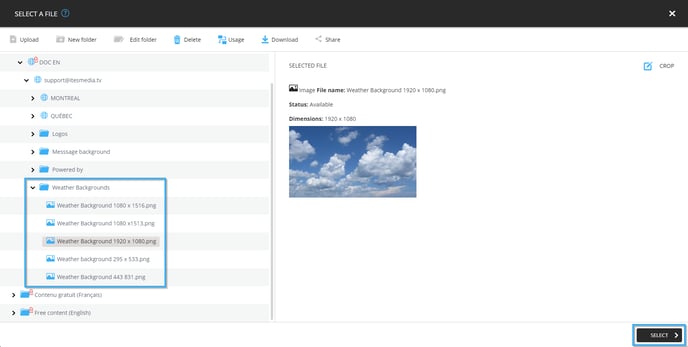
Click the "Save" button to apply your selection.
Content creation
Please ensure that you use a second layer for the next steps, seeing that the content will be directly above the template, the second layer ensures that the elements in the template are easily maintained or edited. We also recommend that you identify each layer as quickly as possible according to the information it contains.
Click on the list tool in the list on the left-hand side of the template editor.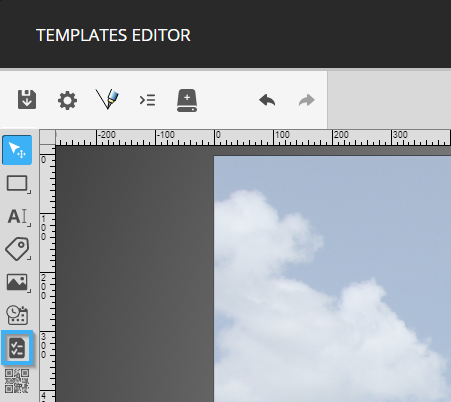
Click and drag your mouse in the template to place the tool.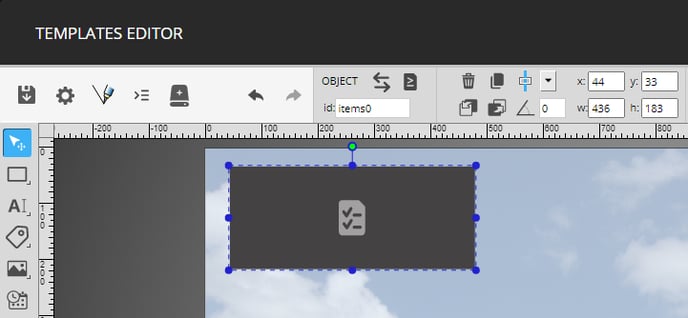
You can lose the circles Vous pouvez utiliser les cercles autour de l'outil de liste ou les contrôles pour la position et la taille de la forme pour placer l'outil.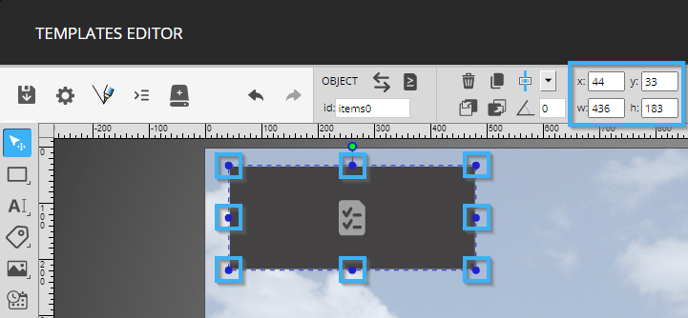
The following configurations are applied to the list for this example.
- X: 0
- Y: 303
- W: 1920
- H: 567
- Rows: 1
- Columns: 3
- Horizontal gap: 0
- Vertical gap: 0
- Element direction: Vertical
- Scrolling method: None
- Data source: Weather
- Data node: days (forecast -> days)
Once the configurations have been applied to the list, double click on it to configure its content.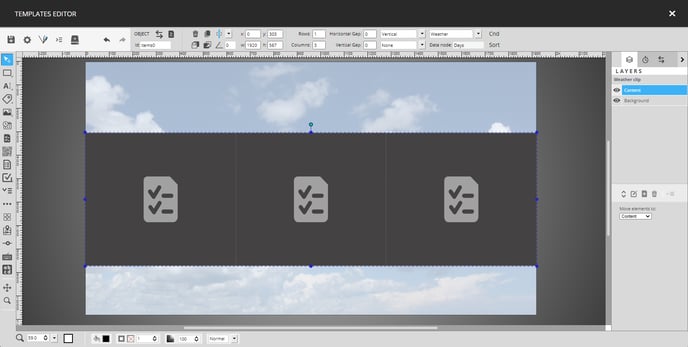
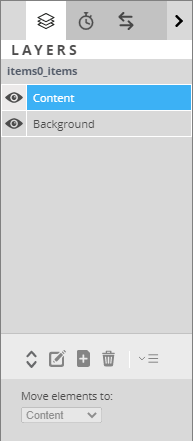
Once you are in the list's context, you must once more create layers for the different objects that will be created in the list. For instance, the example that you will create in this article uses the two following layers.
- Background
- Content
Select the "Background" layer and click on the shape tool in the list on the left-hand side of the template editor. 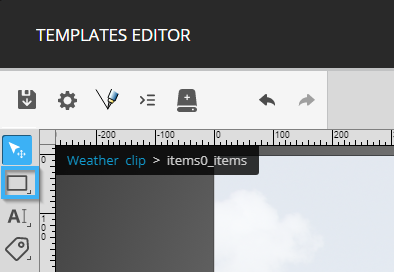
Click and drag your mouse in the template to place the tool.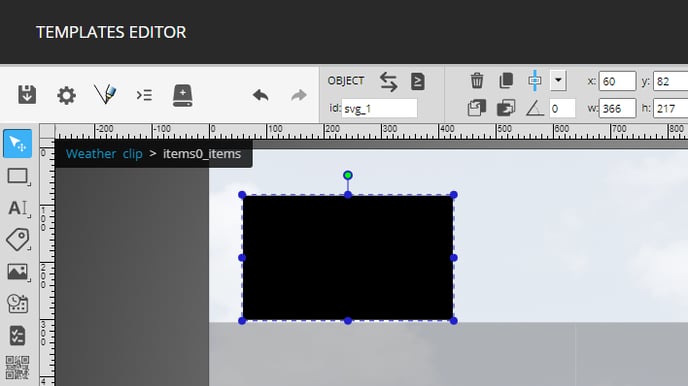
You can use the circles around the tool or the size and position configurations to place the tool.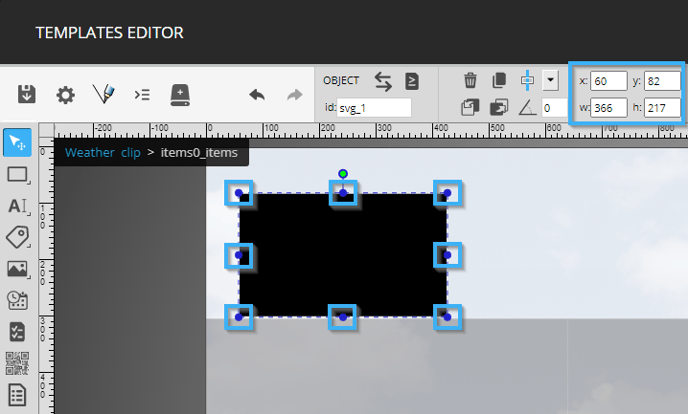
Once the tool has been placed, click on the control that determines the tool's colour in the bottom left-hand corner of the template editor and specify the desired colour for the shape. 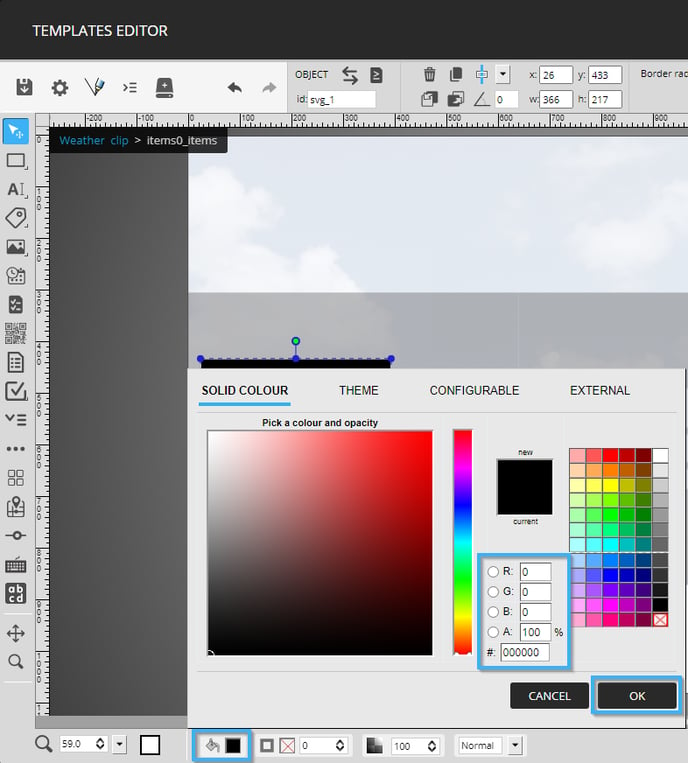
The following are the configurations applied to the shape tool in this example.
- X: 0
- Y: 303
- W: 630
- H: 567
- Colour: #097bce (hexadecimal format)
Now select the "Content" layer. 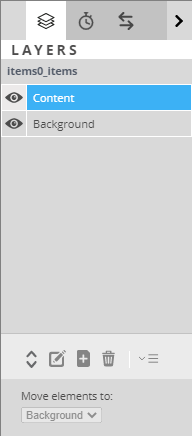
Select the text tool in the list on the left-hand side of the template editor.
Click and drag your mouse in the template to place the tool.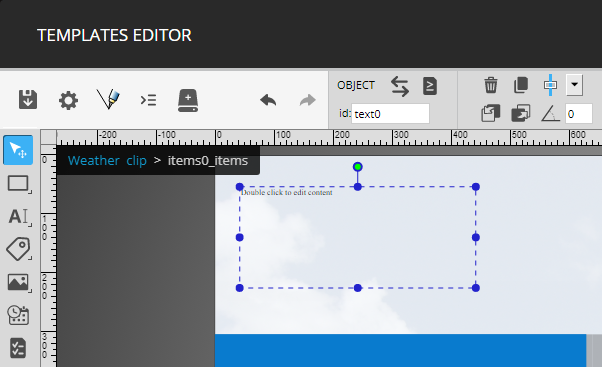
The following are the configurations used for the text tool that contains the day of the week.
- X: 0
- Y: 324
- W: 626
- H: 100
- Font family: Helvetica
- Font style: Regular
- Font size: 40 points
- Text tansformation: First Uppercase
- Horizontal alignment: Centre
- Vertical alignment: Middle
- Font colour: #ffffff
Double click on the tool to configure its content.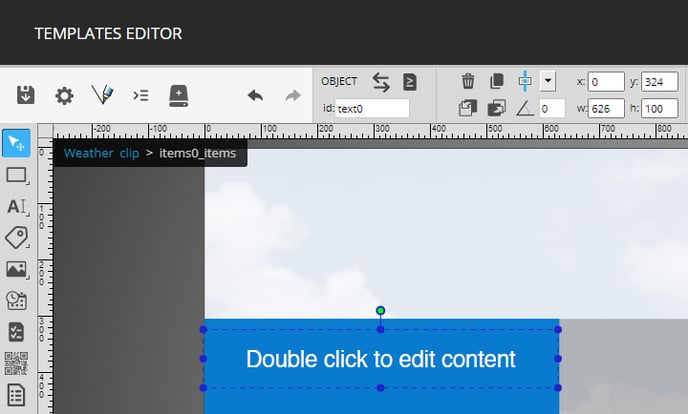
Click the icon that represents a hard disk to select the field that contains the day of the week in the data.
The following is the field that is used for this tool.
Meteo -> Days -> DayFr
Click the drop-down list and select the "Weather" data source. Then, click on the field mentioned above and click "Save".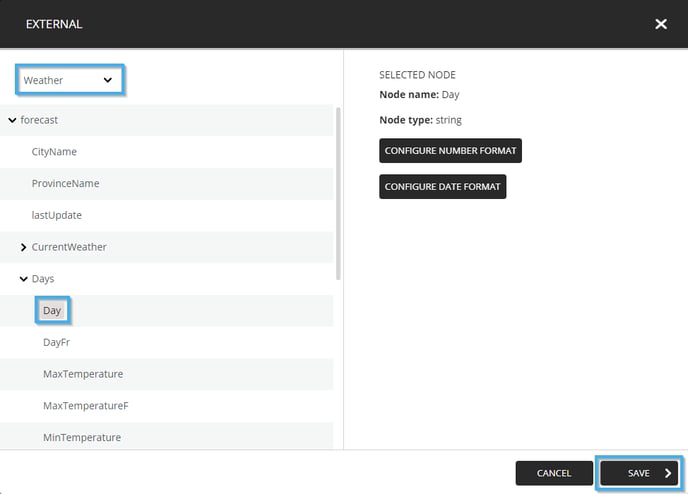
Once the selected field is visible in the window, click on the "Save" button.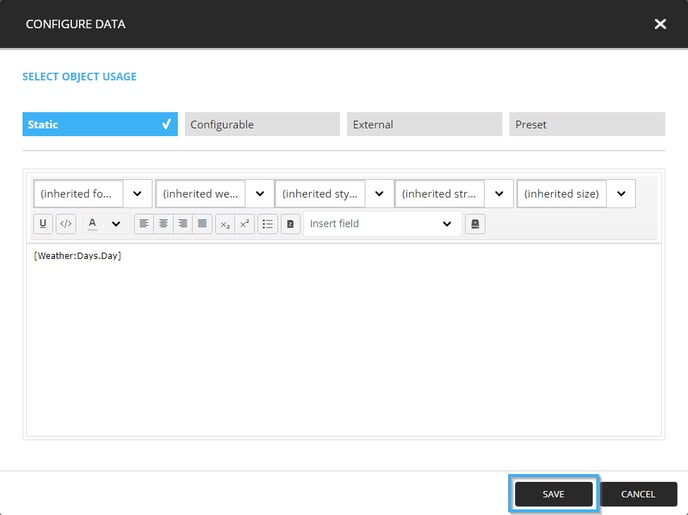
Repeat these steps to configure text tools with the following information.
-
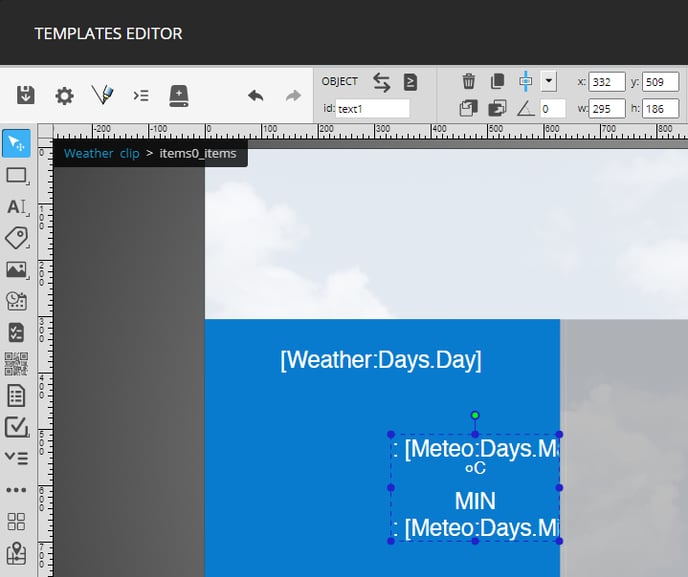
Minimum and maximum temperature
- X: 331
- Y: 507
- W: 295
- H: 186
- Font family: Helvetica
- Font style: Regular
- Font size: 40 points
- Text transformation: Normal
- Horizontal alignment: Gauche
- Vertical alignment: Millieu
- Font colour: #ffffff
- Text tool's content: MAX : [Meteo:Days.MaxTemperature]°c
MIN : [Meteo:Days.MinTemperature]°c
- X: 331
There is a slight difference in configuration while adding the expected weather for the day. When you are adding the data for the minimum and maximum temperature, click on the icone that resembles a hard disk.
Select the desired field (either minimum or maximum) and click on the "Configure number format" button.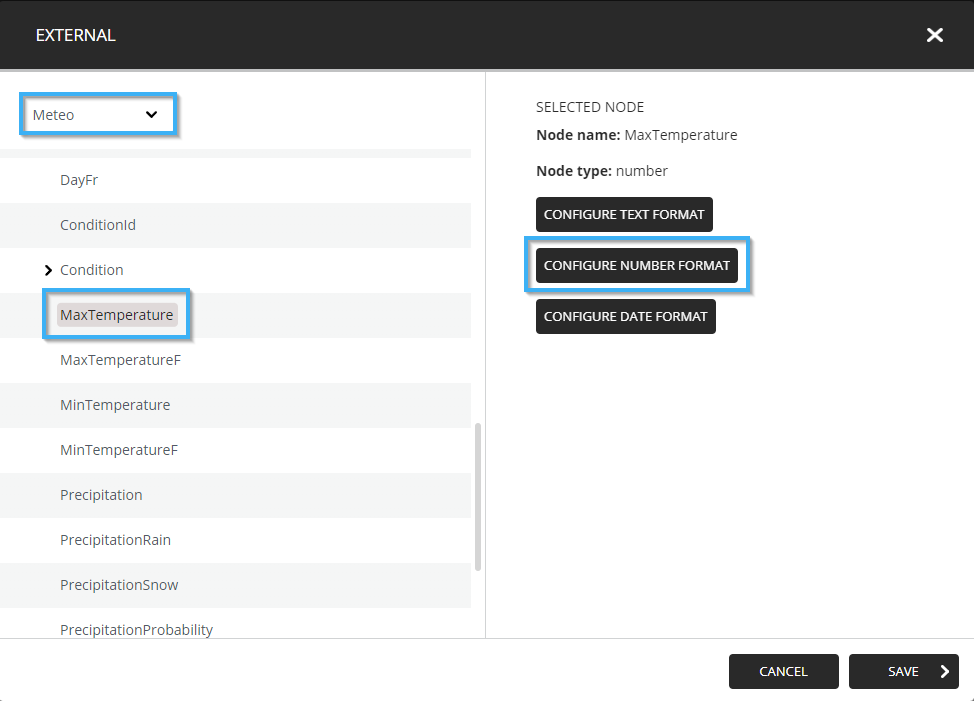
Ensure that the "Style" is set to "Decimal" and that the minimum and maximum fraction values are set to 0. This will make it so that the temperature is not displayed with decimals.
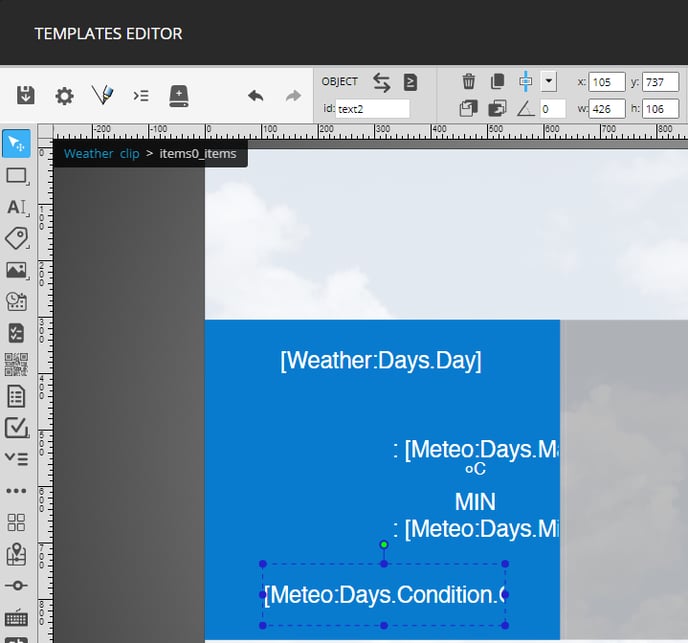
- Expected condition for the day
- X: 102
- Y: 735
- W: 426
- H: 106
- Font family: Helvetica
- Font style: Regular
- Font size: 40 points
- Text transformation: Normal
- Horizontal alignment: Centre
- Vertical alignment: Millieu
- Font colour: #ffffff
- Text tool's content: [Meteo:Days.Condition.ConditionEn]
- X: 102
Click on the image tool in the list on the left-hand side of the template editor. Click and drag to place the image tool in the template.
The following configurations are used for this example.
- X: 102
- Y: 735
- W: 426
- H: 106
- Horizontal alignment: Centre
- Vertical alignment: Milieu
- Scale mode: Contain
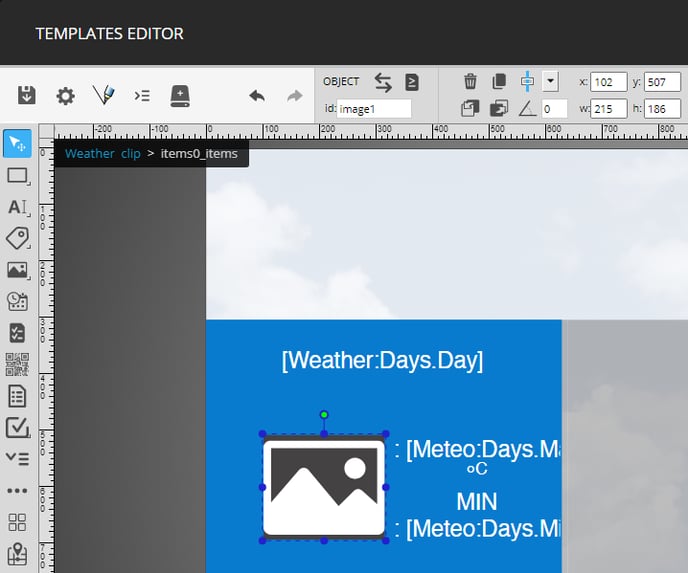
Double click on the tool to configure its content, once in the tool's configuration window click on the "External" tab.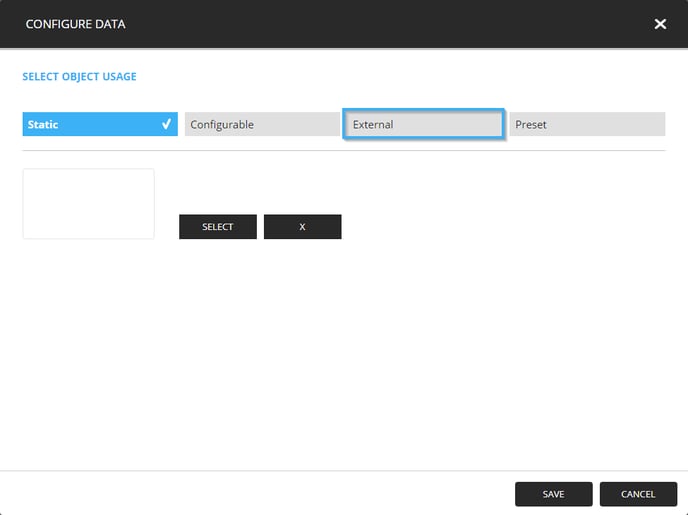
Click on the drop-down list and select the "Weather" data source, then select the following field in the list below the drop-down.
forecast -> Days -> Condition -> IconPath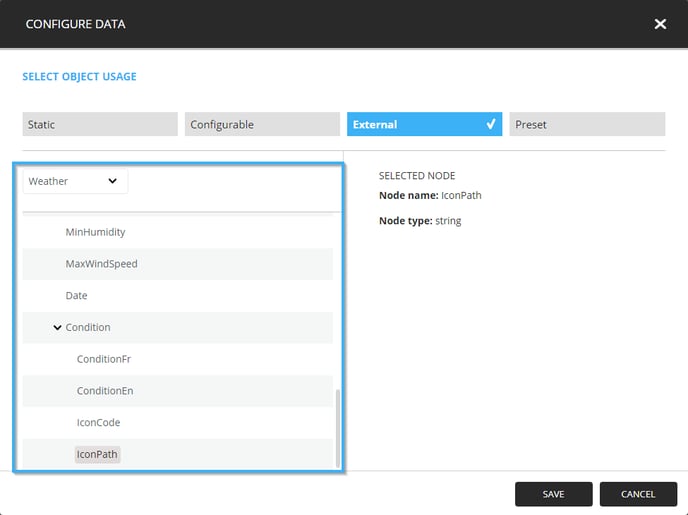
Finally, click the "Save" button to apply your field selection.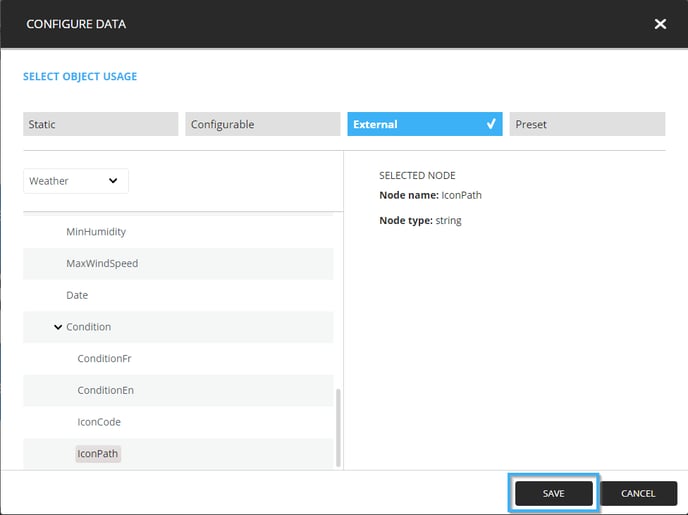
To return to the template's context, click on the template's name in the top left-hand corner of the template editor.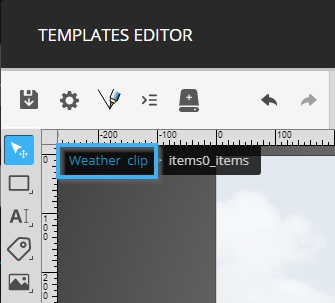
Click on the text tool in the list of tools on the left-hand side of the template editor. Click and drag your mouse in the template to place the tool.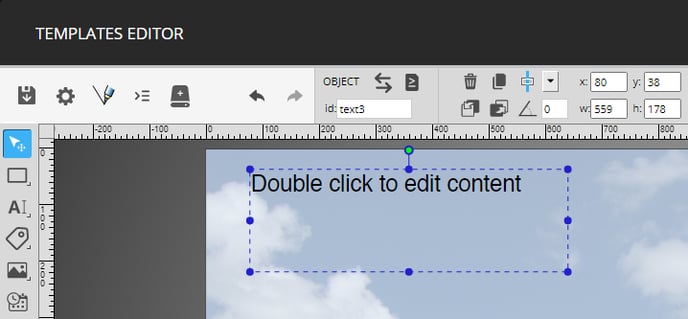
The following are the configurations for the text tool in this example.
- X: 208
- Y: 99
- W: 1400
- H: 119
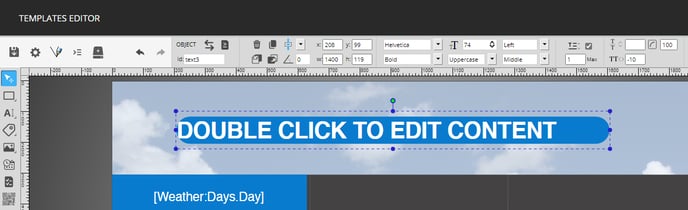
- Font family: Helvetica
- Font style: Gras (Bold)
- Font size: 74 points
- Text transformation: Uppercase
- Horizontal alignment: Left
- Vertical alignment: Middle
- Font colour: #ffffff
- Maximum number of lines to display: 1
- Space between caracters: -10
- Border radius: 100
- Text colour: #ffffff
- Background colour: #097bce
For the background to couvert all of the space behind the text, you will need to click on the "Padding" button to configure the tool's padding.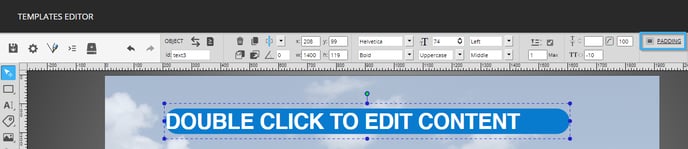
Enter the following information to configure the tool's padding.
- Top: 20
- Bottom: 20
- Left: 80
- Right: 80
Click on the "Ok" button to apply your modifications.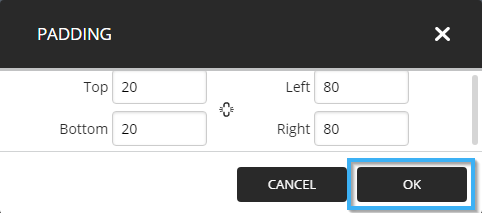
Double click the tool to configure its content, once the configuration window is open, enter the following text for the header.
Weather
Once the text is visible in the configuration window, click on the "Save" button.
Finally, save the template by clicking on the icon that represents a floppy disk in the top left-hand corner of the template editor.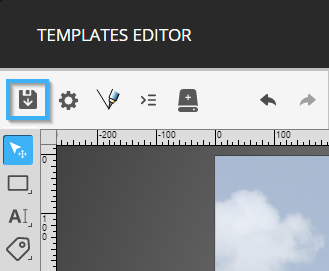
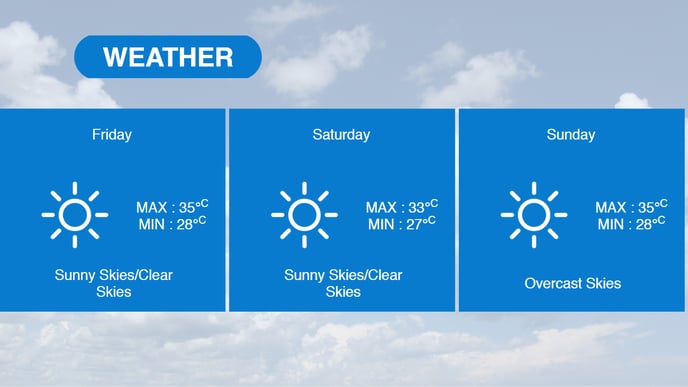
Here is an example of what the template looks like once it is broadcasted.