| AVAILABLE WITH: |
| Windows Player: Premium Web Player: Premium LG webOS Signage Player: Starter, Pro, Premium Samsung SMART Signage Platform (SSSP / Tizen) Player: Premium BrightSign Player: Premium Android Player: Premium Linux Player: Premium macOS Player: Premium |
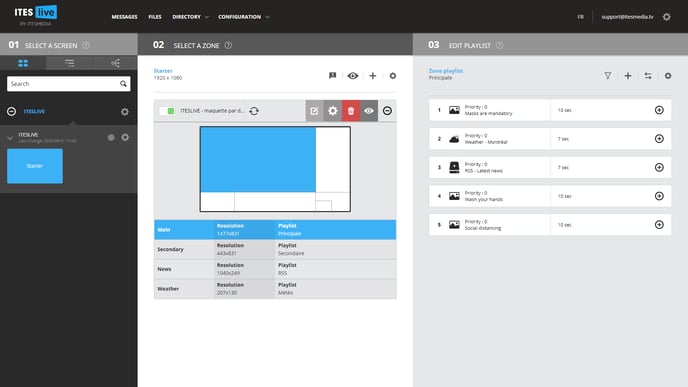
1. Select the zone where you wish to add a parking clip
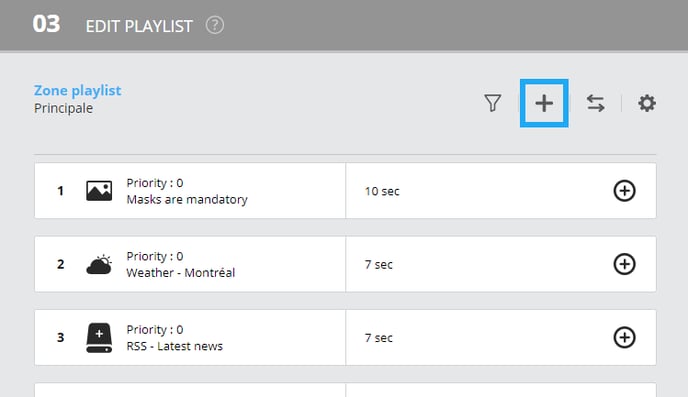
2. Click the " + " icon above the playlist
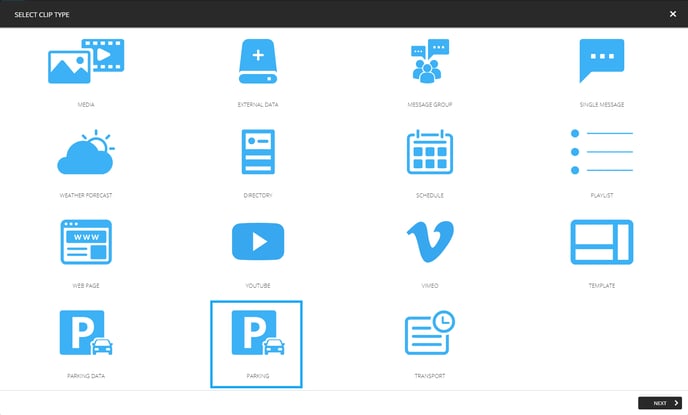
3. Click on " Parking "
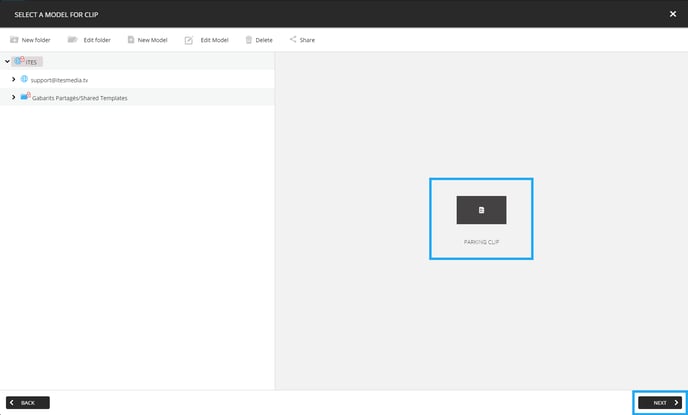
4. Select the template you wish to use and click " Next "
5. Configure parking clip data
Parking selection
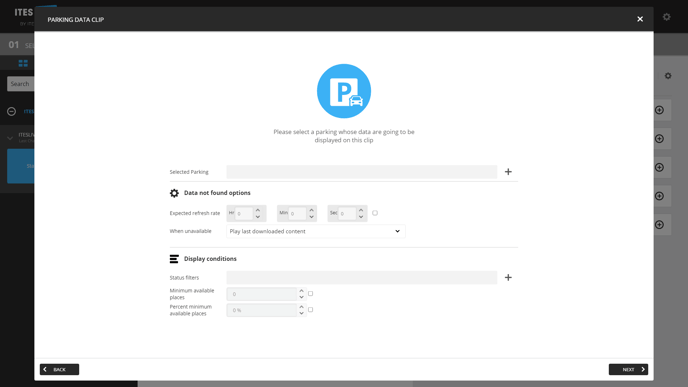
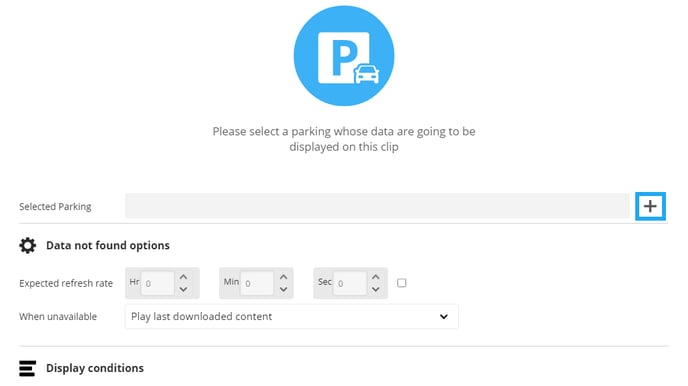
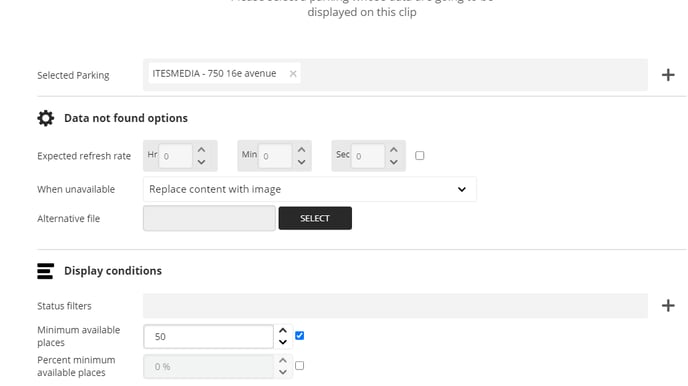
The first part of the parking clip configurations consists of selecting the parking who's data you would like to display. Click the « + » icon to open the parking selection window.P
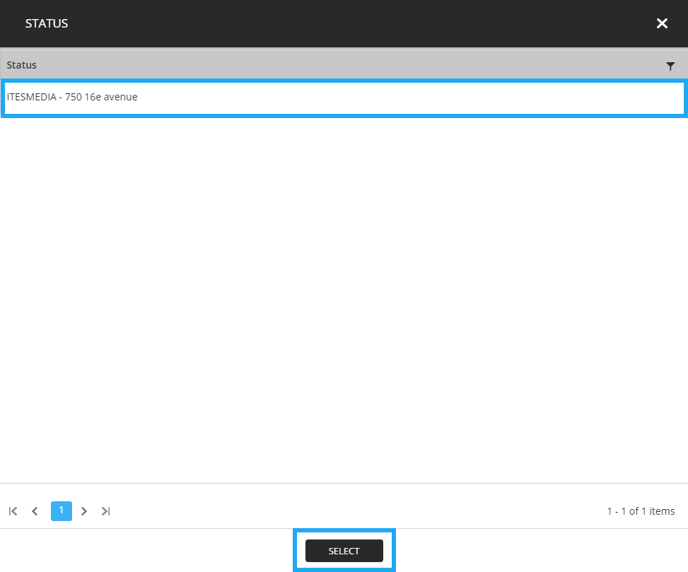
The list of available parkings will be displayed, click on the entry that you would like to use in your clip and click " Select ".
Note: If your template can contain data for more than one parking, you can maintain the " Ctrl " key on your keyboard and select several parkings at once by clicking several parkings on the same page.
Data not found options
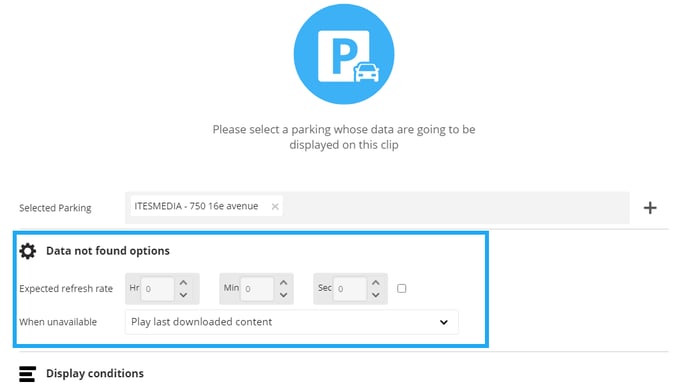
The next step in the clip data configuration determines how the clip will display in the event the parking's data is no longer available. There are two configurations that must be completed in this regard.
- Expected refresh rate
- When unavailable
Expected refresh rate
When this check box is activated, you must specify the expected refresh rate for the selected parking's data. For instance, if you know that the parking's data is produced every hour, you must enter 1 hour in the appropriate field. In the event that the paking's data is not updated every hour, the behavior configured in the following field will be applied.
Note: It is also possible to configure the expected refresh rate for each parking individually in the parking management. In the event that the clip displays several parkings, you must take into consideration that the expected refresh rate configured in the clip will be applied to all of them. If this configuration needs to be different for each parking, you will have to enter these in the parking management rather than in the clip.
When unavailable
If the expected refresh rate is not respected, there are three actions that can be taken for the clip.
- Play last downloaded content
- Skip the clip
- Replace content with image
Play last downloaded content
With the " Play last downloaded content" configuration the last information received by the display will continue to be displayed.
Skip the clip
As soon as the data is no longer available according to the expected refresh rate, the display will automatically skip to the next clip until the data is updated once more.
Replace content with image
This configuration allows you to select an image that will be used to replace the parking data until the data is updated once more.
Displays conditions

The last step of the clip data configuration is to add display conditions that will determine whether or not the parking's data will be displayed.
- Status filters
- Minimum available places
- Percent minimum available places
Status filters
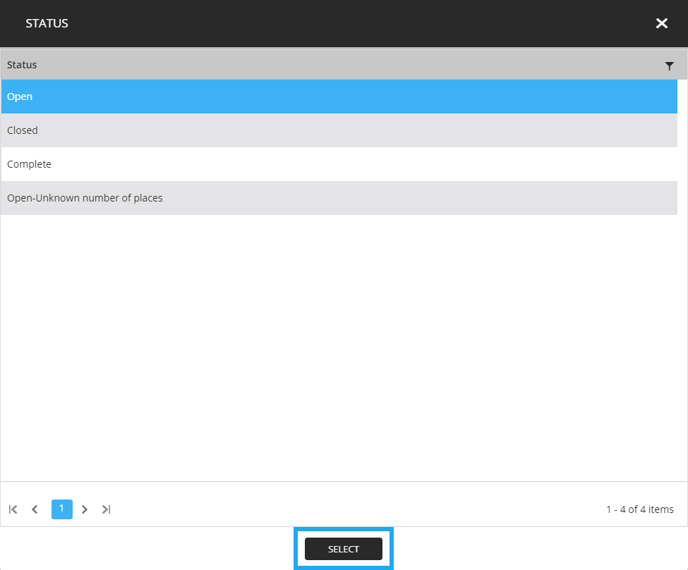
To activate this configuration click on the " + " icon, in the status list that is displayed afterwards select the statuses that you wish to include in your display. For instance, if you wish to display parkings that are open click the " Open " status then click " Select ".
Note: In the event that you wish to include multiple statuses in your clip, you can maintain the " Ctrl " button on your keyboard to complete a multiple selection.
Minimum available places
When you active this checkbox, you must specify the minimum number of available places required for the parking's data to be displayed. If you configure this value by entering 50 places, the selected parking will only be displayed if it ahs 50 or more available places.
Percent minimum available places
When you activate this checkbox, you must specify the minimum percentage of available spaces required for the parking's data to be displayed. The percentage in the field must be entered as a numeric value between 0 and 1. For instance, if we set the minimum percentage to 30% of the remaining available places you must enter .30 in the field.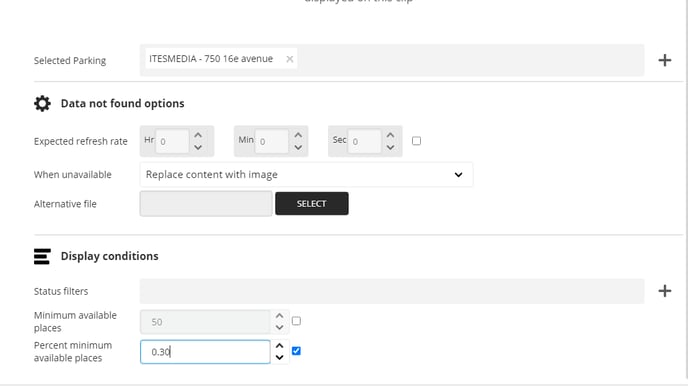
6. Adjust your settings
Click “Next” to adjust your clip settings.