| available with: |
| Windows Player : Premium Web Player : Premium LG webOS Signage Player : Premium Samsung SMART Signage Platform (SSSP / Tizen) Player : Premium BrightSign Player: Premium Android Player: Premium Linux Player: Premium MacOS Player: Premium |
Important: The following steps require access to a directory data source on the Studio ITESLIVE, if this resource is not available to you, please contact support for more information.
support@itesmedia.tv
514-642-3790 (x2)
Creating a new template
Add a directory data source
Creating the template's visual aspects
Creating a new template
Click the "Configurations" tab at the top of the Studio and select the "Templates management".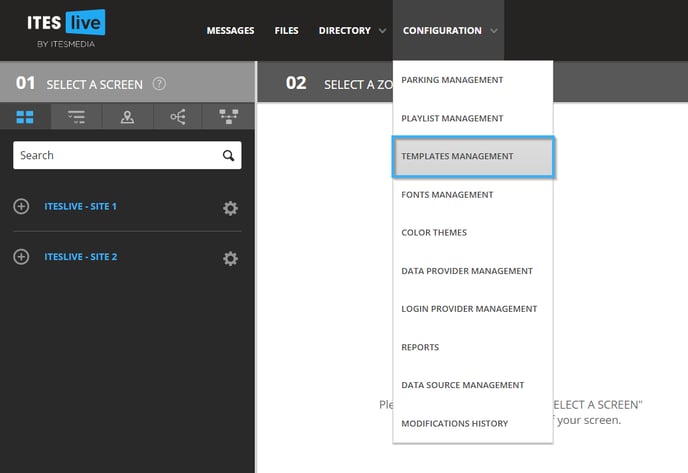
Select the folder in which you wish to create the template then click the "New Template" button.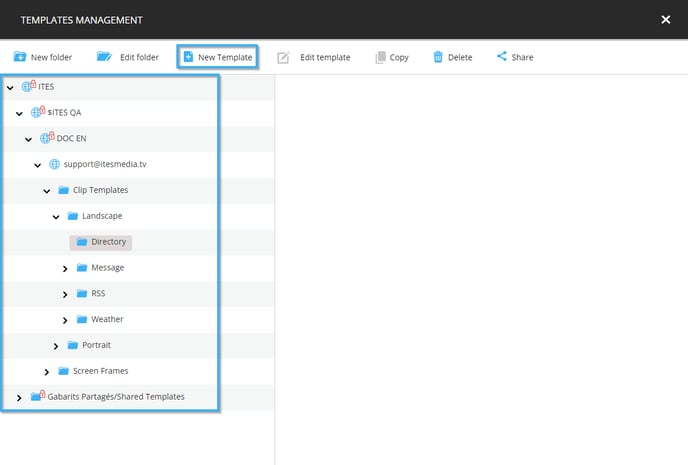
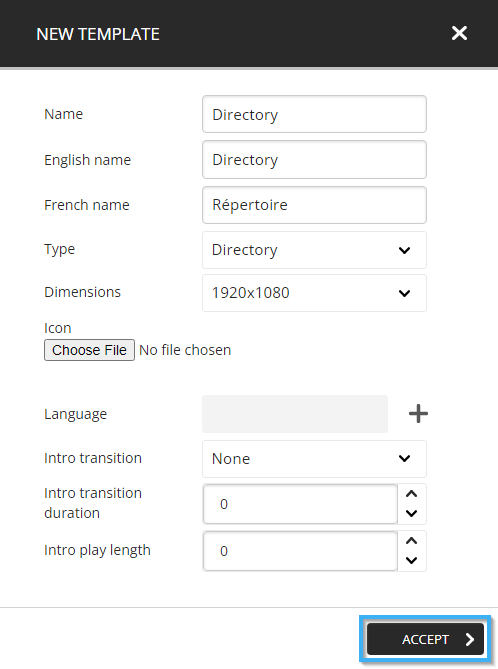
Before creating the template's visual aspects, you must provide the following information.
- Name: Unique identifier for the template
- English name: The name that will be displayed when the Studio is used in English
- French name: The name that will be displayed when the Studio is used in French
- Type: In this case, we need to select the "Directory" template type
- Dimensions: The template's resolution must be identical to the resolution of the zone in which you will be using this template.
- Icon: A file that you can select that will be used as the template's "thumbnail"
- Language: Determine the number of languages available in the template
- Transition intro (optional): The animation that is used for the template's introduction
- Intro transition duration (optional): The length of the template's introduction animation
- Intro play length (optional): The play length in seconds for the template's introduction
Once you have completed the form, click the "Accept" button.
Add a directory data source
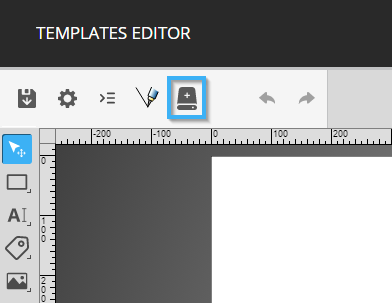
Once the configurations above have been applied, the ITESLIVE Studio will automatically the template editor. Click on the icon that resembles a hard drive in the top left corner of the template editor.
In the data source selection window, click the "+" icon to add a new data source.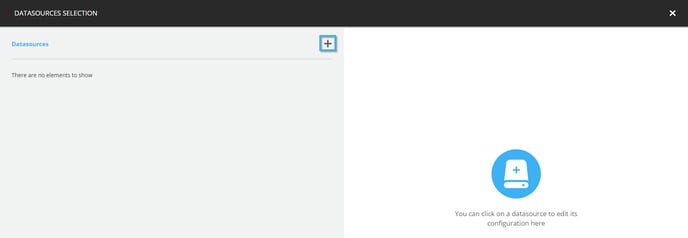
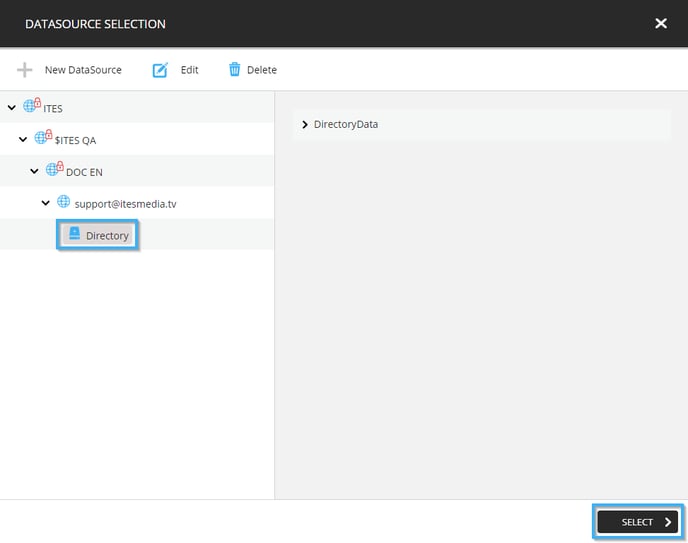
Select the desired data source and click the "Select" button.
The selected data source will be displayed on the right side of the data source selection window, you must now specify the configurations that will be used for the data source.
- is optional: If this checkbox is active, the directory clip will be displayed even if there is not data. In this case, it is preferable for this configuration to remain inactive to avoid displaying an empty directory in the event that there is no information to broadcast.
- Items per slide: In this example, we will create a template that broadcasts the complete list of tenants that have been created in the ITESLVIE Studio, thus you must activate the "All" checkbox.
- Empty list handling: You can simply leave this configuration with its default "Inherit" value, this will enable the default behaviour for the directory data source.
- Main data node: The main data node represents the location in the data source where the information you wish to use can be found. Navigate the data structure and select the following node.
DirectoryData -> Tenants
Once you have applied these configurations, click on the icon that resembles a floppy disk.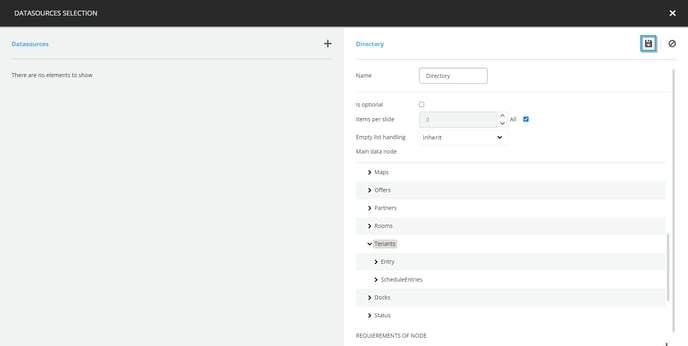
Once the data source is visible on the left-hand side of the window, click the icon that resembles an "x" in the top right corner of the window.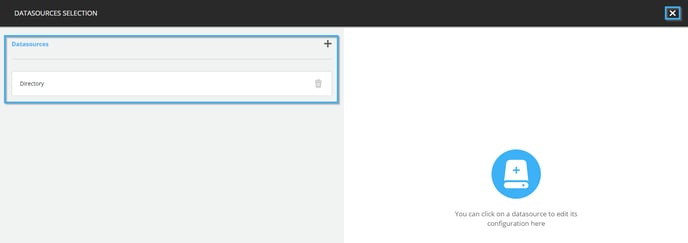
Creating the template's visual aspects
Click on the list tool in the tool list located on the left-hand side of the template editor.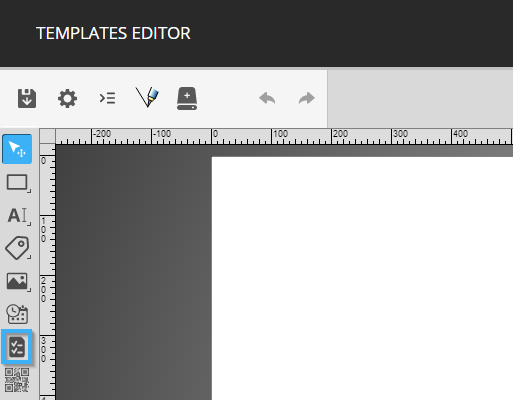
Click and drag your mouse in the template's blank space to place the tool.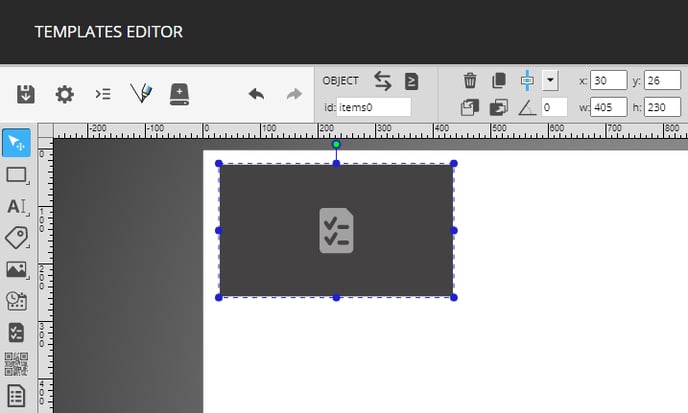
You can use the circles around the tool or the controls in the top of the template editor to resize or move the tool.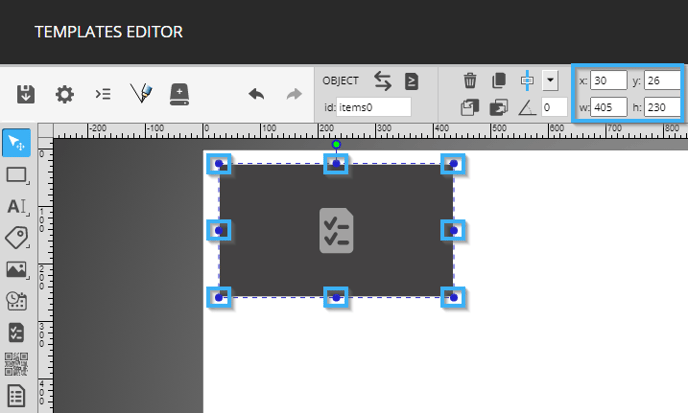
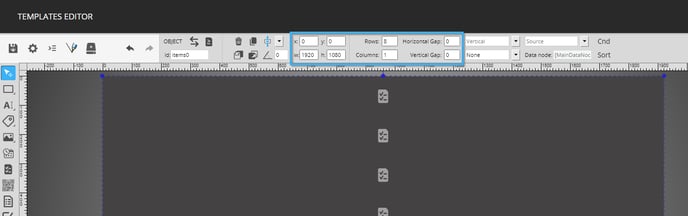
The following are the configurations used for the position and size of the tool for the example included in this article.
- X : 0
- Y : 0
- Width (w) : 1920
- Height (h) : 1080
Once the tool has been placed, you must specify the number of rows and columns that will be included in the list, as well as the horizontal and vertical spaces between each element. The following are the configurations used in the example included in this article.
- Rows : 8
- Columns : 1
- Horizontal gap : 0
- Vertical gap : 0
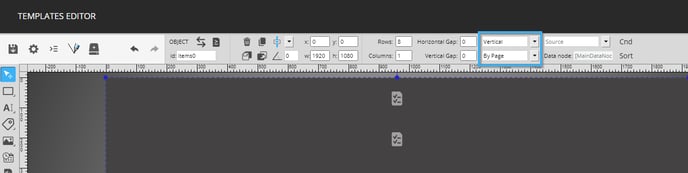
Then you need to specify the direction in which the list's elements will scroll as well as the type of scrolling you wish to include in the display. The following are the configurations used in the example included in this article.
- Elements direction : Vertical
- Scrolling method : By page
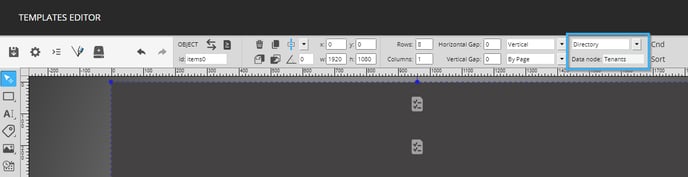
You must specify the data source that will be used for the list's data as well as its main data node. The following configurations are used for the example included in this article.
- Source : Repertoire (créé plus tôt dans l'article)
- Data node : DirectoryData -> Tenants (the same as the main data node for the data source you created earlier)
To add information in the list, you need to double click on it. This manipulation changes the context in which you are working in the template, rather than editing the template globally, you will be working with objects within the list exclusively. This change is represented by the text included in the top left corner of the template editor.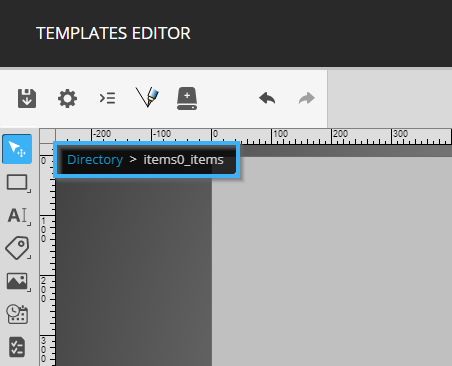
Once you are in the list's context, click on the button to rename the current layer. The following name will be given to the layer in this example.
Background - Even rows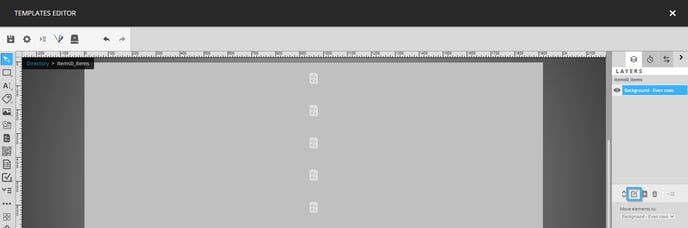
Now click on the shape tool and add a shape in the template with the following values for its position and size.
- X : 0
- Y : 0
- W : 1920
- H : 135

Then click on the colour picker in the bottom of the template editor and attribute the following colour to the shape.
#f4f3f3

The objective with the shape is to display it on alternating rows (once every second row); thus, you must click on the conditions management button to add a condition that will create this effect.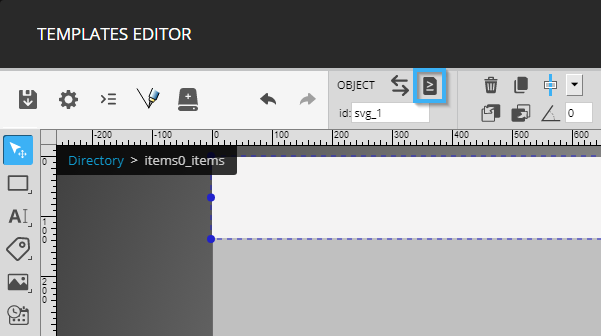
Click the "+" icon to add a condition on the shape.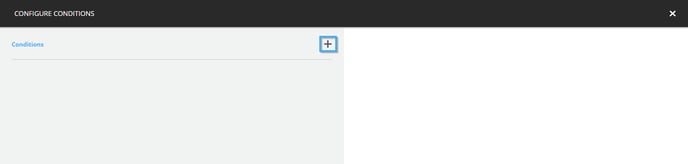
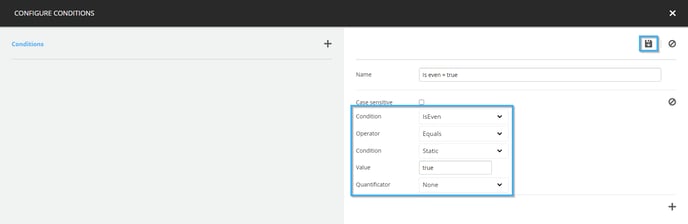
Now enter the following information in the condition, you can click on the icon that resembles a floppy disk when you are finished.
- Name : You can choose any name you wish, that being said, we recommend that you use a name that represents the desired condition. The following is an example used in this article.
Is even = true - Condition : Is even
- Operator : Equals
- Condition : Static
- Value : true
- Quantificator : None
Once the condition is visible on the left side of the window, you can click on the icon that resembles an x in the top right corner of the template editor.
Now add a new layer in which you will place the background for the uneven rows. Please ensure that you enter a name that identifies the information that will be contained in this layer, the following is the name for the new layer in this example.
Background - Uneven rows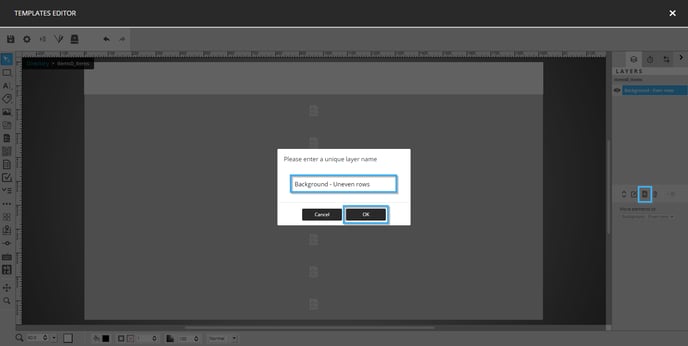
Add a new shape that has the same size and position as the previous shape.
- X : 0
- Y : 0
- W : 1920
- H : 135
Once the shape has been placed, click on the colour picker in the bottom of the template editor and attribute the following colour to the shape.
#ffffff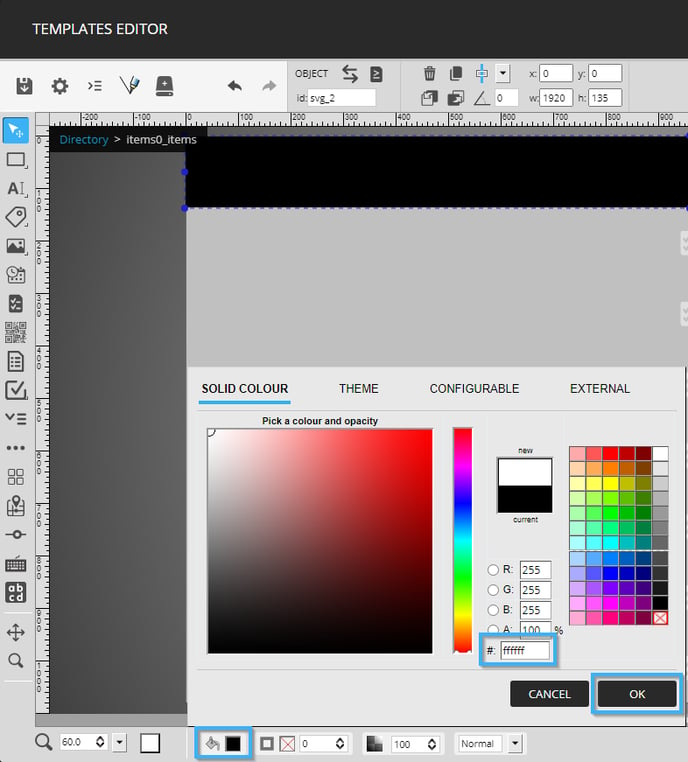
You must now click on the conditions management button to add the opposite effect to the condition you created on the background for the even rows.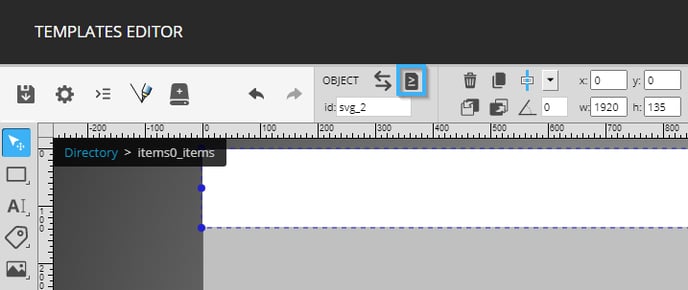
Click the "+" icon to add a condition on the shape.
Now enter the following information in the condition, you can click on the icon that resembles a floppy disk when you are finished.
- Name : You can choose any name you wish, that being said, we recommend that you use a name that represents the desired condition. The following is an example used in this article.
Is even = false - Condition : Is Even
- Operator : Equals
- Condition : Static
- Value : false
- Quantificator : None
Once the condition is visible on the left side of the window, you can click on the icon that resembles an x in the top right corner of the template editor.
Now add a new layer in which you will place the text fields that will contain the list's data. Please ensure that you enter a name that identifies the information that will be contained in this layer, the following is the name for the new layer in this example.
Text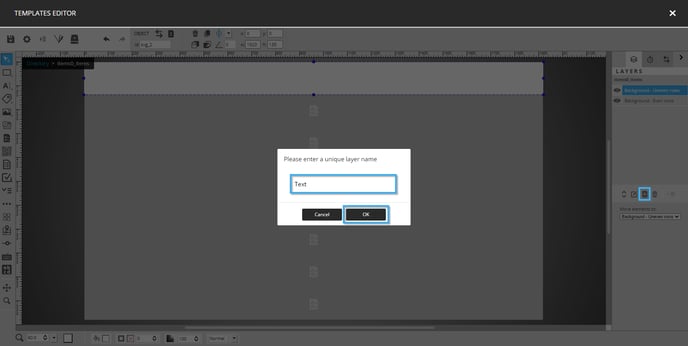
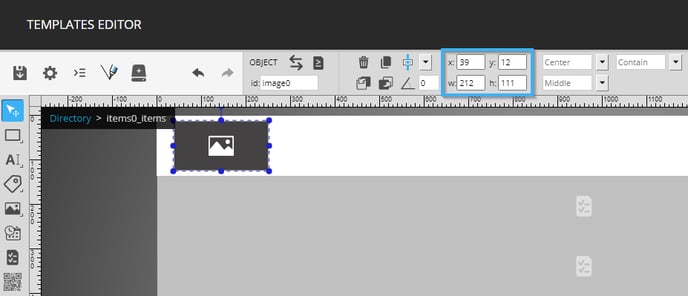
Click the image tool in the list on the left-hand side of the template editor, then place the image tool and give it the following values for its size and position.
- X : 39
- Y : 12
- W : 212
- H : 111
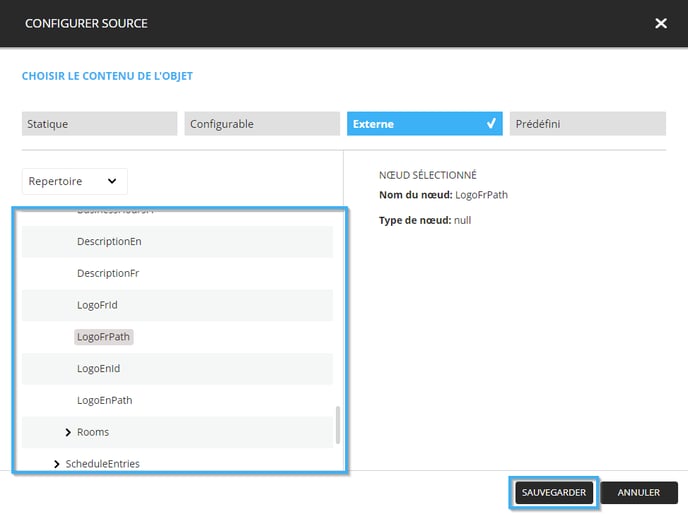
Double click the image tool to configure its content, once in the tool's configuration window click the "External" tab.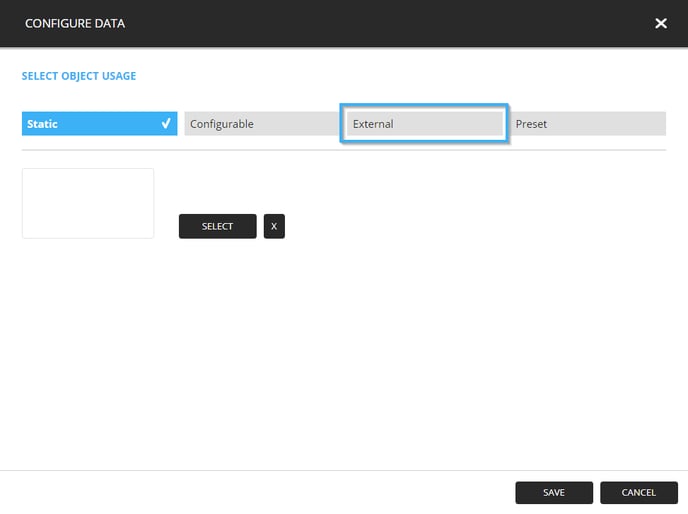
Click the drop-down list and select the data source you created earlier.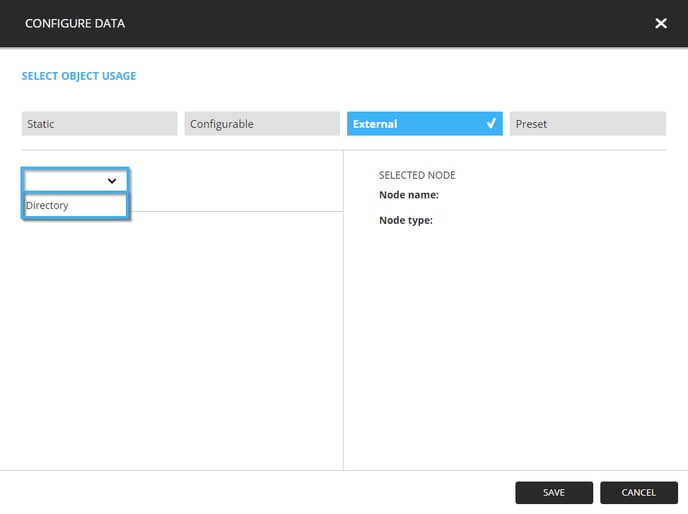
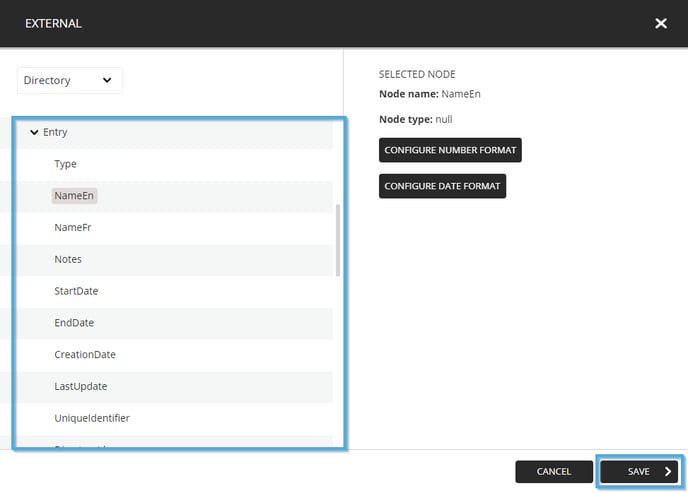
In the data structure presented beneath the selected source, click on the following field and click the "Save" button.
DirectoryData -> Tenants -> Entry -> LogoEnPath
Note: The example included in this article will broadcast the information for all tenants for a building in English. The image tool you configured will display the tenant's logo (if there is one). It is for this reason that the field above was selected.
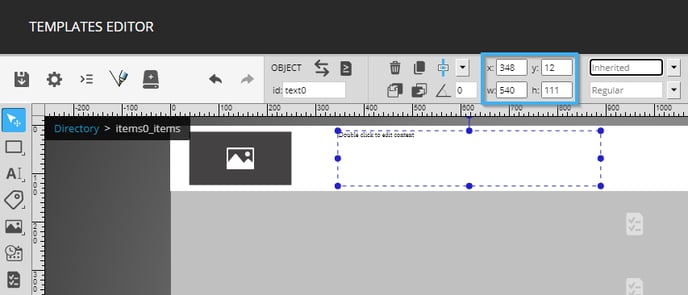
Click on the text tool in the list on the left-hand side of the template editor, then place a text tool with the following values for its size and position.
- X : 248
- Y : 12
- W : 540
- H : 111
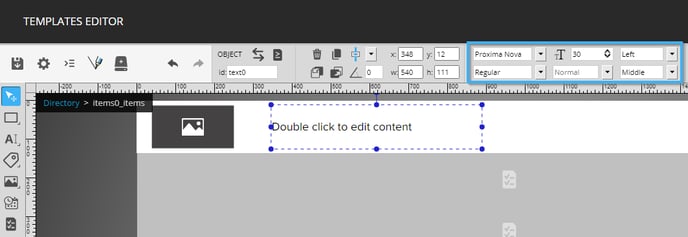
Attribute the following configurations to the tool's font.
- Font familly : Proxima Nova
- Font style : Regular
- Font size : 30px
- Text transformation : Normal
- Horizontal alignment : Left
- Vertical alignment : Middle
Once the font configurations have been applied, click the colour picker in the bottom of the template editor and attribute the following colour to the text tool.
#000000
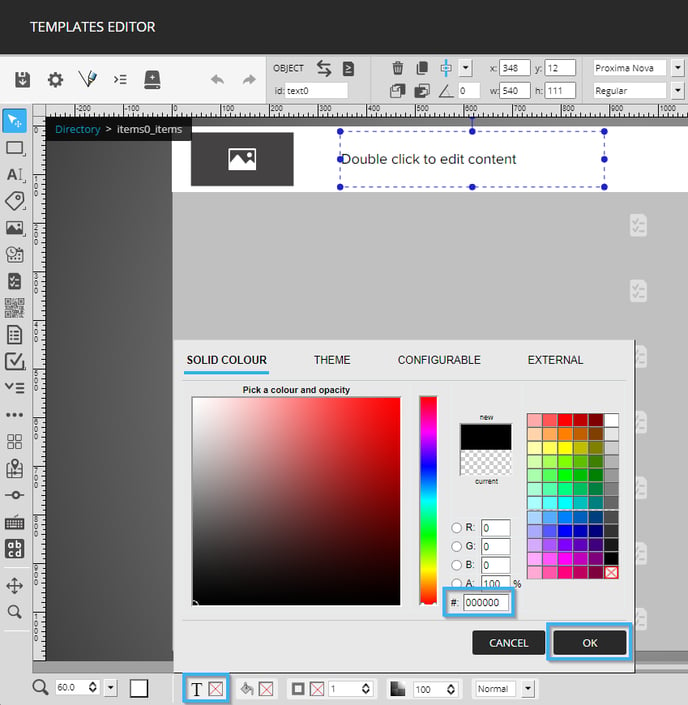
Once the colour has been applied to the tool, double click it to configure its content. Once in the tool’s configuration window, click on the external data button, it is the icon that resembles a hard drive.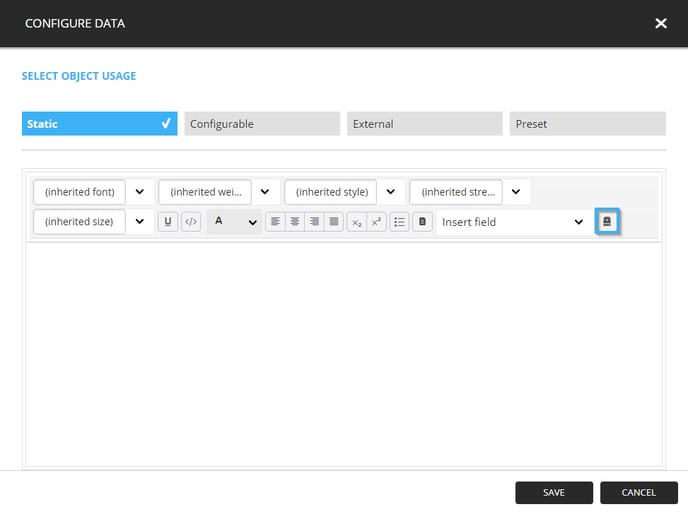
Click the drop-down list and select the data source you created earlier.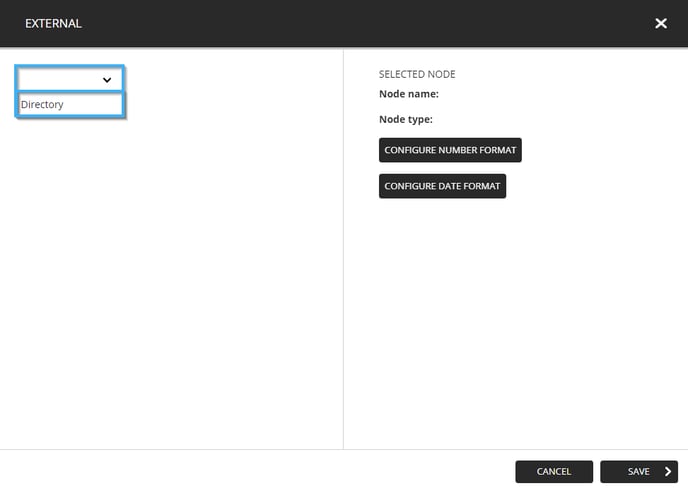
In the data structure presented under the selected source, click on the following field and click the "Save" button.
DirectoryData -> Tenants -> Entry -> NameEn
Once the selected field is visible in the text tool, click the "Save" button.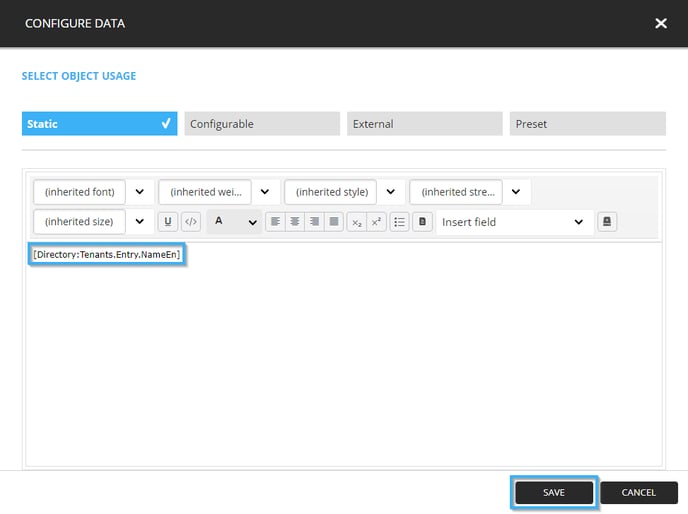
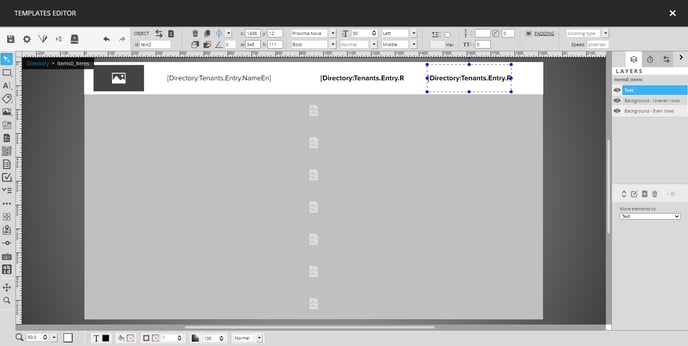
You must now place two more text tools with the following configurations and containing the following fields.
- DirectoryData -> Tenants -> Entry -> Rooms -> DirectoryRoom -> NameEn
- X : 988
- Y : 12
- W : 348
- H : 111
- Font family : Proxima Nove
- Font style : Bold
- Font size : 30px
- Text transformation : Normal
- Horizontal alignment : Left
- Vertical alignment : Middle
- Colour : #000000
Note: Seeing that this example is conceived to display the information for all tenants in a building in English, the field mentioned above to display the name of the room the tenants are occupying in English.
- DirectoryData -> Tenants -> Entry -> Rooms -> DirectoryRoom -> DescriptionFR
- X : 1436
- Y : 12
- W : 348
- H : 111
- Font family : Proxima Nove
- Font style : Bold
- Font size : 30px
- Text transformation : Normal
- Horizontal alignment : Left
- Vertical alignment : Middle
- Colour : #000000
Note: Seeing that this example is conceived to display the information for all tenants in a building in English, in this case the field mentioned above contains the floor on which the tenant's room is found. Selecting it allows you to display the name of the room the tenants are occupying in English.
Once the fields have been configured in the template, you can click on the button that returns you to the template's global context.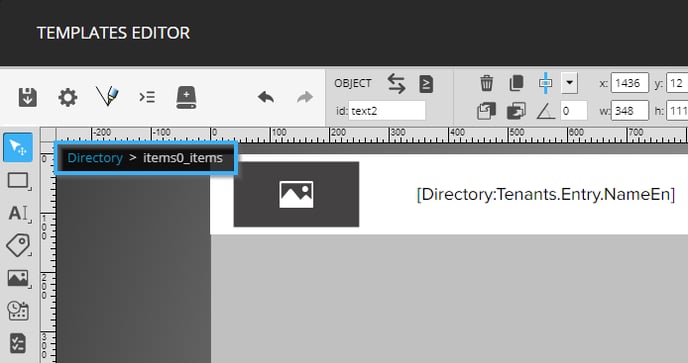
Finally, you can click on the icon that resembles a hard drive to save the template.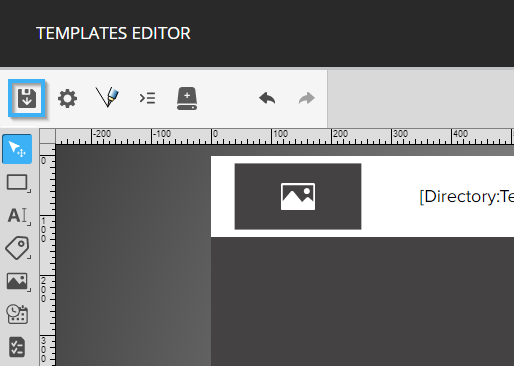
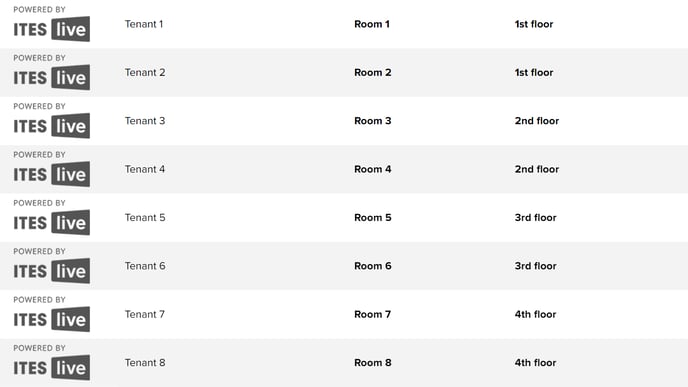
Note: The following is an example of the visual result of the configurations applied in the template created in this article.