Learn how to create a display group (transit authority)
| available with: |
| Windows Player : Premium Web Player : Premium LG webOS Signage Player : Premium Samsung SMART Signage Platform (SSSP / Tizen) Player : Premium BrightSign Player: Premium Android Player: Premium Linux Player: Premium macOS Player: Premium |
Important: To complete the creation of a new display group, you must first have created a display group collection. For this display group to be usable, the collection you create it in must have been associated to a transport message group.
Once connected to the ITESLIVE Studio, click on the "Messages" tab and select the "Display groups management". 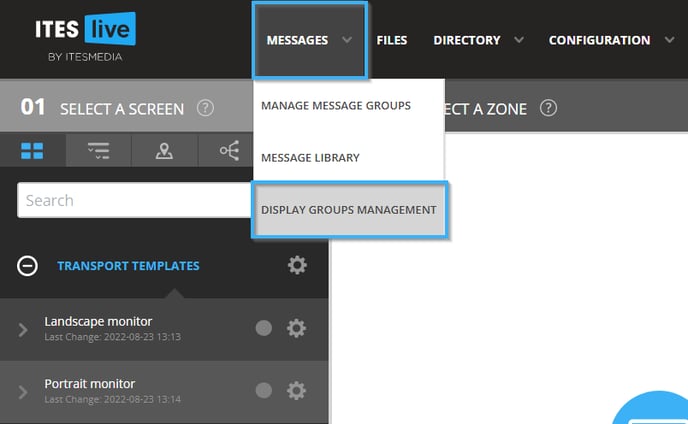
Click on the desired display group collection on the left-hand side of the window, then click on the icon that resembles a "+" on the right-hand side of the window.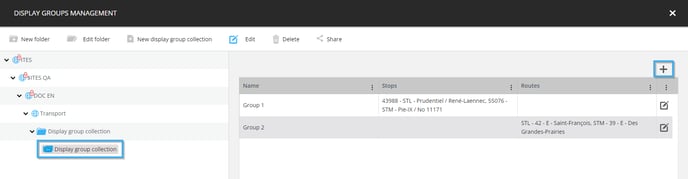
Give the display group a name and click on the "+" icon next to the "Stops" title.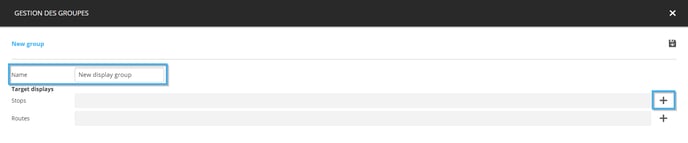
Select the desired stop and click the "Select" button at the bottom of the window.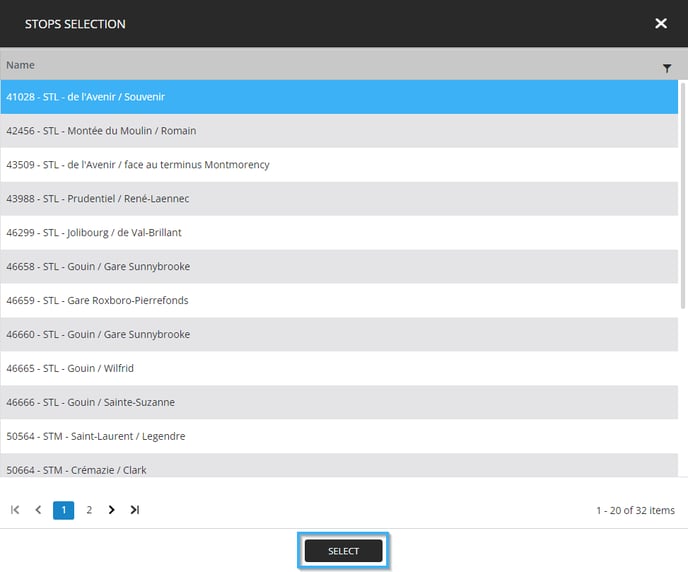
You can also click on the "funnel" icon to filter the stop list, we recommend you use the "Contains" filter to search for the desired stop number.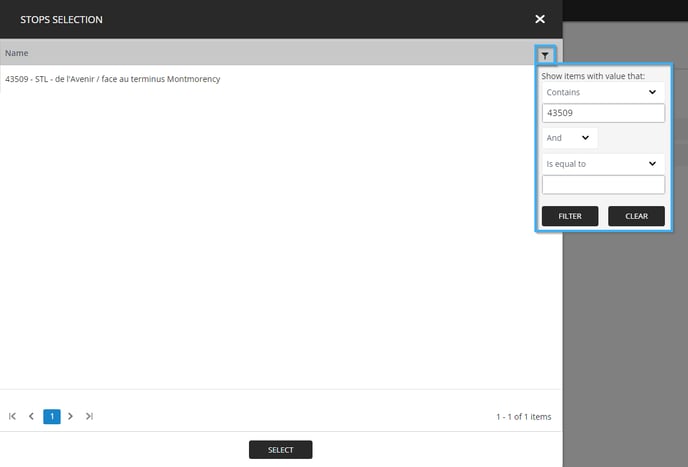
Note: You can repeat the stop selection repeatedly to add more than one stop to the display group.
Once you have selected the desired stops, click on the "+" icon to the right of the "Routes" title.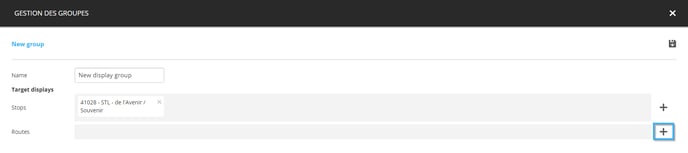
Select the desired route and click the "Select" button at the bottom of the window.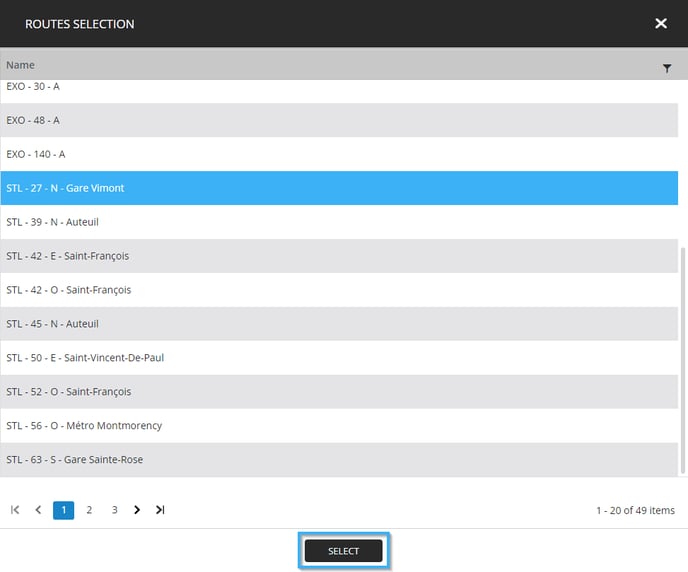
You can also click on the "funnel" icon to filter the route list, we recommend you use the "Contains" filter to search for the desired route number.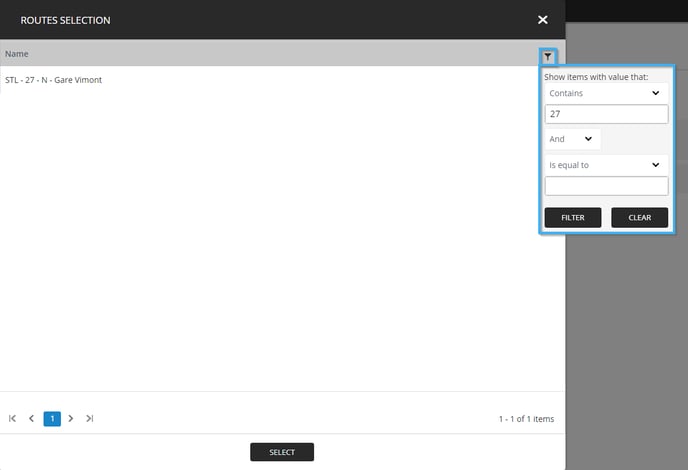
Note: You can repeat the route selection repeatedly to add more than one stop to the display group.
Once you have completed your selections, click on the "floppy disk" icon to save the display group.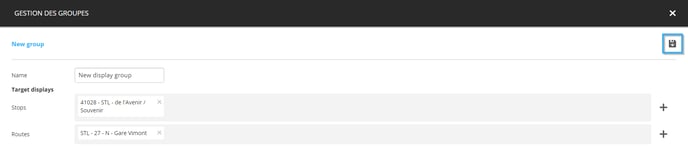
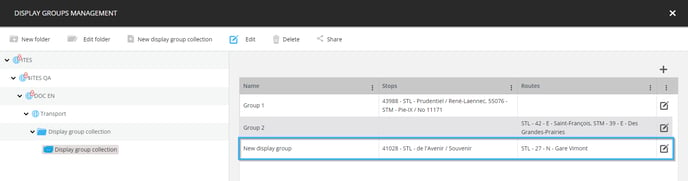
Once the window closes, the new display group will be visible in the list of display groups contained in the selected collection.