| available with: |
| Windows Player : Premium Web Player : Premium LG webOS Signage Player : Premium Samsung SMART Signage Platform (SSSP / Tizen) Player : Premium BrightSign Player: Premium Android Player: Premium Linux Player: Premium macOS Player: Premium |
Note: The "Transport message groups" are the resource on the ITESLIVE Studio that allows users to send passenger information communications directly in the transit data and broadcasts them according to the rules applied in this regard in the transport clip templates.
To access the message group management, click on the "Messages" tab in the top left-hand corner of the Studio and select the "Manage message groups" entry.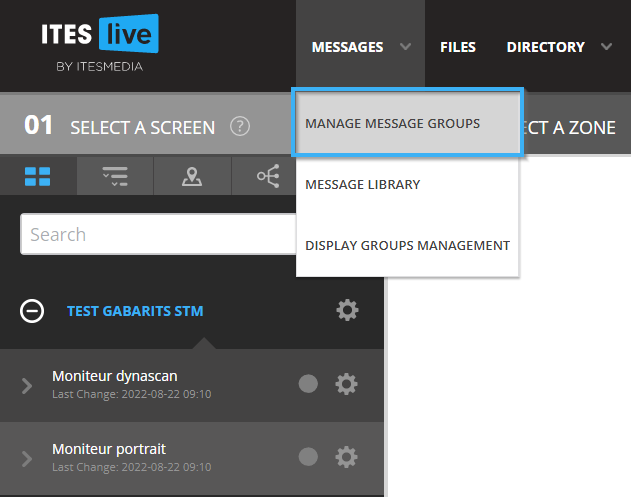
Navigate the tree view on the left-hand side of the window and click on the account group in which you wish to create the message group and click on the "+" icon above the list on the right-hand side of the window.
Click on the "Transport" type message group. 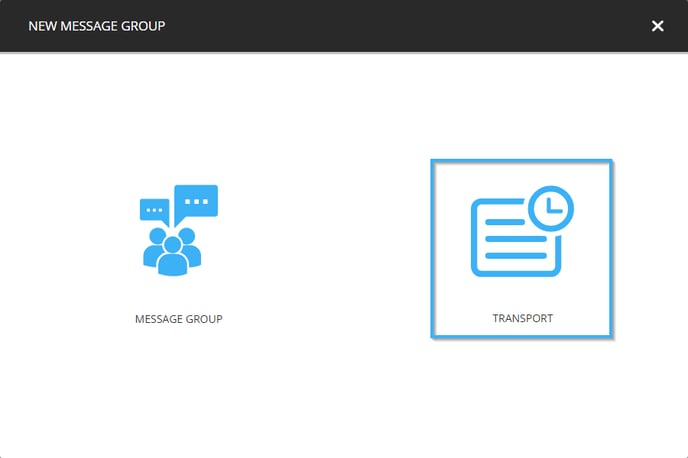
Give the transport message group a name and click on the "+" icon to the right of the "Languages" title.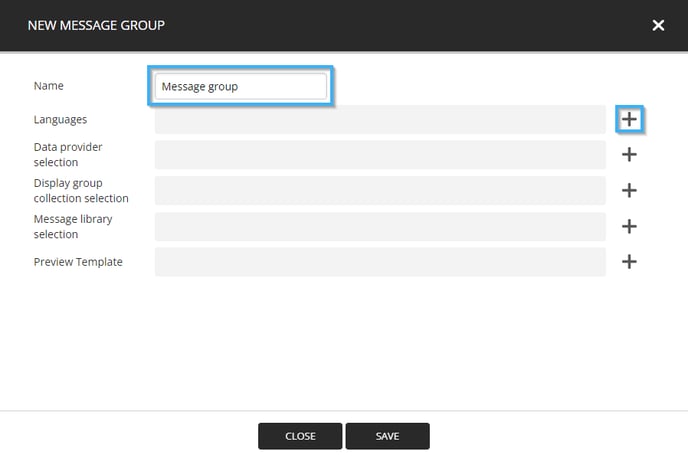
Click on the desired language to select it and click the "Select" button.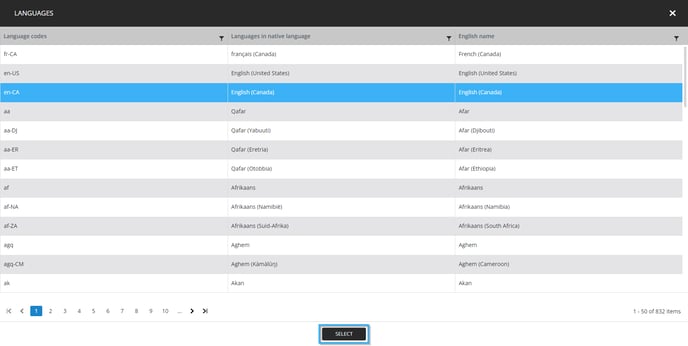
Note: You can repeat these steps to add more than one language in the message group.
Important: The languages selected here must be the same that are used in the message library that you will associate to this message group.
Once your language selections have been completed, click on the "+" icon to the right of the "Data provider selection" title.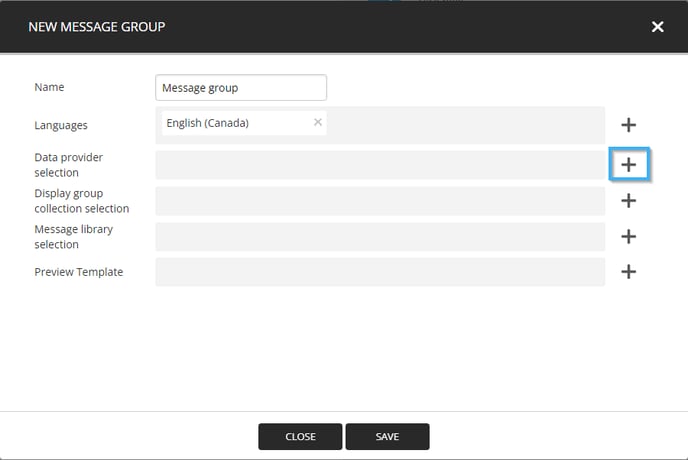
Select the desired "data provider" and click the "Select" button.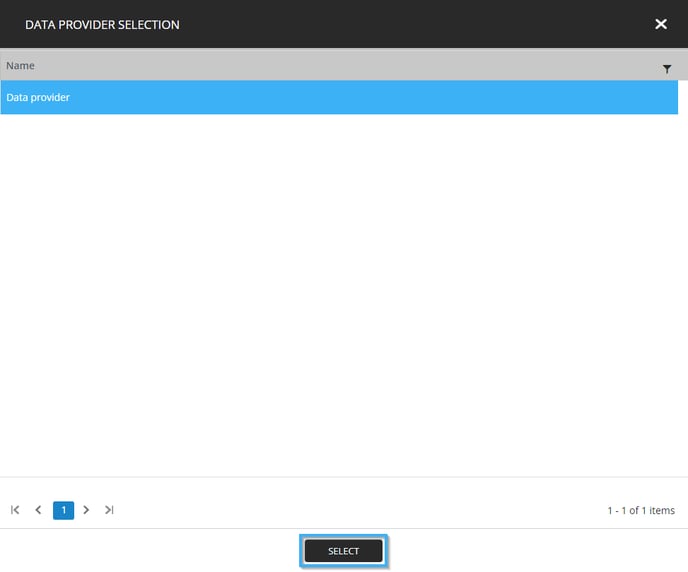
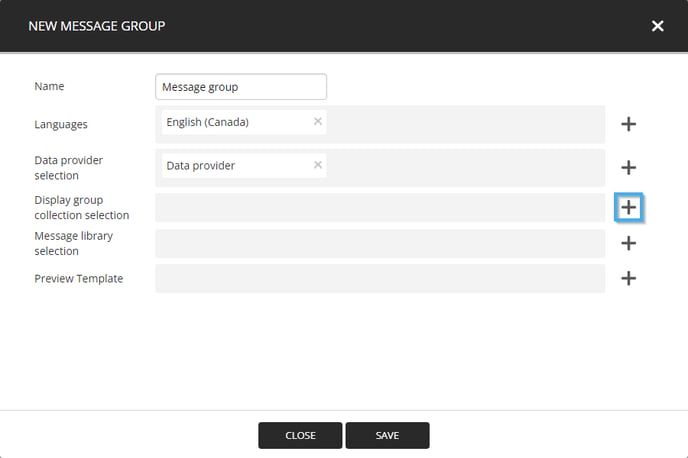
Once the data provider selection has been completed, click on the "+" icon to the right of the "Display group collection selection" title.
Note: The display group collections contain predetermined selections of stops and routes (created on the Studio) that can be used when creating a message to allow users to quickly broadcast a message to a group of stops, routes or stops and routes.
Click on the desired collection and click on the "Select" button.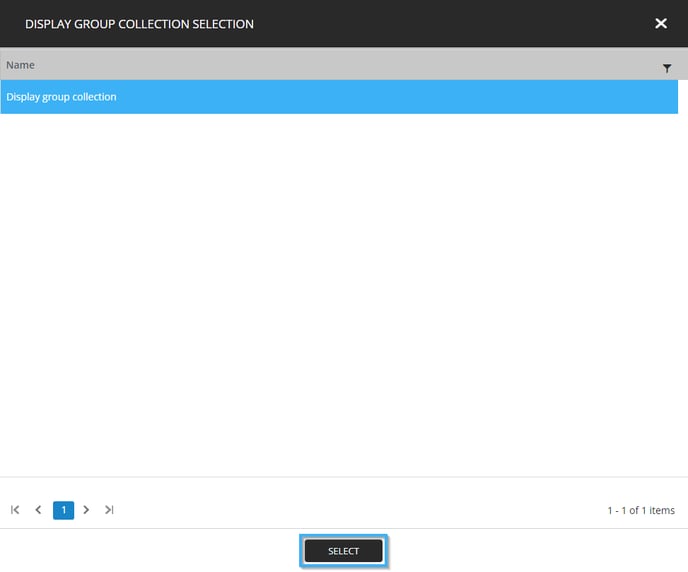
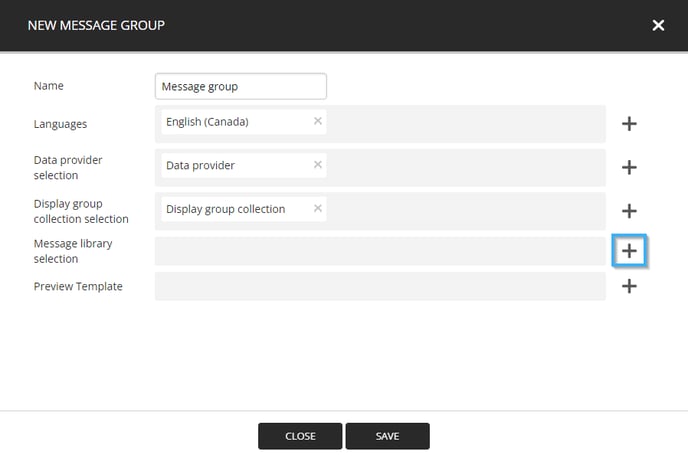
Once the display group collection selection has been completed, click on the "+" icon to the right of the "Message library selection" title.
Note: The message library contains pre-written texts (messages created in the message library) to allow users to quickly broadcast a new message with a minimal number of modifications.
Click on the message library you wish to use and click on the "Select" button.
Once the message library selection has been completed, click on the "+" icon to the right of the "Preview template" title.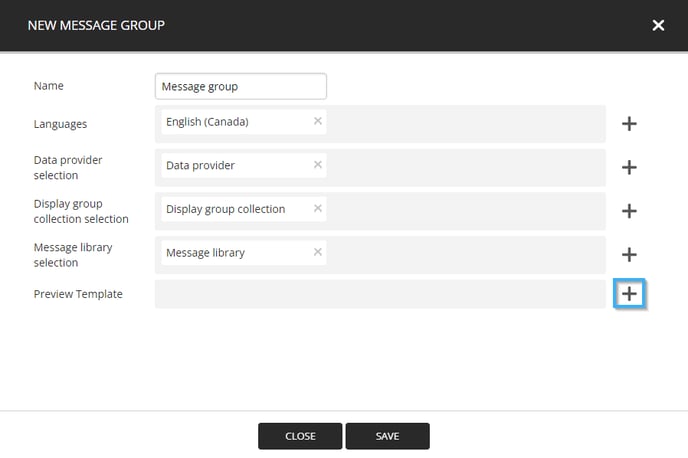
Navigate the tree view on the left-hand side of the window and click on the account group or directory that contains the template you wish to use. Then click on the template in the list on the right-hand side of the window and click "Accept".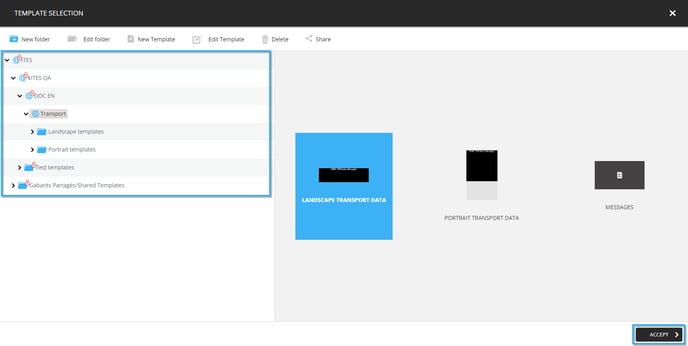
Note: You can repeat these steps to add more than one template to the message group.
Important: You must select the same templates that are used in the message library that you associated to the message group.
Finally, click the "Save" button to finalize the message group creation.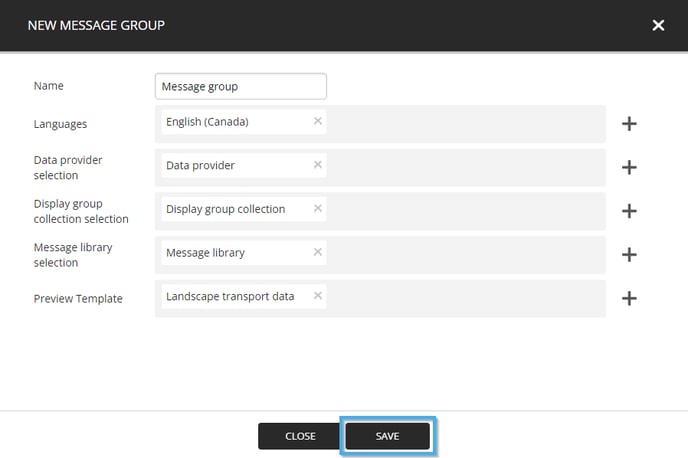
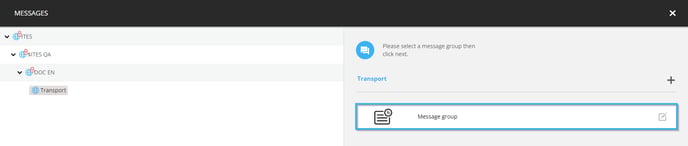
Once the transport message group has been completed, it will become visible above the list on the right-hand side of the message group management window.