| AVAILABLE WITH: |
| LG webOS Signage Player : Starter, Pro, Premium |
Important: It is crucial that you inform yourself in regard to the version of the webOS Signage system included with your monitor. The ITESlive software supports exclusively the LG webOS Signage versions 4.X and above.
Note:
1) It is important to allow the domains and ports in your firewall to ensure proper display functionality.
Here is the list of domains and ports:
https://support.itesmedia.tv/domains-and-ports-to-authorize-in-your-firewall
2) If you do not have the monitor's remote, you can still follow this procedure by connecting a USB keyboard to the monitor.
1. Factory reset
Note: If you are using an LG webOS Signage monitor that has never been used, you can proceed directly to the following steps. The factory reset must be completed exclusively on a monitor that was in use prior to the installation of the ITESlive software.
Navigate to the menu named "Admin", in order to access the settings within this menu, select the «Off» button and press the "OK" button on your remote.

Once you activate the "Admin", the monitor will ask for a password in order to complete the activation. The default password for LG webOS Signage monitors is the following;
000000

Once the "Admin" activé, navigate to the "Factory Reset" entry and press the "OK" button on your remote.
The factory reset confirmation message will then be display, select "Confirm" and press the "OK" button on your remote.

The monitor will automatically shutdown, you simply need to power it on by either pressing the power button on your remote or on the monitor itself. Once the monitor starts up, you will see the "Ready to use" configurations.
2. "Ready to use" configurations
The first time you start you monitor, you will see the «Ready to use» to use menu.
In the list of startup configurations, select "Go to settings" and press the "OK" button on your remote.

On the "Go to settings" radial button is active, select the «Start» button and press the «OK» button on your remote.

3. Wi-Fi connection
Select the «General» menu, then navigate to the sub menu named "Network" and press the "OK" button on your remote.

In the "Network" menu, navigate to the entry named "Wi-Fi Connection" and press the "OK" button on your remote.

Once inside the Wi-Fi connection menu, select the network to which you wish to connect your monitor. Select the name of your network in the list and press the "OK" button on your remote.

Enter the Wi-Fi network's password, then select the "Connect" button and press the "OK" button on your remote.

A white check mark symbol will appear next to your Wi-Fi network's name if the connection was successful.

4. Date & Time configurations
Important: Whether you wish to use an internal time server or one that is available on the web, you will need to contact your IT team to obtain the information required and validate that the server is indeed allowed on your network.
You can configure a time server using one of the following elements.
- IPV4 - The time server's IP address in the IPV4 format
- IPV6 - The time server's IP address in the IPV6 format
- URL - The URL that is used to call the time server
For instance: time.cloudflare.com
Press the button with an icon that represents a gear on your monitor's remote control. Once the menu opens, select the "General" entry. Une fois que le menu s'ouvre à l'écran, sélectionnez l'entrée « Général ».
Once in the "General" menu, select the "Time & Date" entry.
Once in the "Time & Date", ensure that the "Set automatically" option is enabled.
Then select the "NTP Server Setting" entry.
Once in the NTP server configuration window, ensure that the "Default NTP Server" configuration is disabled.
Important: If you wish to use an internal time server, it is possible that you will need to contact your IT team to obtain the information required to configure the correct connexion type and its value here.
Then select the correct connexion type for your time server, in this example we will use "URL".
Enter the IP address or the URL for the desired time server, for this example we used the following URL.
time.cloudflare.com
If the "Update now" button becomes enabled, you can select it and press the "Ok" button on your remote control to apply the configurations and immediately update the monitor's information.
In the event that the button is not enabled, you can simply restart the monitor using the power button on your remote control. The monitor's time will normally be correct when the monitor restarts.
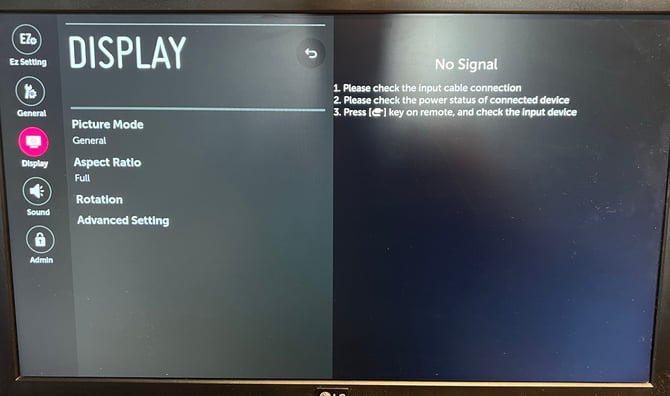
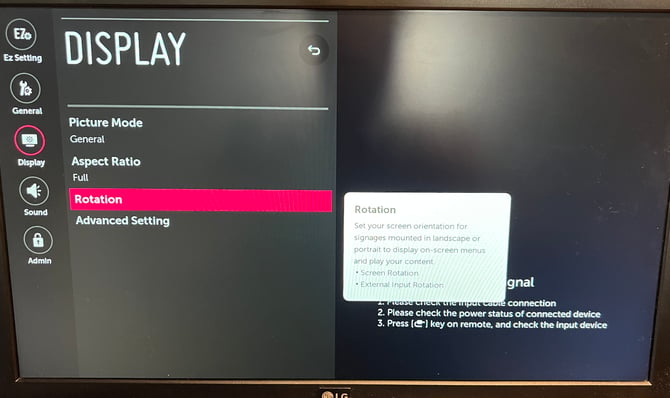
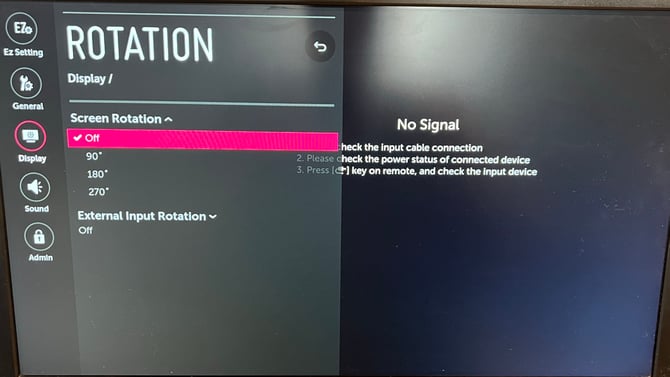
5. Select the appropriate display mode
Make sure to select the appropriate display mode: portrait (vertical) or landscape (horizontal).
Click on display
Click on rotation
Select the correct orientation
6. ITESlive installation
Select the "Ez Setting", navigate to the entry named "SI Server Settings" and press the "OK" button on your remote.

Once in the "SI Server Setting", select the entry named "SI Server Setting" and press the "OK" button on your remote.

By default the "Fully Qualified Domain Name" will be disabled, select this entry and press the "OK" button on your remote.

In the text zone une the "Fully Qualified Domain Name" option, enter the following URL;
https://iteslive.tv/iteslive.ipk
Then, activate the "Local" radial button for the "Application Launch Mode" entry and the «IPK» radial button for the "Application type" entry. Afterwards, navigate to the "REMOTE" button to the right of the entry named "Local Application Upgrade" and press the "OK" button on your remote.

Once the installation of the ITESlive for LG webOS Signage has been completed, your monitor will display the following message. You now shutdown the monitor and turn it back on, this can be done by using either the power button on your remote or the power button directly on the monitor.

Shortly after monitor your monitor has started up, the monitor will show a loading screen indicating that the ITESlive software is starting.

Once the software has been started, you will see an ITESlive pop up requesting an ITESlive ID. This is where you must enter your display's identifier, after you have entered the ID, your display will begin downloading its content.

7. ITESlive ID
Note: to activate your player using a serial number, go to the following step.
The ITESlive ID can be found on the ITESlive Studio, the following are the steps required to access this information.
Select the screen with the content you wish to display
At step “01 Select a Screen,” choose the display with the content you wish to show on screen.

Open the broadcasting window
At “02 Select a Zone,” click the broadcasting icon.

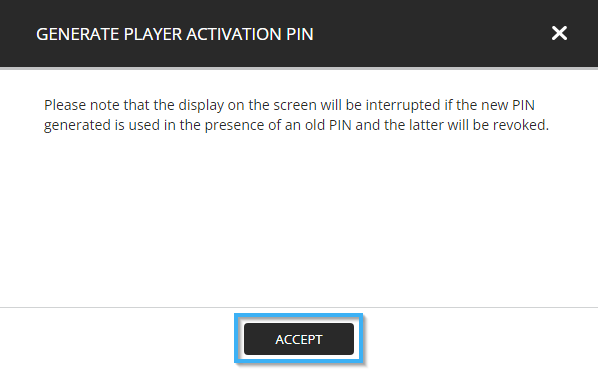
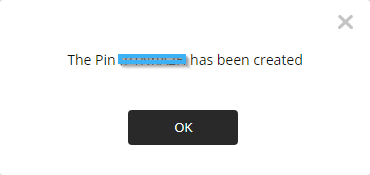
Click the "Generate player activation PIN" button.

Click the "Accept" button to generate a PIN.
Important: Please note that the display on the screen will be interrupted if the new PIN generated is used in the presence of an old PIN and the latter will be revoked.
Take note of your ITESlive ID
Note: In the even that the player type displayed in the broadcasting window in the ITESlive Studio does not represent the type of device you wish to use for your display. It is possible to change this configuration in the ITESLVIE Studio.
8. Activating your device using a serial number
After having selected the player, click on the broadcasting button under the "02 Select a zone" section.
Once in the broadcasting window, click on the "Register serial" button.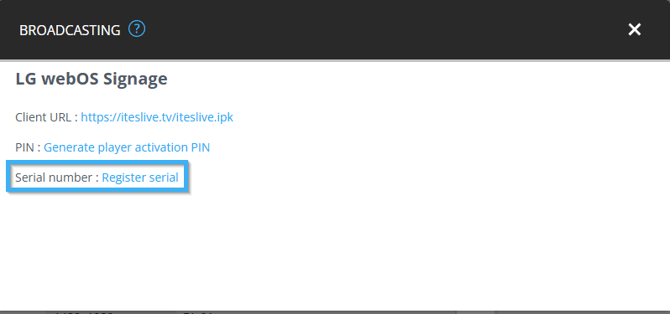
In the "Register serial" window, click in the text box and enter your WebOS device's serial number. Click on the "Save" button once you haved entered the serial number.
Note: This configuration ensures that when the player bearing the serial number that has been registered connects to our server, it will automatically obtain the information for the player its serial number was Registered to.
Important: The serial number will stay visible up until the player is activated. This configuration will only succeed in activating the player once. If you need to reset the device to the factory defaults you will need to register its serial number on the ITESlive Studio once more.