| available with: |
| Windows Player : Starter, Pro, Premium Web Player : Starter, Pro, Premium LG webOS Signage Player : Starter, Pro, Premium Samsung SMART Signage Platform (SSSP / Tizen) Player : Starter, Pro, Premium Brightsign Player: Starter, Pro, Premium Android Player: Starter, Pro, Premium Linux Player: Starter, Pro, Premium macOS Player: Starter, Pro, Premium |
The date and time tool that has a very specific use, but there are several ways to display it. In any case, the result will be that the date and time will be broadcast in various formats, with different fonts and different colours. The following are the steps for the different aspects of the date and time tool configuration.
- How to place the date and time tool in the template editor
- How to configure the content of the date and time tool
- How to configure the font for the date and time tool
- How to configure the colour of the date and time tool
How to place the date and time tool in the template editor
The date and time tool is located in the list on the left-hand side of the template editor.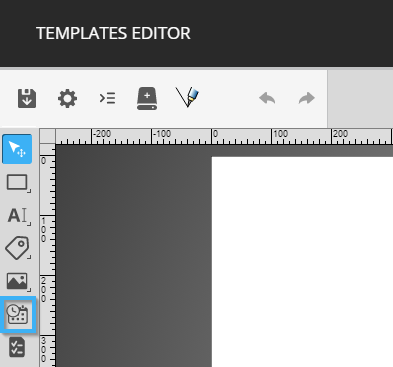
Once the tool has been selected, click and drag in the white space in the template to place the tool.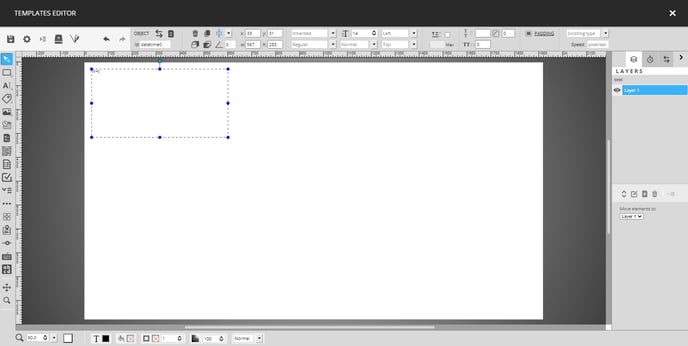
You can position the date and time tool using the circles around the tool or using the position and size controls for the tool.
How to configure the content of the date and time tool
Once the tool has been placed, you can double-click on it to access the content configurations.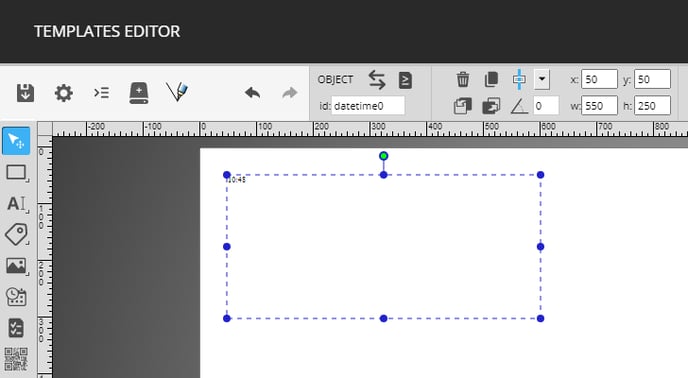
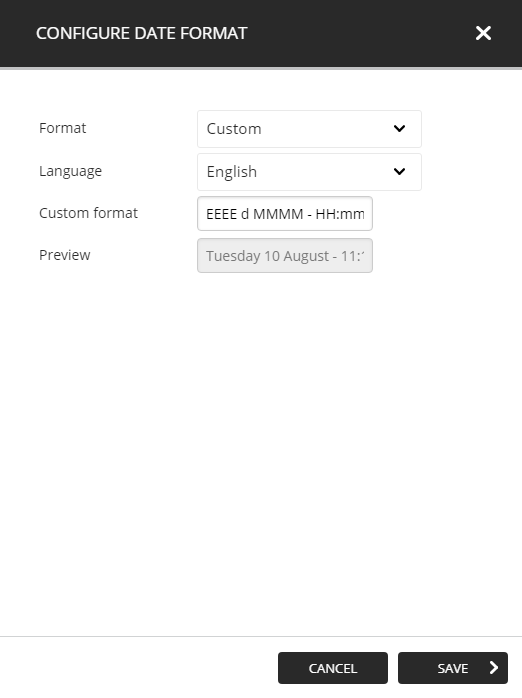
The configuration window will open with the « Time 24H » and French selected as the language configuration by default. The date and time formats in this tool can be used both in English and in French, the following are the available formats for this tool.
- Time 24H: Broadcasts the time exclusively in the 24 hour format
- Time 12H: Broadcasts the time exclusively in the 24 hour format
- Year-Month-Date Short: Broadcasts the date in a numerical format and in the following order; year, month, date (2021-08-09)
- Date Month: Broadcasts the date in a numerical format, followed by the month in a text format (9 August)
- Date Month Year: Broadcasts the date in a numerical format, followed by the month in a text format and the year in a numerical format (9 August 2021)
- Day-of-the-week Date Month: Broadcasts the day of the week, followed by the date in a numerical format and the month in a text format (Monday 9 August)
- Custom: Broadcasts the date and time information in a manually specified format.
- HH: Time in the 24 hour format
- hh: Time in the 12 hour format
- mm: Minutes in a numerical format
- y: Year in a numerical format
- MM: Month in a numerical format
- dd: Day in a numerical format (with a 0)
- d:Day in a numerical format (without a 0)
- MMMM: Month in a text format
- EEEE: Day of the week in a text format
- EEE: Abbreviation for the day of the week
- a: AM/PM
The following are examples of custom configurations based on the default options.
- Time 24H: HH:mm
- Time 12H: hh:mm a
- Year-Month-Date Short: y-MM-dd
- Date Month: d MMMM
- Date Month Year: d MMMM y
- Day-of-the-week Date Month: EEEE d MMMM
Note: Please note that the above examples work the same way in any language, you must manually edit the order of the custom configurations if the current order does not work in your language.
How to configure the font for the date and time tool
Once you have selected the date and time tool in the editor, the controls for the text's font will appear in the top of the template editor.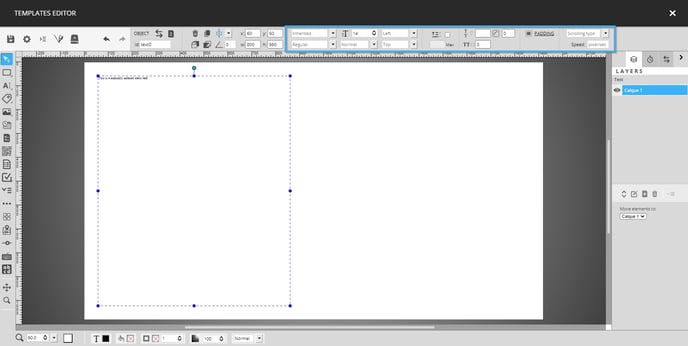
You can configure the following font aspects.
- Font family: The font family that will be used for the text (such as Monserrat, Proxima Nove, etc.)
- Font style: The font style that will be used to the text's font (italic, bold, etc.)
- Font size: The size of the font that will be used for the text
- Text transformation: Determines the way that the text is transformed after being inserted in the tool (normal, uppercase, lowercase or first letter uppercase)
- Horizontal alignment: The horizontal alignment for the text in the tool (left, centre, right or justified)
- Vertical alignment: The vertical alignment for the text in the tool (top, middle or bottom)
- Scrolling type: In the event that the text is longer than the space attributed to the tool, this configuration determines how the text will scroll to display the part that could not be displayed initially.
- None: The text will not scroll and will display as is
- Continuous vertical: The text continuously scrolls vertically
- Continuous horizontal: The text continuously scrolls horizontally
- By page vertical: The text scrolls one page at a time vertically
- By page horizontal: The text scrolls one page at a time horizontally
- Touch vertical: The text continuously scrolls vertically and can be scrolled manually with a touch screen
- Touch horizontal: The text continuously scrolls horizontally and can be scrolled manually with a touch screen
- Scrolling speed: A numerical value that represents the text's scrolling speed in pixels per second
How to configure the colour of the date and time tool
Once you have selected the date and time tool in the template editor, you can edit the colour by using the control in the bottom left-hand corner of the editor.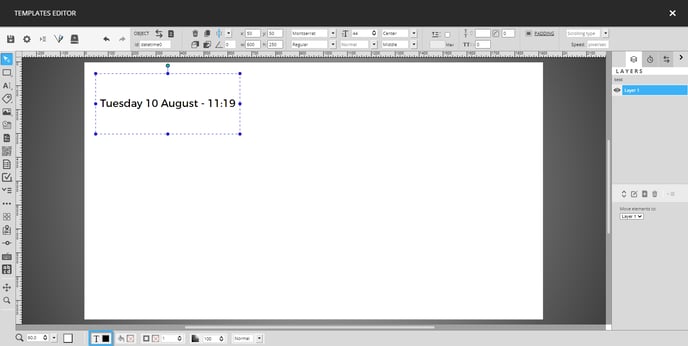
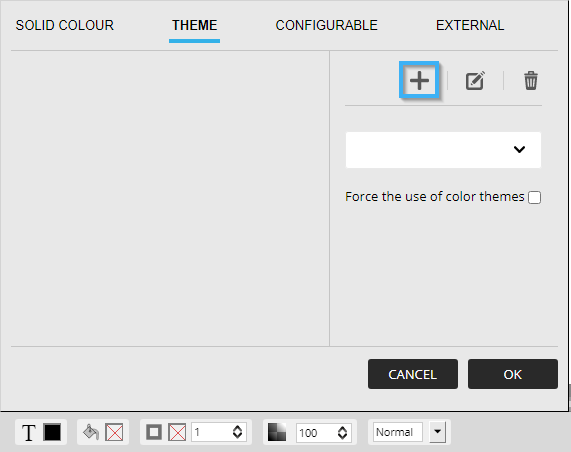
When you click the control, a window containing 4 tabs is open. By default the window will open in the "Solid Colour" tab. Here you can enter an "RGB" (Red, Green, Blue) colour, a hexadecimal colour code or select one of the default colour options.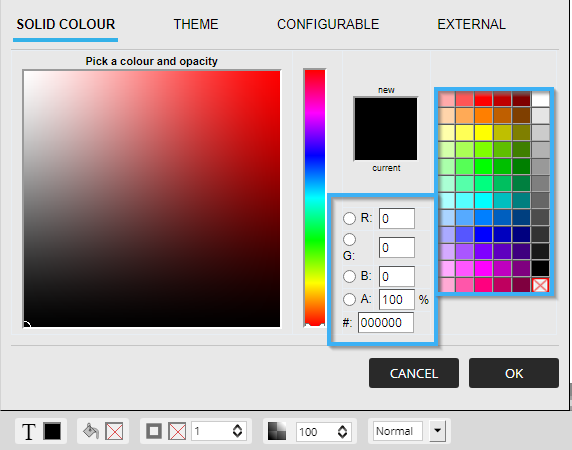
With the "Theme" tab, you can select a colour from a colour theme that is available in your account group. To add a theme click on the "+" icon.
Note: A colour theme is a collection of colours that is predefined, it facilitates the use of the colours it contains because you do not need to have their information on hand. This group of colours can also be used to ensure that the company's branding guidelines are respected.
In the colour themes window, select the desired theme and click the "save" button.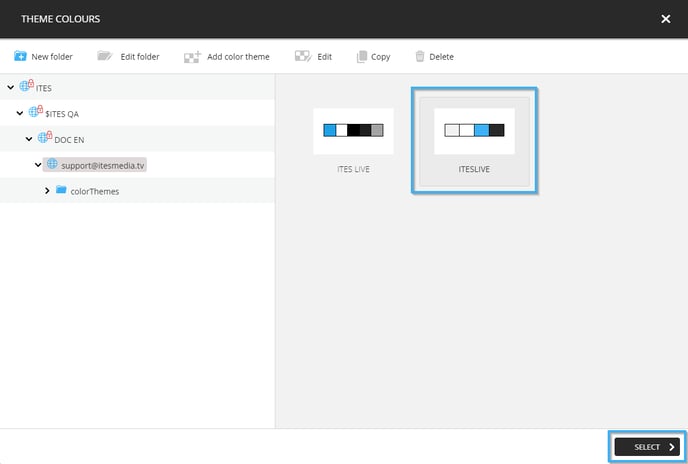
Once the theme is visible in the "Theme" tab, you can choose among the colours it contains.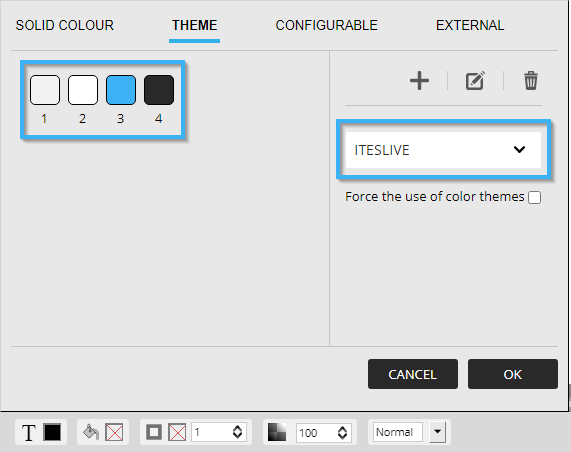
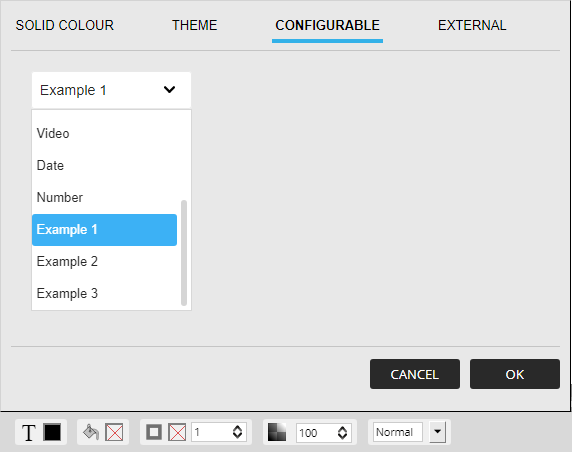
The "Configurable" tab allows you to select a configurable field, this configuration makes it so that the user will be able to select the text's colour while creating a message clip in a display.
Important: Although the template editor is available with all of the licence types, a Pro licence is required to use the message templates in your display.
Note: For more information on configurable fields, you can read the following article.