Important: According to the official BrightSign documentation, the required format for an NTP address is: ntp://123.123.123.123
Make sure to use this format to ensure proper time synchronization.
1. Click on this link: https://app.bsn.cloud, enter your credentials, and log in.
2. Select your existing network from the list.
3. Go to Admin > Setup Library.

4. Select the PlayerName, then click on the Edit icon (pencil).

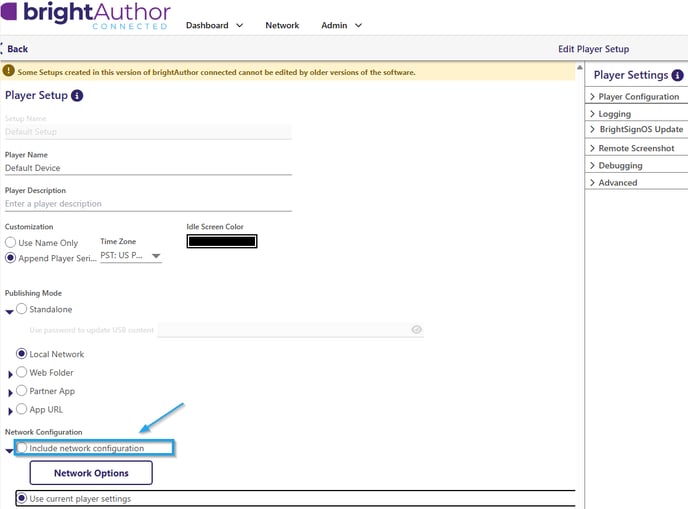
5. In the Network Configuration section, check the box Include network configuration.
6. In the Time Server field, enter your NTP server address, then click Done.
Exemple de Time Server: ntp://123.123.123.123

Your BrightSign player is now configured to synchronize its time with the NTP server you specified. This will help ensure accurate and reliable content playback.
Feel free to consult our related articles to learn more about installing ITESlive or advanced NTP service configuration.