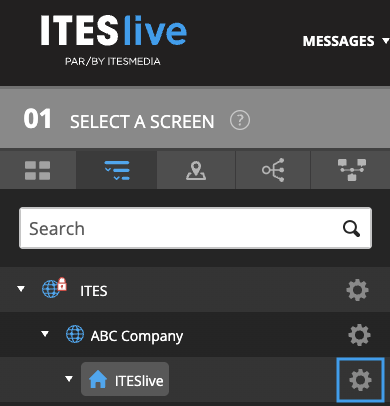
1. Click on the tree view

2. Click on your account group

3. Click on the site
Select the site under which you want to create your player.

4. Click on the gear icon to the right of the site
5. Click on Add player

6. Fill in the fields:
Reference number: For reference purposes only.
Description: Enter the name you want to assign to the screen.
For example: Cafeteria, Conference Room, Entrance, etc. Ideally, choose a name that will help you easily locate the screen within your organization. This will make it easier to add, edit, or remove content in the right place later on.
Type: Select the equipment type from the drop-down menu.
In other words, specify whether the software will broadcast to a Windows digital signage player, BrightSign, Linux, or a digital signage monitor such as LG WebOS, etc.
Active: Leave this box unchecked. It will be checked automatically once the equipment installation is completed.
Monitoring: Leave this box checked to be able to monitor your display with screenshots and alerts.
Release Channel: Leave this box empty.

7. Click on Save
Once you have clicked Save, your player will be added.

As shown in the example, the new Cafeteria player has been added.
Note: A sufficient number of licenses must be available in your account in order to install the player you created in ITESlive Studio on a physical device.
If you need an additional license, please contact your ITESMEDIA representative.