| Available with: |
| Windows Player : Starter, Pro, Premium Web Player : Starter, Pro, Premium LG webOS Signage Player : Starter, Pro, Premium Samsung SMART Signage Platform (SSSP / Tizen) Player : Starter, Pro, Premium BrightSign Player: Starter, Pro, Premium Android Player: Starter, Pro, Premium Linux Player: Starter, Pro, Premium macOS Player: Starter, Pro, Premium |
In the event that you are aware of an upcoming potential disconnection for a player in your digital signage network, whether it is caused by renovations, equipment maintenance or even a change in your internet service provider. It is possible to inform your team that the device loss of connectivity is normal or scheduled.
You can enter the information for the scheduled maintenance work on the Studio, this will result in the player having a second status indicating ongoing maintenance during the specified period. The following are the steps required to schedule a maintenance period for a player on the Studio.
Once connected to the ITESlive Studio, navigate to the desired player and click on the gear to its right.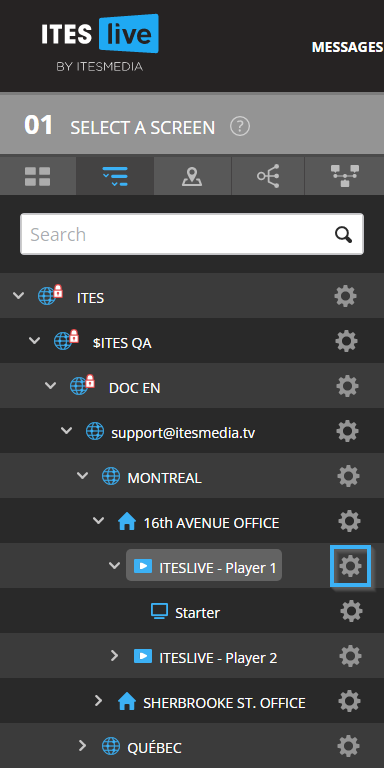
In the list that appears afterwards, click on the "Edit" button.
Once in the player modification window, click on the "Maintenance" tab.
To add a maintenance period, click on the "+" icon.
You must now enter the required information to document the scheduled maintenance period.
Note: Please note that the scheduled end date for the maintenance period is not a mandatory field. In the event that you do not know the end date, you can simply ignore this configuration when creating the maintenance period.
- Reason: The reason the player may lose its connection during the specified period. (renovations, equipment maintenance, a change of internet service provider)
- Start date: The start date and time for the scheduled maintenance period.
- End date: The end date and time for the scheduled maintenance period.
Once you have completed the required information, you can click on the icon that represents a check mark in a blue square.
Once you have applied the configurations for the maintenance period, click the "Save" button. 
After saving the scheduled maintenance period, the player will have two statuses once the maintenance period beings. This means that the player's current status will be accompanied by a second status indicating that maintenance is in progress.