| AVAILABLE WITH: |
| Player Windows: Starter, Pro, Premium |
| Player Web: Starter, Pro, Premium LG webOS Signage Player: Starter, Pro, Premium Samsung SMART Signage Platform (SSSP / Tizen) Player: Starter, Pro, Premium Brightsign Player: Starter, Pro, Premium Android Player: Starter, Pro, Premium Linux Player: Starter, Pro, Premium macOS Player: Starter, Pro, Premium |
To find out how to access the zone template editor, click here.
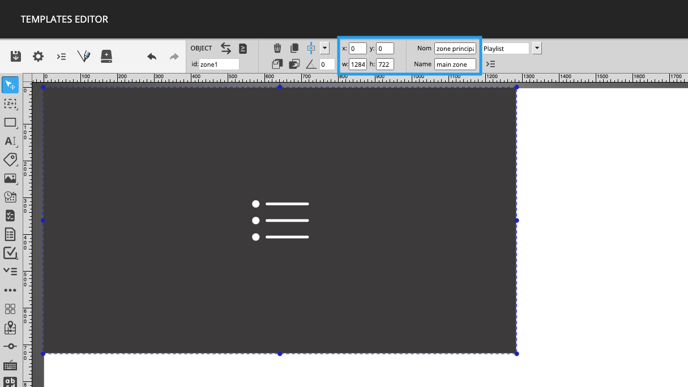
When you create a zone template, you must use the zone tool to define the locations of the various sections of the display.
1. Click the 2nd icon and select “unconstrained” or “16:9 Zone.”
The tool can be found in the toolbar on the left-hand side of the zone template editor.
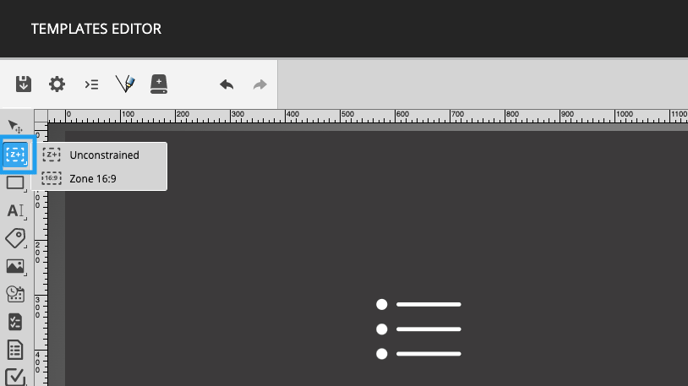
It is possible to create two different types of zones using the zone tool. To select the type of zones you wish to use, click and hold down the left mouse button on the zone tool. Then you can pick whether you want a “unconstrained” or “16:9” zone. The “unconstrained” zone lets you create a zone in your template that is not limited to a specific ratio. The “16:9 Zone” lets you create a zone that must comply with the 16:9 ratio.
2. Select the size and position
Then draw your “unconstrained” or “16:9” zone on your template. You can subsequently adjust the size with your mouse or indicate the size and position manually.
Note: You can also name your zones to clearly identify them.