| available with: |
| Windows Player : Pro, Premium Web Player : Pro, Premium LG webOS Signage Player : Pro, Premium Samsung SMART Signage Platform (SSSP / Tizen) Player : Pro, Premium BrightSign Player: Pro, Premium Android Player: Pro, Premium Linux Player: Pro, Premium macOS Player: Pro, Premium |
There are several steps required to make the information of a Facebook page (for which you are an administrator) available in your displays. The following instructions cover the association of the Facebook page to your ITESLIVE account, the creation of a Facebook clip as well as how to delete a Facebook clip or the page's information in the event you no longer wish to use it.
How to create a Facebook data provider
How to delete a Facebook data provider
How to create a Facebook data provider
Note: The Facebook data provider is the entity required to associate your Facebook page to your ITESLIVE account.
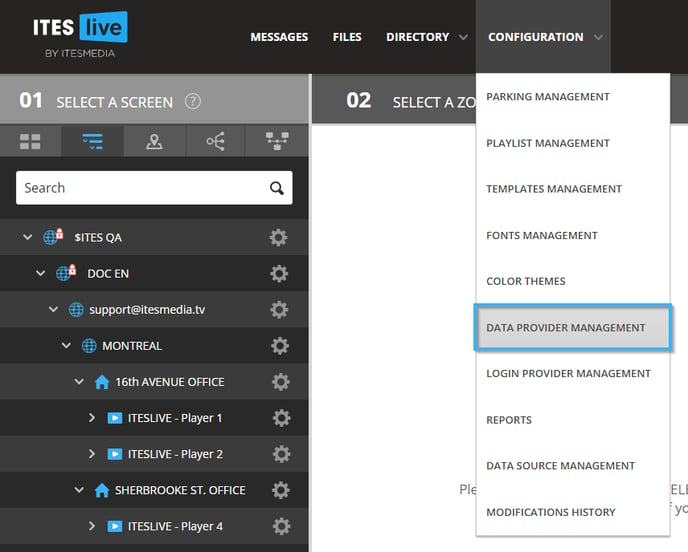
Once you are connected to the ITESLIVE Studio, click the "Configuration" tab and select the "Data provider management" entry.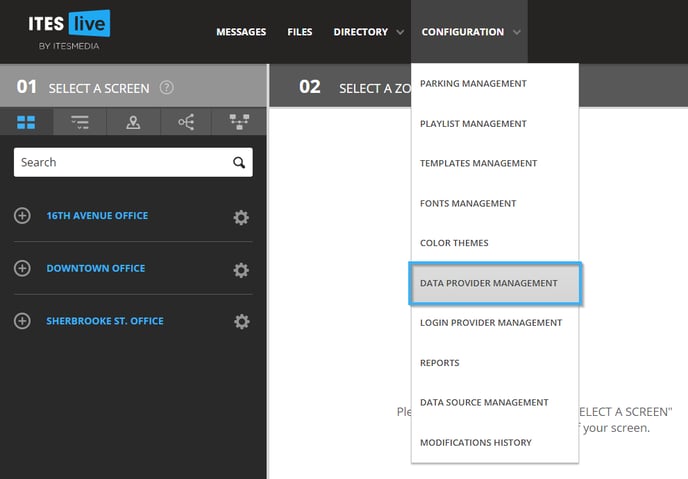
Select the account group in which you wish to create the data provider and click the "New folder" button.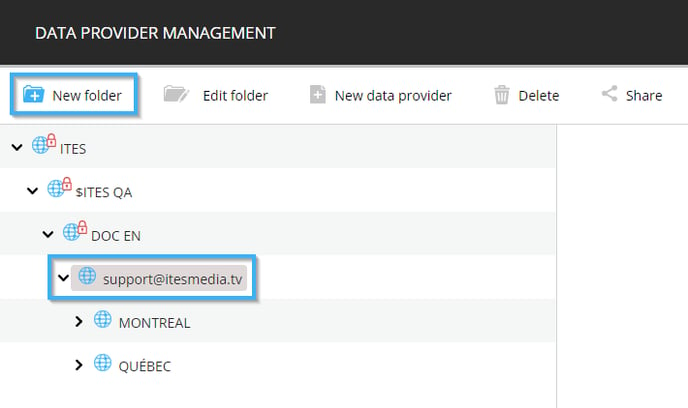
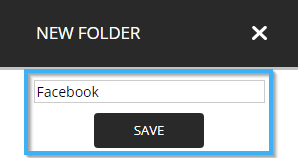
Name the folder you are creating and click the "Save" button.
Click on the folder you have created and click on the "New data provider" button.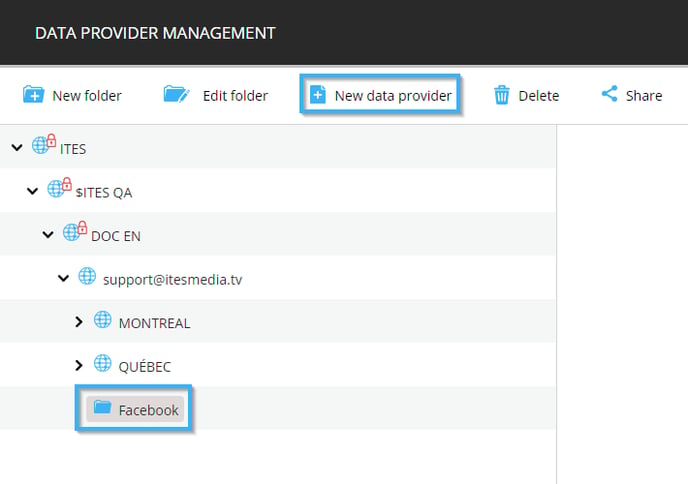
In the "New data provider" window, click the drop-down list and select the "Facebook" type.
Click the "Save" button.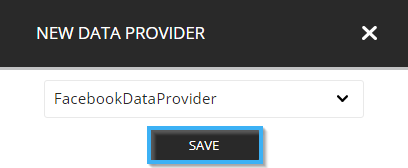
Entrer un nom pour le fournisseur de données et Cliquez sur le bouton « Se connecter avec Facebook ».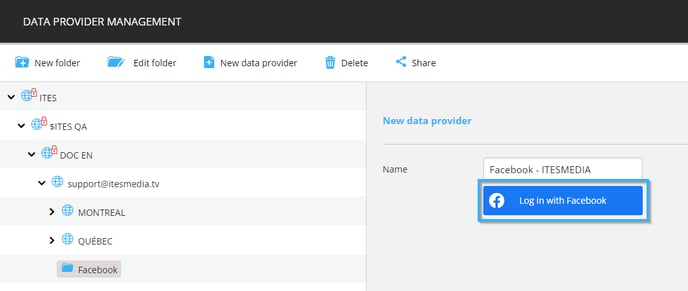
In the window that opens, log in to your Facebook account that is an administrator for the page you wish to broadcast.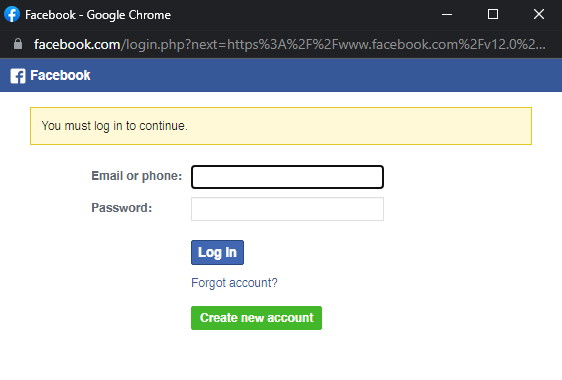
Once the Facebook account's information is displayed in both greyed out fields, click on the icon that represents a floppy disk.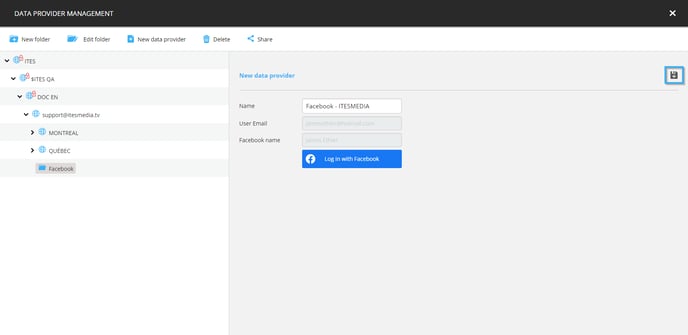
Once the data provider is visible in the folder, you can click on the icon that resembles the letter x.
How to create a Facebook clip
To create a Facebook in a display, navigate to the player in which you wish to create the clip.
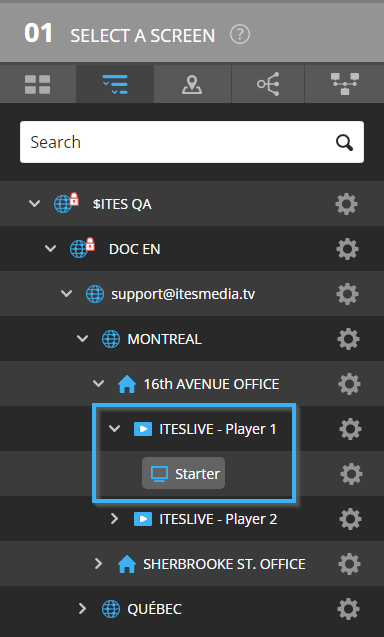
Once the player has been selected, select the zone in which you wish to create the clip.
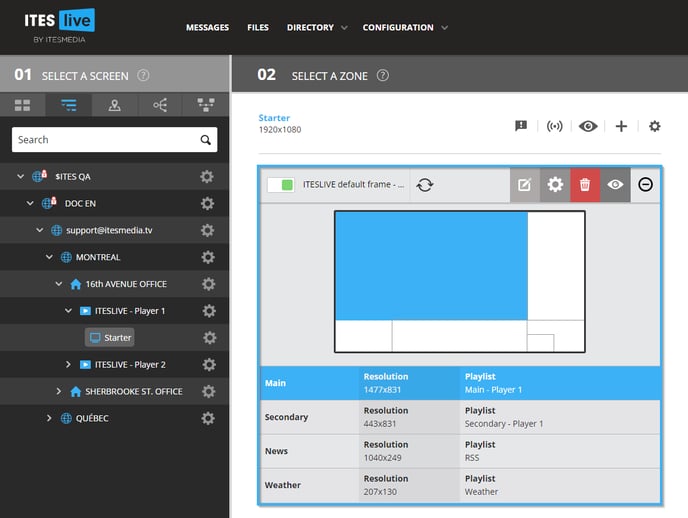
Click on the icon that resembles a "+" above the playlist.
Select the "Facebook" clip type and click "Next".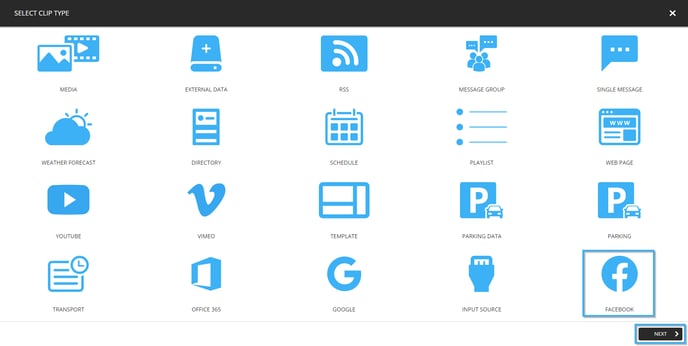
Select the desired data provider and click the "Next" button.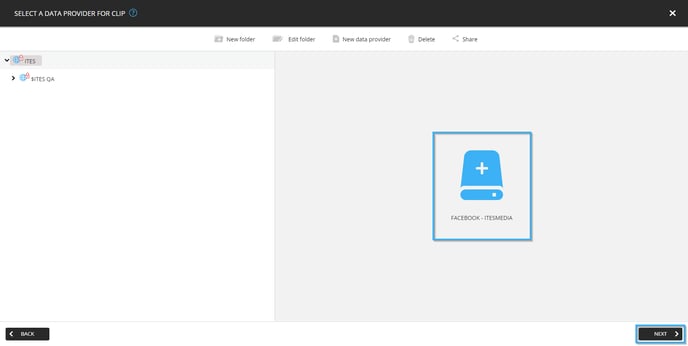
Select the template that you wish to use for the Facebook clip and click "Next".
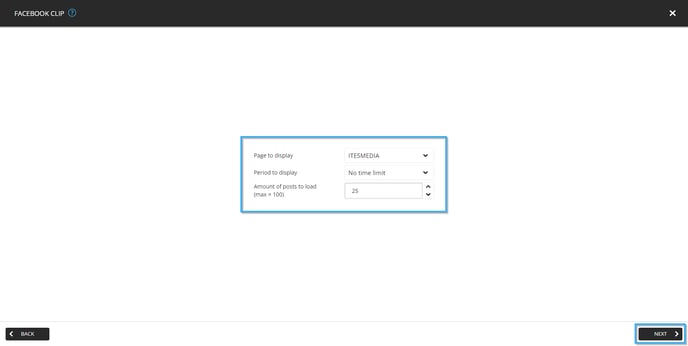
The following are the available configurations for the data from the Facebook page.
- Page to display: The list of Facebook pages associated to the account in the data provider. The data of the page selected here will be broadcast.
- Period to display: Determines the period in which the data will be taken.
- No time limit: There will not be a limit for the data based on its publication date, the clip will contain as much data as it can until the maximum number of posts is reached.
-
- Current day: The posts of the current day will be included exclusively in the data.
- Current month: The posts of the current month will be included exclusively in the data.
- Number of days: This numerical value represents the period in which the data will be included in the display. For instance, if you write "5" in this field, the posts for the last 5 days will be broadcast in the ITESLIVE display.
- Amount of posts to load (Max = 100): A numerical value that represents the maximum number of posts that will be included in the display's data. The maximum number of posts that can be loaded is 100.
When you have completed your configurations, click the next button and proceed with your clip settings.
How to delete a Facebook data provider
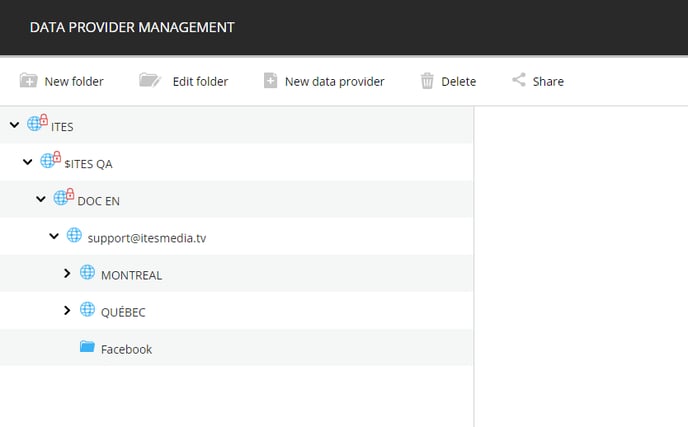
To remove the association between a Facebook page and your ITESLIVE account, click the "Configuration" tab.
Navigate to the folder that contains the data provider you wish to delete and click on the data provider. Once the data provider has been selected, click on the "Delete" button.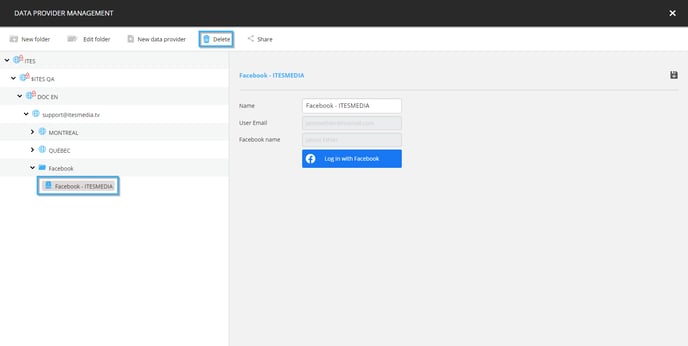
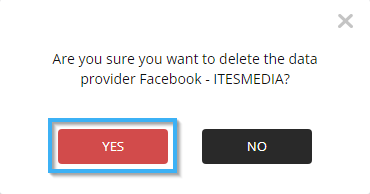
Confirm that you wish to delete the data provider by clicking "Yes".
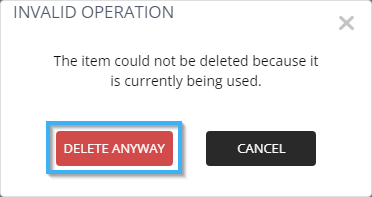
If the data provider is in use, in other words, if there are Facebook clips that are currently using the provider’s data. A message indicating that it cannot be deleted will be displayed, click on the "Delete anyway" button.
Important: Please note that in the event that Facebook clips are using the selected data provider, the clips will also be deleted if you proceed.
Once you have sent the confirmation, the data provider will be deleted, you can confirm that this has indeed been done by exploring the content of the folder in which the data provider was located. It will no longer be visible there.
How to delete a Facebook clip
Navigate to the player in which the clip is currently being broadcast.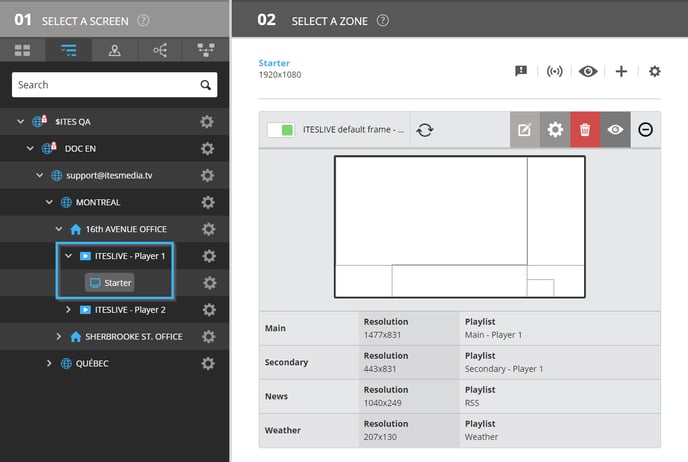
Select the zone in which the clip is located in the drawing that represents the screen frame.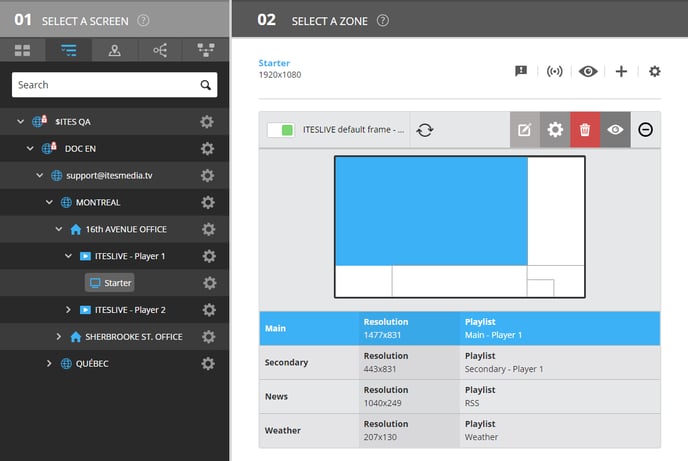
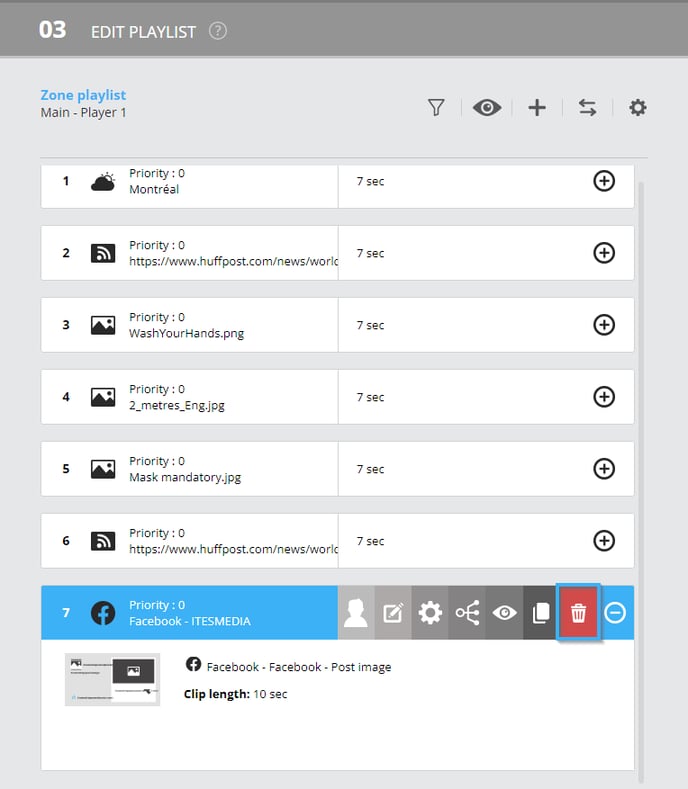
Click the "+" icon to the right of the Facebook clip in the playlist.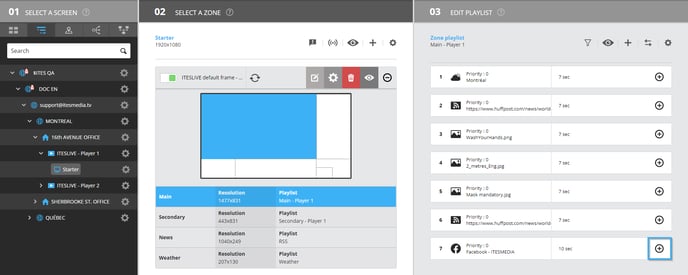
In the list of controls that is displayed, click on the waste basket icon to delete the clip.
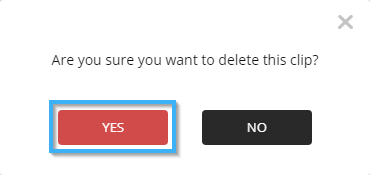
Confirm that you wish to delete the clip by clicking the "Yes" button.