| Available with: |
| Windows player: Pro, Premium Web player: Pro, Premium LG webOS Signage Player: Pro, Premium Samsung SMART Signage Platform (SSSP / Tizen) Player: Pro, Premium Brightsign Player: Pro, Premium Android Player: Pro, Premium Linux Player: Pro, Premium macOS Player: Pro, Premium |
Note: The « Broadcasting timeline » is a feature available on the ITESLIVE Studio that allows you to view all of the content for a « player », a « site » or an « account group » in a calendar.
How to access the « Broadcasting timeline »
There are two different ways you can access the « Broadcasting timeline », the first method allows you to view all of the content for each playlist in a player individually in a calendar. The second method allows you to view all of the content for a « player », a « site » or an « account group » in a calendar.
The « Broadcasting timeline » view
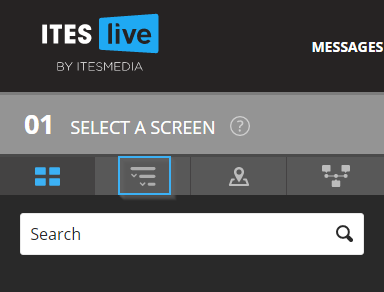
Once you are logged in to the ITESLIVE Studio, click the « Broadcasting timeline » under the « 01 Select a screen » header.
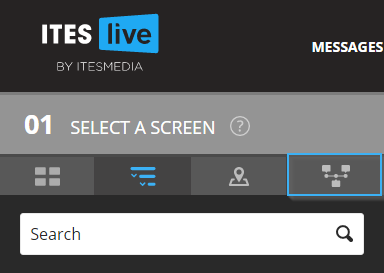
The menu under the « 01 Select a screen » header will be similar to that of the « tree view ». Here you must navigate the « tree view » to select the player whose « Broadcasting timeline » you wish to see.
Note: The biggest visual difference in the Studio for this view is found in the « 02 Select a zone » and « 03 Edit playlist » sections that are now divided horizontally rather than being divided vertically.
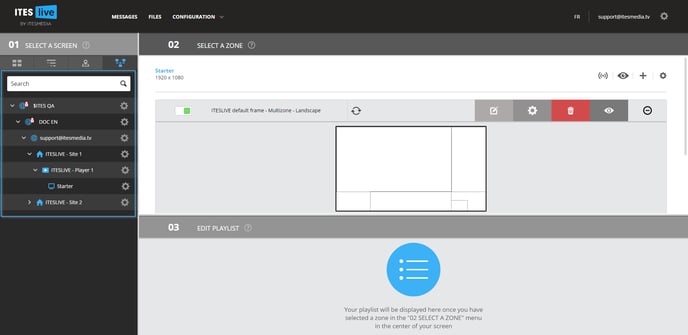
Once you have selected a player, select the zone that contains the playlist that you would like to see under the « 02 Select a zone » header. Once you have selected a playlist, it will appear in the « Broadcasting timeline » under the « 03 Edit playlist » header.

Once the « Broadcasting timeline » is displayed, you can select three different visuals for its content.
- Timeline - Month
- Timeline - Week
- Timeline - Day
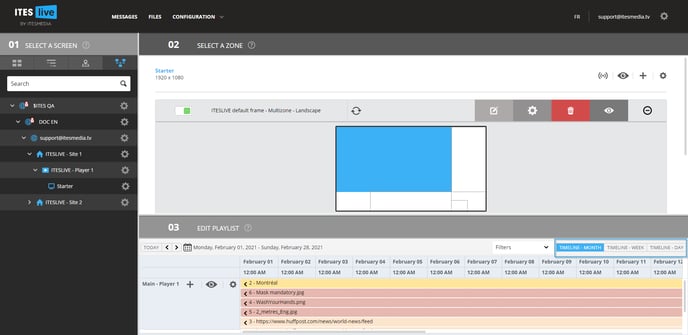
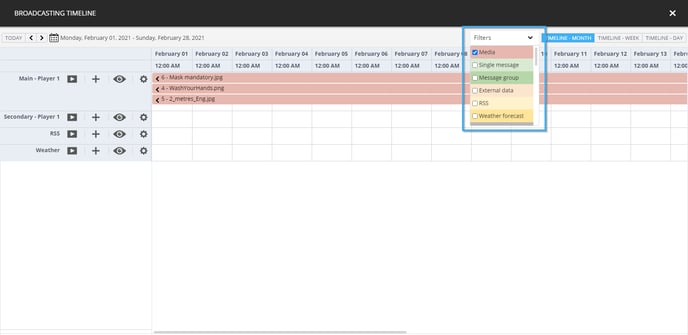
You can also filter the entries in the « Broadcasting timeline » by clip type using the « Filters » drop-down list.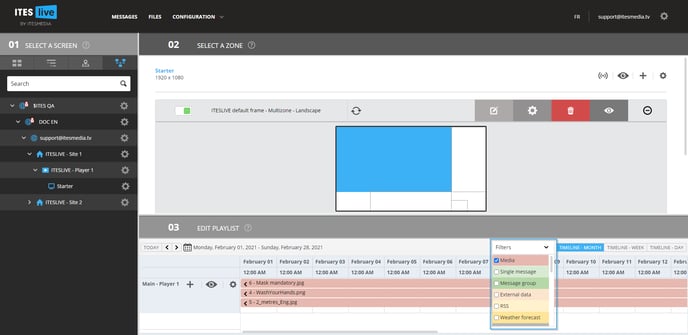
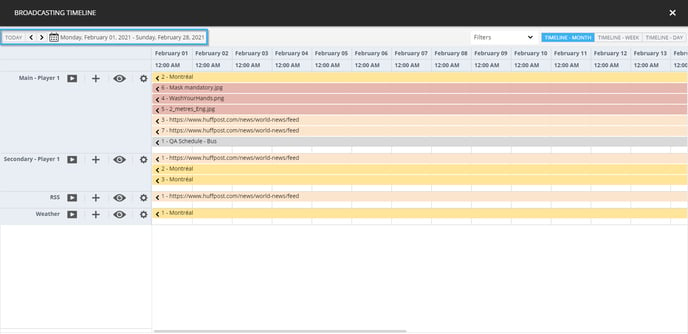
No matter the type of timeline you wish to use (month, week, day), you can change the period displayed in the timeline by using the arrows to the right of the icon that represents a calendar.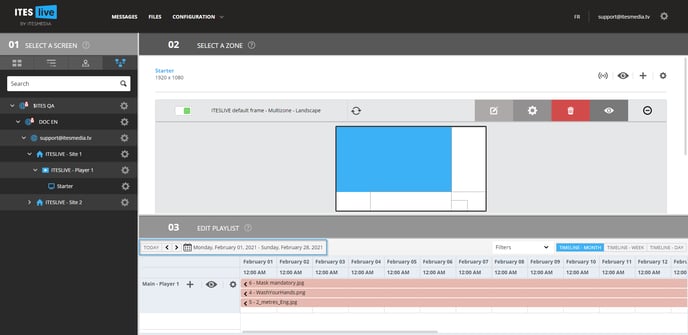
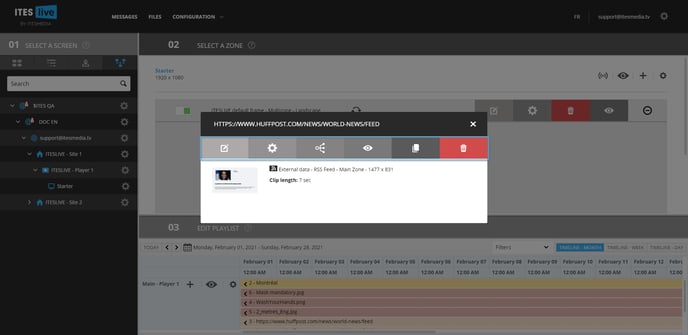
Should you wish to view a specific clip's configurations, you can access the configurations for each clip in the « Broadcasting timeline » by double clicking on it.
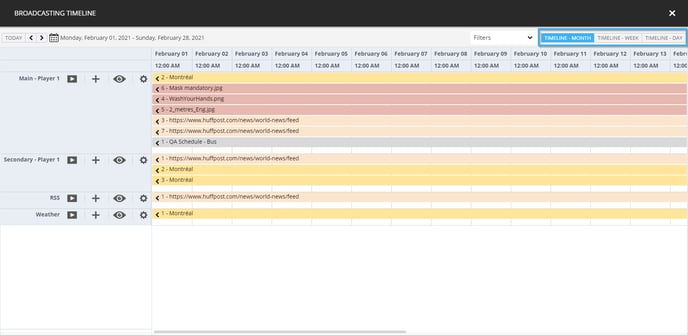
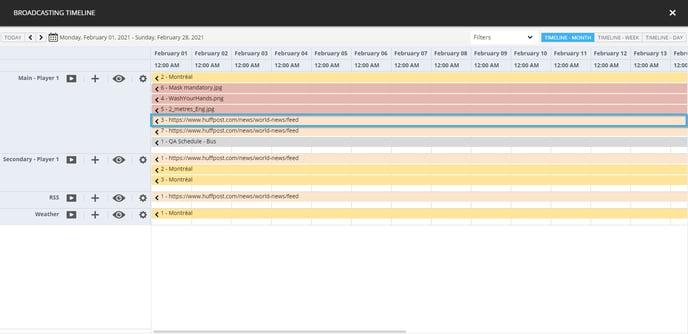
Note: Each clip in a playlist is represented by a coloured line in the calendar. You can see the clip's name and its position in the playlist to help identify it, once you have identified your clip, double click the line that represents the clip.

The menu that appears contains the clip's configurations. Select the information you wish to see by clicking the icon that represents it, you can also preview the clip's content or distribute the clip. The following is the complete list of actions that can be taken for each clip.
- View or edit the clip's content
- View the clip settings
- Distribute the clip
- View the clip's preview
- Copy the clip
- Delete the clip
Note: The menu in the following image appears as the result of double clicking on a clip in the calendar as specified in the previous step.
The « Broadcasting timeline » also allows you to take playlist exclusive actions. Every playlist presented in the « Broadcasting timeline » is segmented in the list of broadcast content, you can see the playlist name as well as the playlist controls on the right-hand side of the « 03 Edit playlist » section of the Studio.
Important: In this example, we opened the « Broadcasting timeline » for one playlist; thus, there is only one playlist displayed in the calendar.
You can take the following actions for every playlist displayed in the calendar.
- Add a clip
- View the playlist preview (preview for all clips in the selected playlist)
- View the playlist's settings
Finally, if you wish to have more space to view any of the Studio's three sections, you can resize them by sliding the lines separating each section.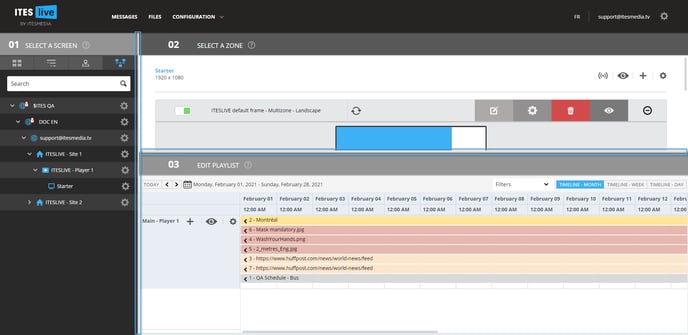
The « Broadcasting timeline » button in the « Tree view »
Once you are logged in to the ITESLIVE Studio, click the « Tree view » under the « 01 Select a screen » header.
In the « Tree view », there are three locations from which you can open the « Broadcasting timeline ». To view the information that will be broadcast for all the players in an account group, you can click the gear to the right of the account group and select the « Broadcasting timeline ».
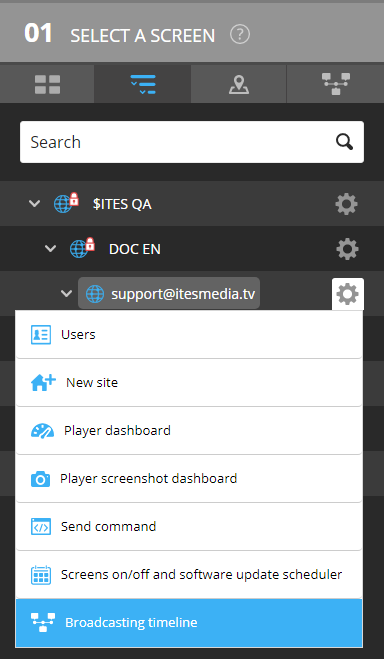
To view the information that will be broadcast for all the players in a site, you can click the gear to the right of the site and select the « Broadcasting timeline ».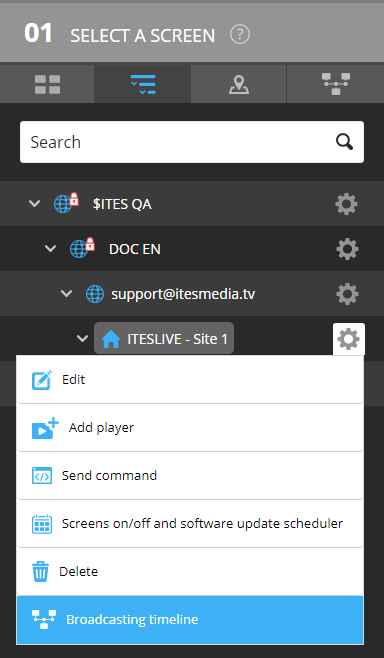
To view the information that will be broadcast for all the playlists in a specific player, you can click the gear to the right of the player and select the « Broadcasting timeline ».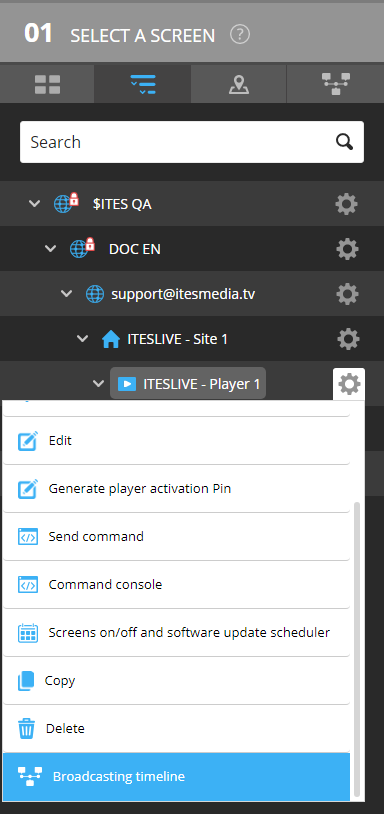
Note: In the following images, we will be using the « Broadcasting timeline » to view the playlists in a player.
Rather than being displayed as a section of the Studio, opening the « Broadcasting timeline » with the button in the « Tree view » will open the calendar in its own window.
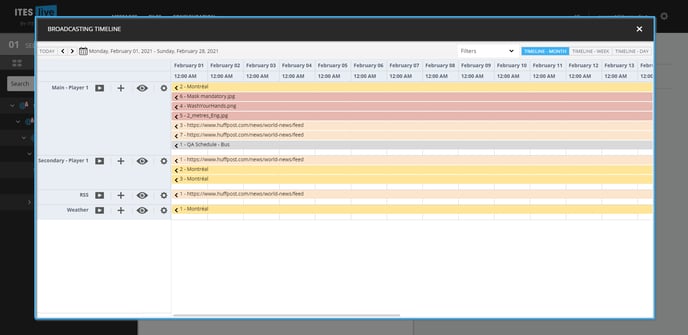
Once the « Broadcasting timeline » is displayed, you can select three different visuals for its content.
- Timeline - Month
- Timeline - Week
- Timeline - Day
You can also filter the entries in the « Broadcasting timeline » by clip type using the « Filters » drop-down list.
No matter the type of timeline you wish to use (month, week, day), you can change the period displayed in the timeline by using the arrows to the right of the icon that represents a calendar.
Should you wish to view a specific clip's configurations, you can access the configurations for each clip in the « Broadcasting timeline » by double clicking on it.
Note: Each clip in a playlist is represented by a coloured line in the calendar. You can see the clip's name and its position in the playlist to help identify it, once you have identified your clip, double click the line that represents the clip.
The menu that appears contains the clip's configurations. Select the information you wish to see by clicking the icon that represents it, you can also preview the clip's content or distribute the clip. The following is the complete list of actions that can be taken for each clip.
- View or edit the clip's content
- View the clip settings
- Distribute the clip
- View the clip's preview
- Copy the clip
- Delete the clip
Note: The menu in the following image appears as the result of double clicking on a clip in the calendar as specified in the previous step.

The « Broadcasting timeline » also allows you to take playlist exclusive actions. Every playlist presented in the « Broadcasting timeline » is segmented in the list of broadcast content, you can see the playlist name as well as the playlist controls on the right-hand side of the « 03 Edit playlist » section of the Studio.
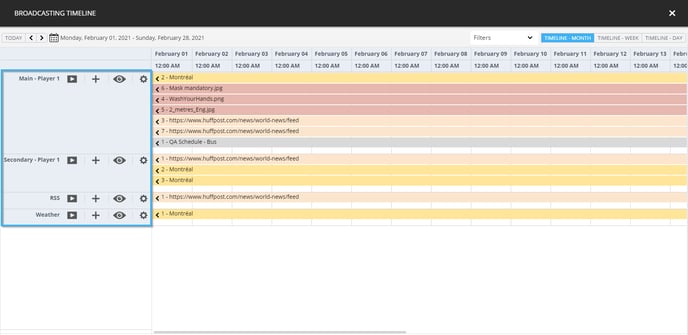
You can take the following actions for every playlist displayed in the calendar.
- Add a clip
- View the playlist preview (preview for all clips in the selected playlist)
- View the playlist's settings