
Important: You must have a USB key with at least 4 Gb to follow these steps.
Step 1: Prepare the image for automatic installation
Download the following image on your computer.
https://files-ites-prod-pri-cac.itesmedia.tv/install/debian13-iteslive-8.11.1-build.15989-20261104-teleste-hybrid-selfinstall.img
Then download and install the following software, it will be used to prepare the USB key you will use to installation ITESlive on the device.
https://etcher.balena.io/
Once "balenaEtcher" is installed, start the softwareand select "Flash from file".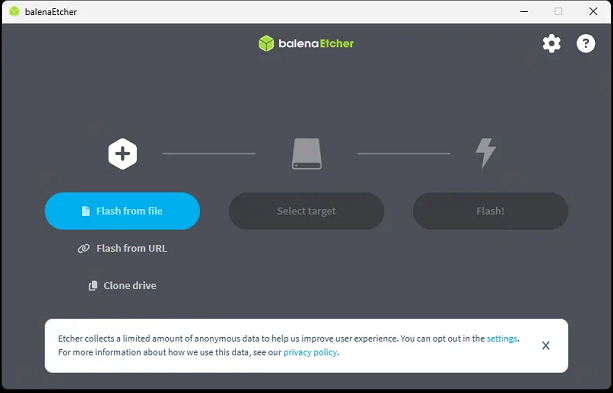
Select the ITESlive image file you downloaded earlier..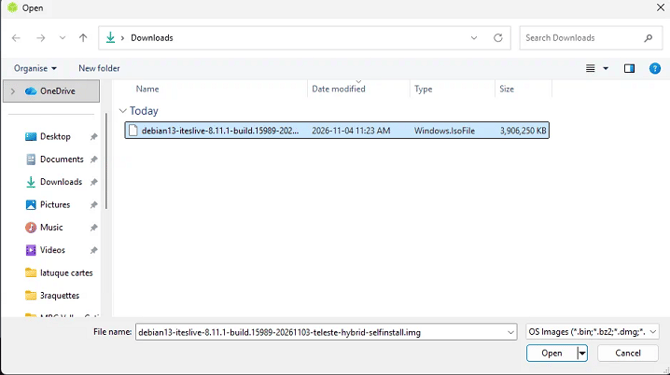
Click on "Select target"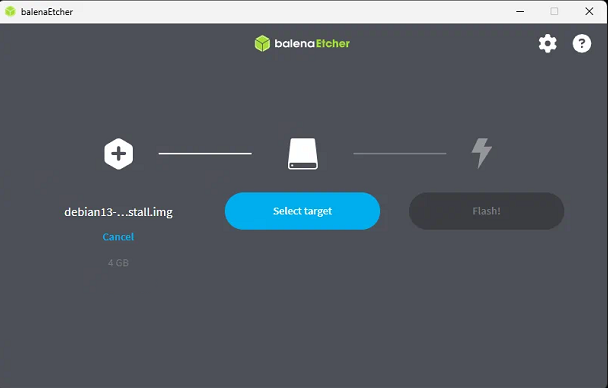
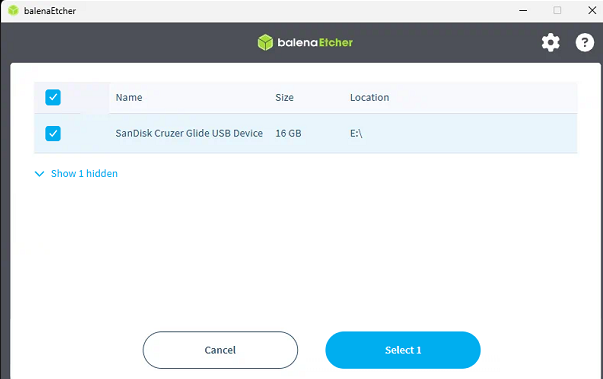
Select your USB key.
Important: The USB key must have at least 4Gb of space.
Finally click on the "Flash" button.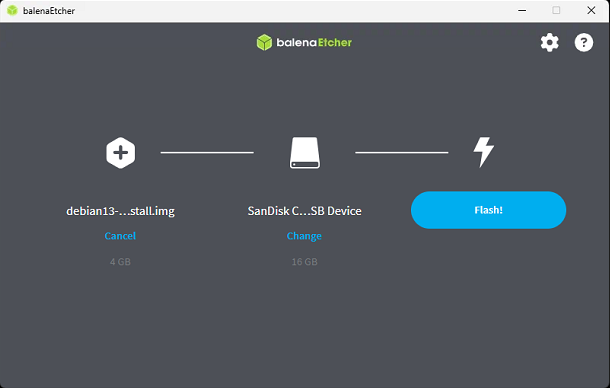
The USB key preparation will automatically begin and can take some time. There will be a message displayed to confirm once this process is completed.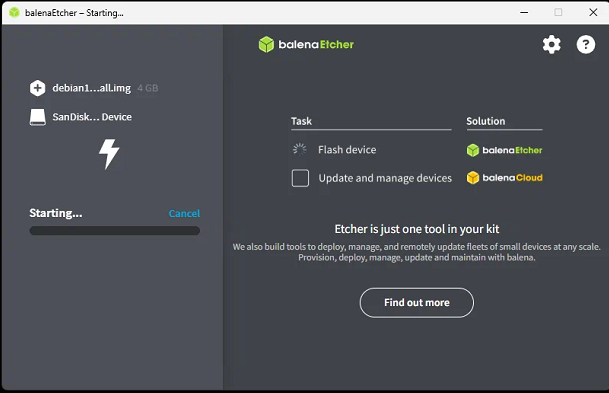
Step 2: Installing the image on the device
Deconnect the USB key from the device used to configure it and connect it to the Telest unit.
Important: On the devices tested by ITESMEDIA, the Teleste units were already configured to boot on the USB in the bios. If that is not the cas you will have to open the device's "boot menu" and tell it to boot on the USB key.
Once the Clonezilla system starts, select the first entry named "ITESlive self install". Press the "Enter" key on your keyboard to select it.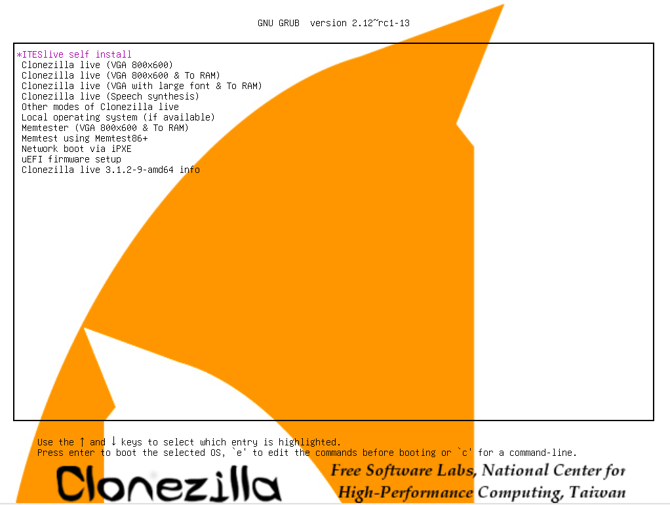
In the next step, you need to chose the correct partition to apply the image to. In the example below there is only one, but on the device there are 2. You have to ensure you select the partition that starts with SDA and has 16Gb of hard disk space.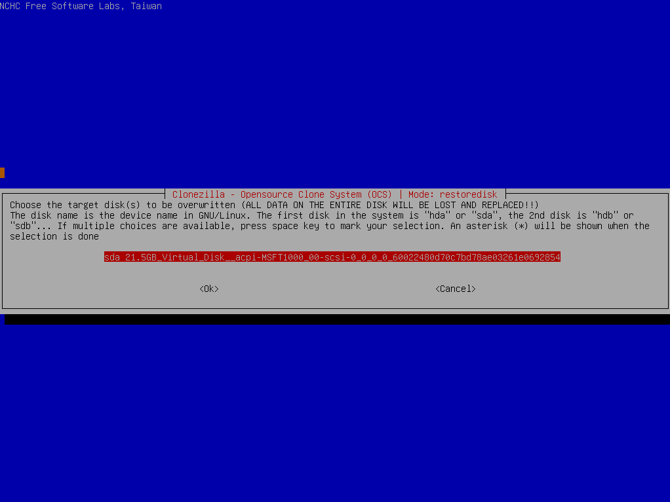
An image validation process will automatically start and there is no required action during this step.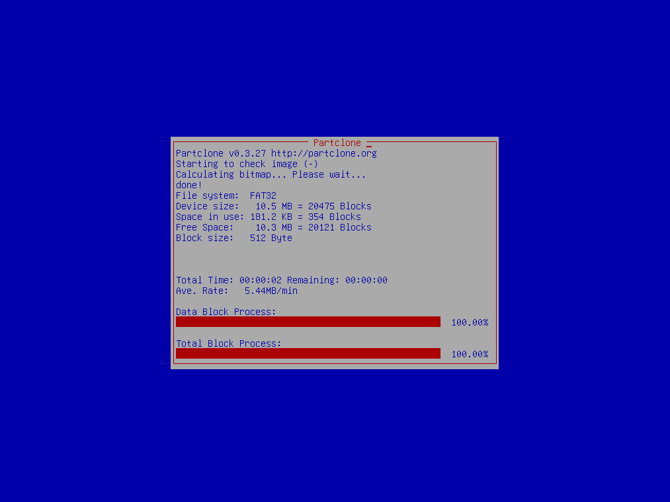
In the terminal that follows, the information will eventually stop scrolling and you will be asked to press "Enter" to continue. You may see errors in the terminal before that point, this is normal part of the process. Simply press "Enter" to continue when asked.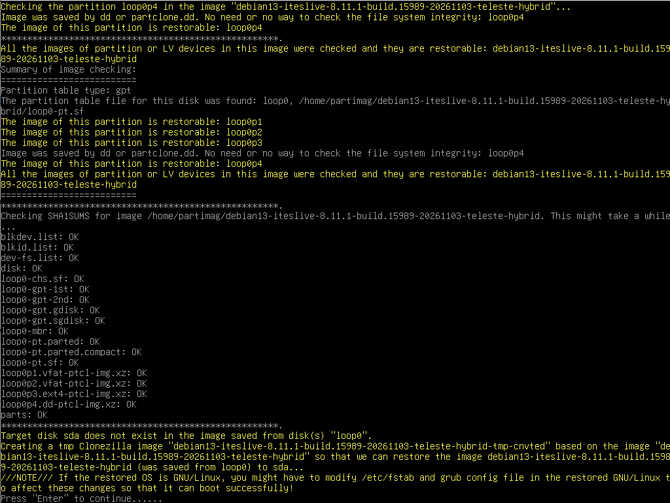
A little bit after that, the terminal will ask you to confirm that you wish to continue. Press the "Y" key followed by the "Enter" key on your keyboard.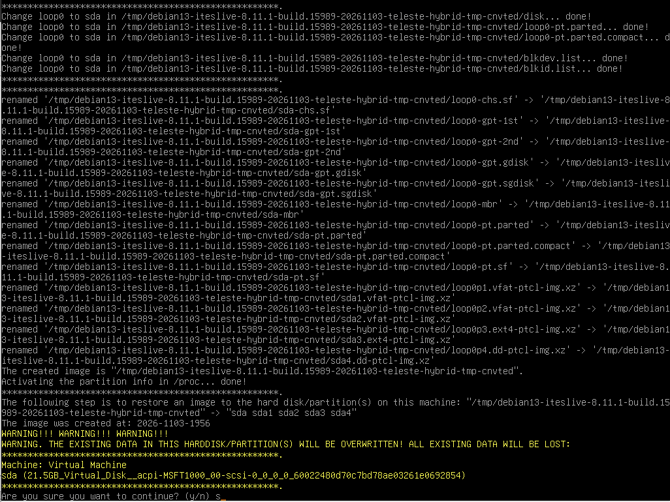
The terminal will then immediately ask you to confirm a second time that you wish to continue. Press "Y" and then "Enter" on your keyboard again to continue.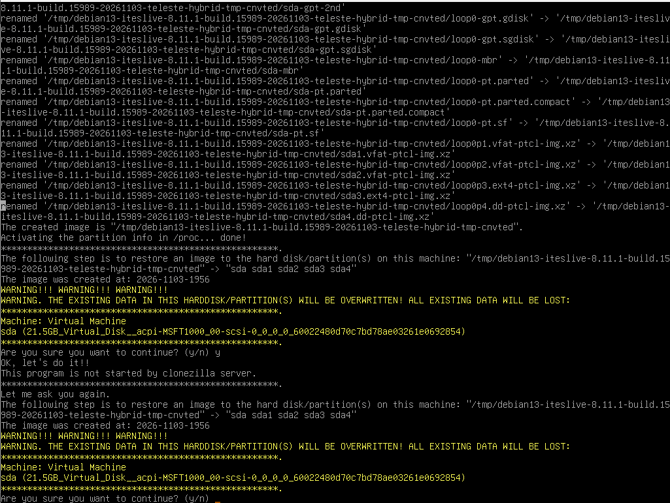
The image installation will automatically begin and there are no required actions during this step.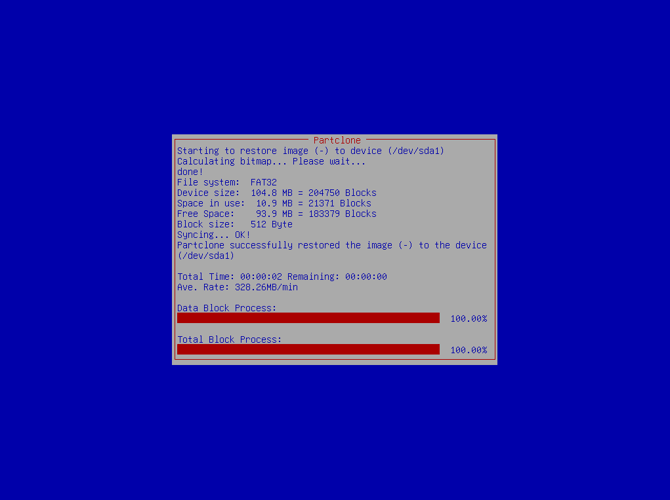
Once the image is installed, you will be asked to chose between 3 options. Select "Power Off". Once the device is powered off, remove the USB key and power it back on. 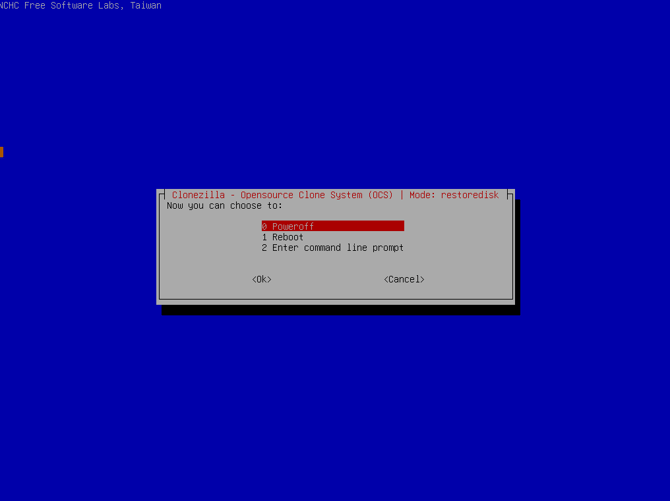
Note: The device should automatically boot the system with the ITESlive software preinstalled. You should normally see a terminal temporarilly then have the PIN windows come up.
If you need to adjust audio settings, you can press the "WIndows" and "A" keys on your keyboard to access the audio settings.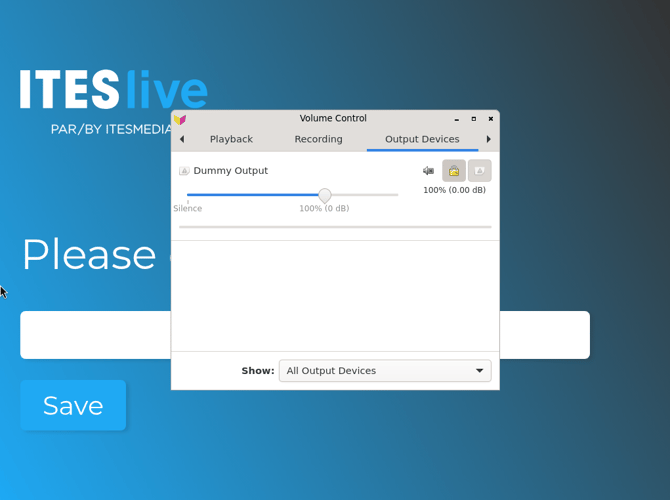
If you need to configure network settings, you can press on the "Windows" and "N" keys on your keyboard to access the network settings. 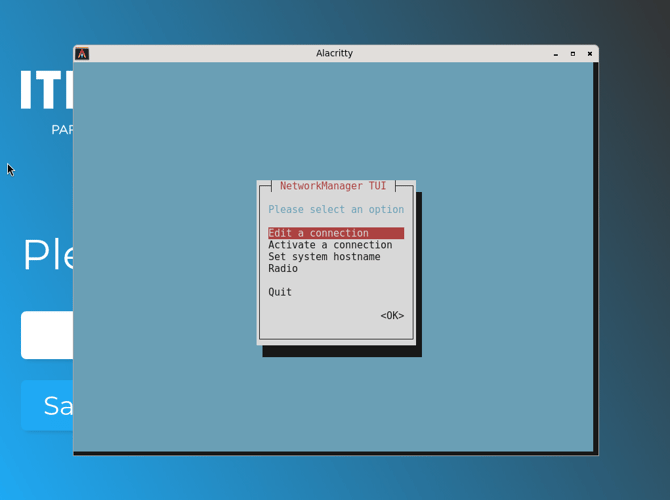
To apply the image mirroring on both screens, press on the "Windows" and "D" keys on your keyboard and ensure that the "Mirror" layout is selected.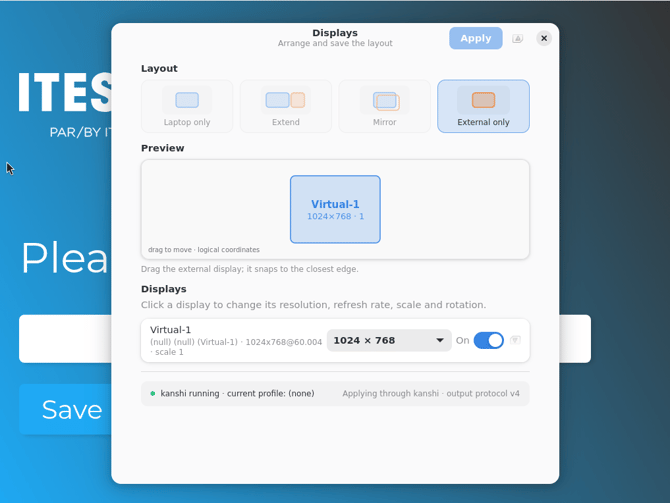
Note: Once you have completed adjusting settings, you can simply exit the different settings windows be pressing the "Esc" key on your keyboard.
Finally, once you've closed the settings windows (if applicable). you will find youself on the PIN window.
Please see the following article for the PIN generation instructions: Generating a PIN