| available with: |
| Windows Player: Starter, Pro, Premium |
❗VERY IMPORTANT❗: You must complete the ITESlive software installation on the device that will be used to broadcast the display. Do not complete the ITESlive software installation on your personal computer.
Important:
Operating system compatibility
As it is no longer possible to install the latest version of the .NET Framework on Windows 2015 LTSB, this version of the operating system is no longer supported by ITESlive. Below are the minimum required and recommended versions for Microsoft systems with long-term support.
Display resolution recommendation
We generally recommend avoiding a 4K configuration unless the device is equipped with sufficient performance capabilities, including a powerful graphics card capable of handling this resolution smoothly. In most cases, a Full HD resolution (1920×1080) is more appropriate, as it helps maintain stable and optimal display performance.
Note: Improper installation due to not following the described procedure may cause security vulnerabilities.
1. Configure the display orientation and resolution
Make sure to configure the screen orientation before proceeding. If the display needs to be in portrait mode, this is the stage where the setting should be applied.
From the computer menu, go to Settings > System > Display, then select the desired orientation from the drop-down menu next to orientation and select de right resolution

2. Download the ITESlive Installer
The first step is to download ITESlive on the computer that will be used to display the content.
Download ITESlive by clicking the following link:
https://iteslive.tv/iteslive.exe
3. Start the Installation and Choose Language
Once the installer is downloaded, launch it and select your preferred language for the installation.

Note: In the even that the player type displayed in the broadcasting window in the ITESlive Studio does not represent the type of device you wish to use for your display. It is possible to change this configuration in the ITESlive Studio.
How to install ITESlive
Once the installer has been downloaded, launch it and select the language you wish to use for the installation. 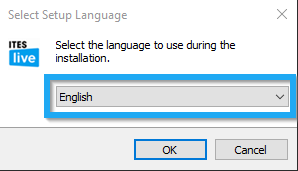
In the « Welcome to the installation » window, you can click on the « Cancel » if you do now wish to continue with the installation or click on the « Next » to continue.

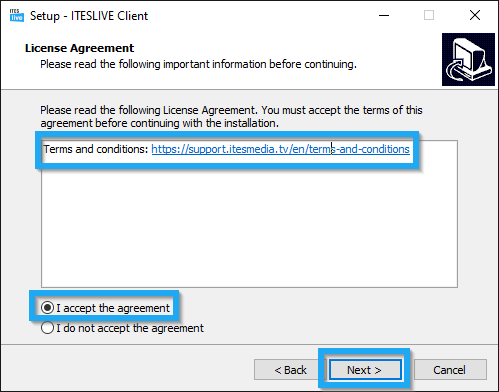
Before selecting the configurations that will be used to complete the installation of the ITESlive software, you must first accept the the license agreement. You can click directly on the URL in the installer to access this information.
Note: It is strongly recommended to read through the terms and conditions for the use of the ITESlive software before accepting them and proceeding with the installation.
Terms and conditions: https://support.itesmedia.tv/en/terms-and-conditions
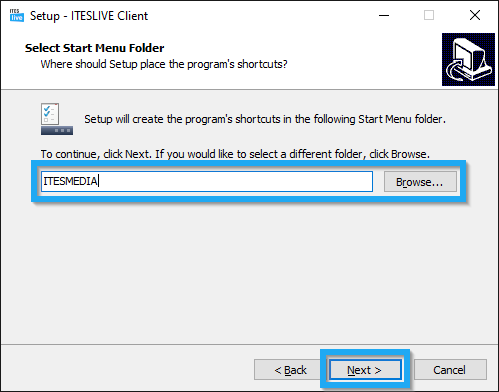
Note: A shortcut will also be included in the Windows startup folder.
Once the desired destination has been selected, click on the « Next » button.
Additional Tasks
The installer's additional tasks will add configurations that will made on the computer if they are activated. 
Configure NTPD
This section offers three possibilities, not to apply any NTP configurations, configure the Windows NTP or install the NTPD service.
Note: The NTP abbreviation refers to a time-server that allows the computer to ensure that its date and time are always accurate.
- No time configuration
The computer's NTP configuration will not be modified. - Configure Windows NTP (Network Time Protocol)
The installer will make it so that the Windows time service is activated and is used to synchronize the computer's date and time. - Install NTPD
NTPD is a free service named Network Time Protocol Daemon that will be installed and configured according to the computer's regional settings. The installer will deactivate the Windows time service and will ensure that the NTPD service will be used to syncrhonize the computer's date and time.
Note: It is possible to use the NTPD service even if you wish to use your own time server. Click here to see the require manipulations to edit the service's configurations.
Enable Microsoft Update
The "Enable Microsoft Update" option is enabled by default because it allows the update of Microsoft products (other than Windows) on the device. Thus, ensuring that .Net is up to date seeing that it is a prerequisite for the ITESlive software.
Disable screen saver
When this configuration is activated, the installer will remove the registry key that makes the Windows screen saver function. This ensures that the screen saver is not displayed over the content displayed by the ITESlive software.
Important: Disabling the screen saver this way will not modify the power options in Windows, it is strongly recommended to revise these configurations before starting your display.
Installation - ITESlive Client
This window summarize the configurations that have been selected in the previous steps, once you are ready to proceed, click on the « Install » button.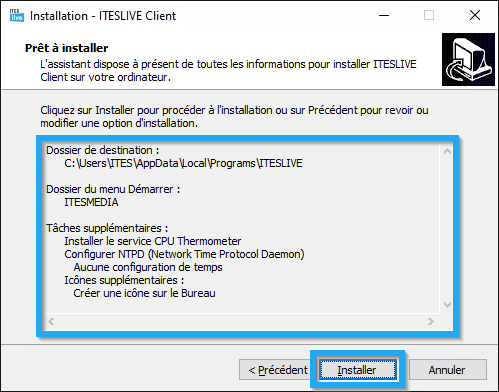
When the installation is launched, you will see a progression bar indicating the progression of the installation in progress.

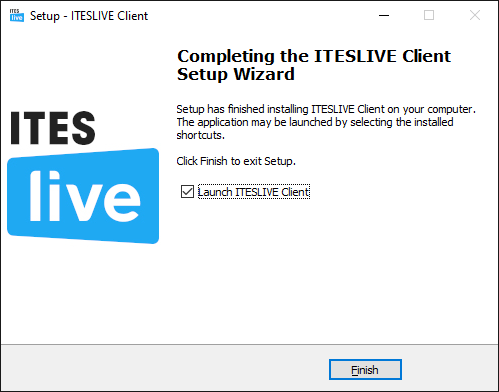
End of the installation - ITESlive Client
The last window of the ITESlive Client installation confirms that the installation has been successfully completed. In the event that you do not want to immediately launch the software, click the checkbox named « Launch ITESlive Client ».
Note: Please note that the ITESlive application will be launched the next time Windows restarts. It is also possible to start the software manually by using one of the shortcuts created during the installation.
If you have chosen to launch the ITESlive software, a window requesting a PIN will be displayed on the desktop. 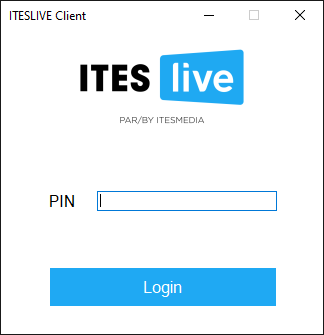
Important: If you enter the PIN and the display does not start, check that the domains and ports mentioned in the article below are allowed on your firewall.
Domains and ports to authorize in your firewall
Once the application appears in the list of startup applications, you can close the window. The next time the user logs into the device, the ITESlive display will launch. However, a PIN will be required to identify the ITESlive player that will be used for the display on this device. You can either launch the application manually to enter the PIN, or restart the device so the application runs at startup. In either case, a window prompting for a PIN will appear.
Enter the PIN you noted earlier in the text field and click on the "Save" button to start the display.
See the article for generating a PIN for this step: Generating a PIN
