| AVAILABLE WITH |
| Samsung SMART Signage Platform (SSSP / Tizen) Player : Starter, Pro, Premium |
Important: If the following steps do not correspond with the menus you are seeing on your monitor, try following the steps described in the following article instead.
How to install ITESlive on Tizen 7
Important: It is crucial that you inform yourself in regard to the version of the Samsung SMART Signage Platform (SSSP) system included with your monitor. The ITESlive software supports the Samsung SMART Signage Platform (SSSP) versions 6.X and above.
Note: If you do not have the monitor's remote, you can still follow this procedure by connecting a USB keyboard to the monitor.
1. Factory reset
Important: If you are using a Samsung SMART Signage Platform (SSSP / Tizen) monitor that has never been used you can skip this step. Please note that this step is mandatory if your device that was in use before the installation of the ITESlive application for Samsung SMART Signage Platform (SSSP).
Press the « Menu » button on your remote control and navigate to the entry named «System», in the «System» menu select the entry named « General ».

In the « General » menu, select the entry named « Empty Storage ». 
When the monitor requests a confirmation select « Yes ».

Once the window named « Empty storage » is closed, press twice on the button that resembles an arrow facing to the left on your remote control in order to return to the main menu and select « Support ».

In the « Support » menu select the entry named « Reset All ».

When the monitor requests a confirmation select « Yes ».

The factory reset will be complete once the window that states « Resetting all settings » is closed.

2. Initial monitor configurations
Press the « Menu » button on your remote control and navigate to the « System » menu, select the entry named « Start Setup ».

The monitor will then ask for a pin, The default pin is the following ;
0000

When the setup begins, you will be able to select the language of the monitor's menus, in this case we will select English.

Once you have selected your language, the first step in the setup is to select your display orientation. This selection must be made based on the orientation of your monitor in your on site installation.
Note: Please make sure to select the correct display mode:
Portrait or Landscape

The next step will be to configure the network connection. If you are using a wired network, connect the Ethernet cable to your device. If you are using a wireless connection, select your network in the list of available networks.

Enter your network's password using the virtual keyboard, if you need to see the characters of the password you are entering you can activate the « Show Password » checkbox.

After the wireless network connection is complete, you will notice that the process skips directly to step 4 as displayed at the top of the monitor and this is normal. The next step in the setup is to specify if the monitor is to use « MagicInfo » or the « URL Launcher »for the display. You must select the « URL Launcher » to install the ITESlive application.

After selecting the « URL Launcher », the monitor will ask you to enter a URL for the application. Enter the following URL and confirm with the « Done » on the virtual keyboard ;
https://iteslive.tv/

After confirming the URL the monitor will ask if you wish to connect to RM Server, you can skip this configuration.

3. Time configuration
Ensure that the date and time configurations are entered correctly. Once that is the case, press the button on your remote control that resembles an arrow facing to the right.

(Conditional depending on the region) Configure Daylight Saving Time (DST)
Important: Although it is possible to enable automatic daylight-saving time changes, this step is conditional and should only be performed if you are installing a display reader in a region that observes daylight saving time.
The values used in the following steps correspond to the Quebec region and are provided as examples only. These values vary depending on location and time zone. For more information, visit https://www.timeanddate.com/time/dst/.
Once in the "Time" menu, select the "Daylight Saving Time" entry.

Enable daylight saving time and select "Start Date."

Select "Month" and choose the month when the time change occurs. Then select the day and choose the day on which the time change takes place.
 Return to the previous screen and select "End Date." Select "Month" and choose the month when the time change ends. Then select the day and choose the day on which the time change ends.

Return to the previous menu and ensure that the time zone correctly reflects the desired daylight saving time change.

NTP server configurations
Important: Although the basic date and time configurations will work correctly, it is possible for the time to become inaccurate if the monitor is not connected to a time server (NTP). The following steps help ensure that the monitor is always using the correct date and time, this is important because any inaccuracy in this information can cause challenges in your display (IE. content using start and end dates).
Press the « Menu » button on your remote control, navigate to the « Système » menu and select the entry named « Time ».
In the « Time » menu select the entry named « NTP Settings ».
In the « NTP Settings » menu select the entry named « Network Time Protocol » and change the value to « Use ».

Enter the following URL: time.cloudflare.com

Select the entry named « Time Zone » and select your time zone in the drop-down list.
Select the « Save » button.

4. Configure the auto source switching
Press the « menu » button on your remote and select the « System » entry.
Select the « Auto Source Switching » entry in the list and press the « Ok » button on your remote.
Select the « Auto source Switching » entry in the list and press the « Ok » button on your remote, then select the « New Input » entry and press the « Ok » button on your remote once more.
Now select the « Default Input » entry and press the « Ok » button on your remote, then select the « URL launcher » entry and press the « Ok » button on your remote once more.
5. Launch the ITESlive application
To launch the ITESlive application, you will need to change the monitor's « Source » by making it so that the active « Source » is the « URL Launcher ». Press on the source button and use the buttons that represent arrows on your remote control to select the « URL Launcher ».

The monitor will take a few moments to install the ITESlive application, once this has been completed you will see the ITESLIVE software starting up.

Once the software has started, you will see an ITESlive windows that is asking for an ITESlive ID. You must enter the ID for your display and the software will begin downloading your content afterwards.
Note: The next step contains a walk through of the procedure required to obtain your display's ITESlive ID.

6. ITESlive ID
The ITESlive ID can be found on the ITESlive Studio, the following are the steps required to access this information.
Select the screen with the content you wish to display
At step “01 Select a Screen,” choose the display with the content you wish to show on screen.

Open the broadcasting window
At “02 Select a Zone,” click the broadcasting icon.

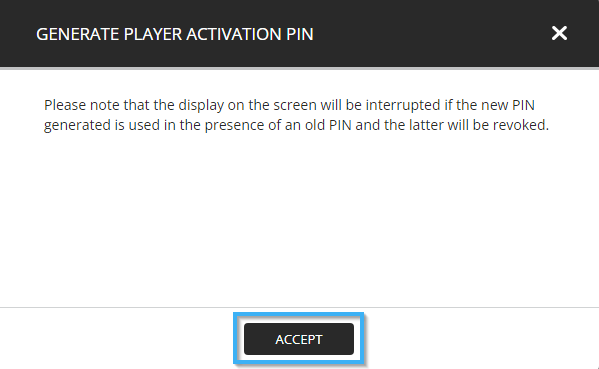
Click the "Generate player activation Pin" button.

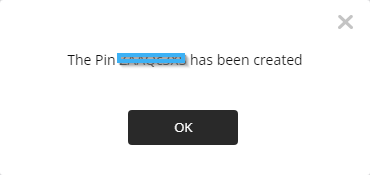
Click the "Accept" button to generate a PIN.
Important: Please note that the display on the screen will be interrupted if the new PIN generated is used in the presence of an old PIN and the latter will be revoked.
Take note of your ITESLIVE ID
Note: In the even that the player type displayed in the broadcasting window in the ITESLIVE Studio does not represent the type of device you wish to use for your display. It is possible to change this configuration in the ITESLVIE Studio.