| Available with: |
| Windows player: Starter, Pro, Premium |
| Web player: Starter, Pro, Premium LG webOS Signage : Starter, Pro, Premium Samsung SMART Signage Platform (SSSP / Tizen) player: Starter, Pro, Premium Brightsign Player: Starter, Pro, Premium Android Player: Starter, Pro, Premium Linux Player: Starter, Pro, Premium macOS Player: Starter, Pro, Premium |
1. Go to the screen on/off and software update scheduler
- On the left, under “01 Select a Screen,” select the player you wish to program to turn on and off at given times.
-
Click the gear icon on the right.
- Click “Screen on/off and software update scheduler.”
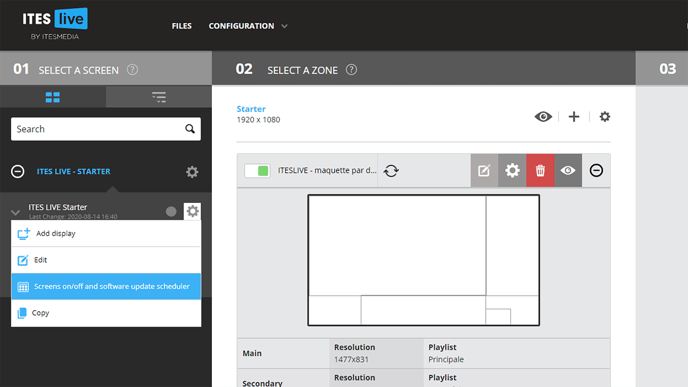
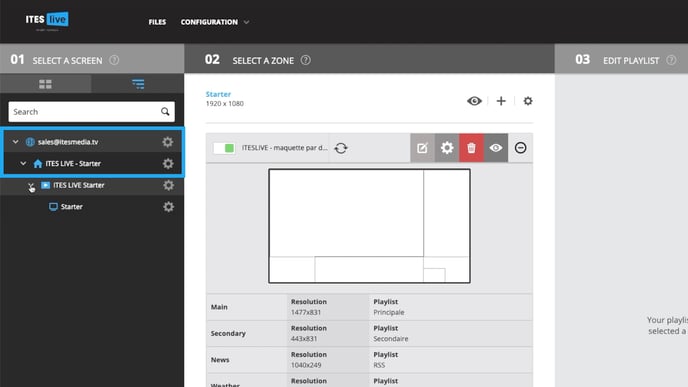
You can also manage all the screens in a given site or group. Simply click the house icon (site) or the globe icon (group).
2. Adjust the on/off settings
To set the opening and closing hours (represented respectively by the top and bottom of the blue column), you have two options:
-
Double-click on the blue column to directly edit the schedule.
-
Click and hold the three small white dots located at the top and/or bottom of the column, then drag to the desired time.
Note: The default setting is 24/7.
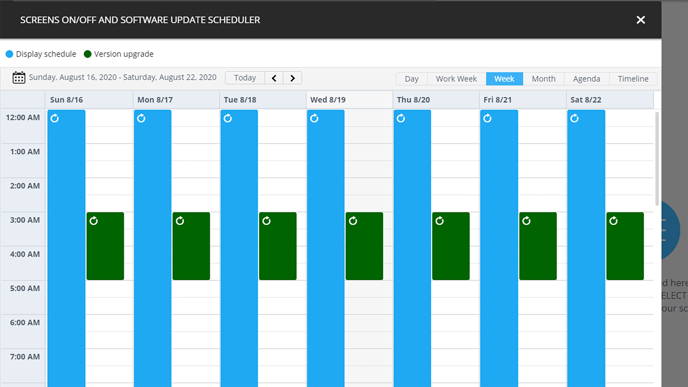
Note: The green lines represent the software update schedule for your screen, here is an article that explains how to configure the software update schedule.
When you double-click on the blue time slot to access the settings for editing the current event or the entire series,
you will be presented with two options:
- Edit Current Occurrence
- Edit the Series
Clicking the "Edit the Series" button will apply the changes to the selected day and to all following days of the same type. For example, if you set an opening hour for Friday, May 1st, that setting will be applied to all subsequent Fridays.

Edit current occurrence

Title
Text field to name the event. This title will appear in the planning interface.
Start and End
Start date and time, and end date and time of the event.
All day
Checkbox: When this option is enabled, the event is scheduled for the entire day without specifying a precise time.
Description (optinal)
Free text field to add notes or details about the event.
Type
Keep the default option “Display Scheduling”
Edit the series

Repeat
Defines how often the event repeats:
Never, Daily, Weekly, Monthly, or Yearly.
Repeat every
Specifies the repeat interval.
Example: 1 week = every week, 2 weeks = every two weeks.
Repeat on
Select the specific days of the week the event will occur.
Example: Sun and Wed = the event will occur every Sunday and Wednesday.
End
Defines when the series ends:
Never, After X occurrences, or On a specific date.
Other fields
The fields Title, Start, End, Description and Type function the same as for a single event.