| AVAILABLE With: |
| Windows player: Starter, Pro, Premium |
| Web player: Starter, Pro, Premium LG webOS Signage Player: Starter, Pro, Premium Samsung SMART Signage Platform (SSSP / Tizen) Player: Starter, Pro, Premium Brightsign Player: Starter, Pro, Premium Android Player: Starter, Pro, Premium Linux Player: Starter, Pro, Premium macOS Player: Starter, Pro, Premium |
To replace a screen frame, start by adding a new template. To proceed, you can:
- Select one of your screen frames that matches the new resolution
- Select one of the default screen frames
- Create a new screen frame
In this article, we will be selecting one of the default templates that come with the system.
Tip: Most users won’t need more than one screen frame. Alternating between different screen frames is not generally recommended. If you’re looking to display a full-screen version of a given clip, you should instead use the “Full Screen” option when adding the clip.
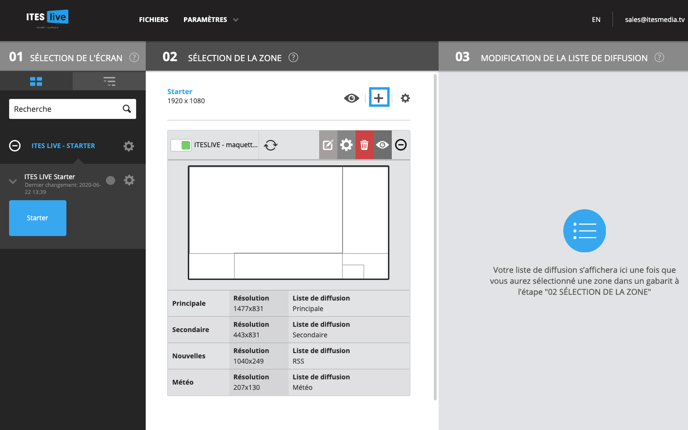
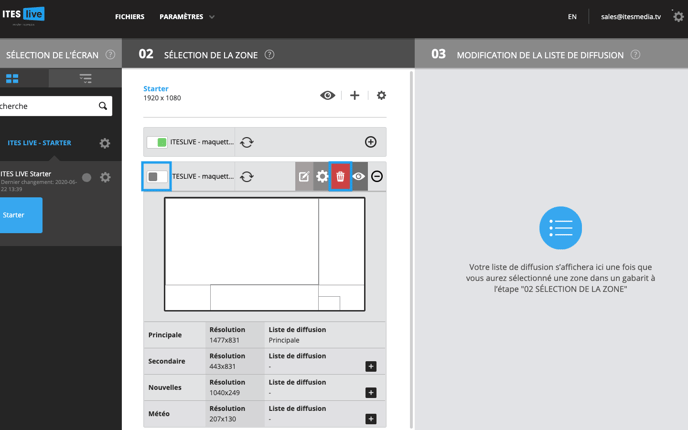
1. Click the "+" at the step " 02 Select a Zone"
2. Select the desired template
Browse through the directories on the left and select the desired template on the right. Then click “Accept.” Your screen frame has now been added.
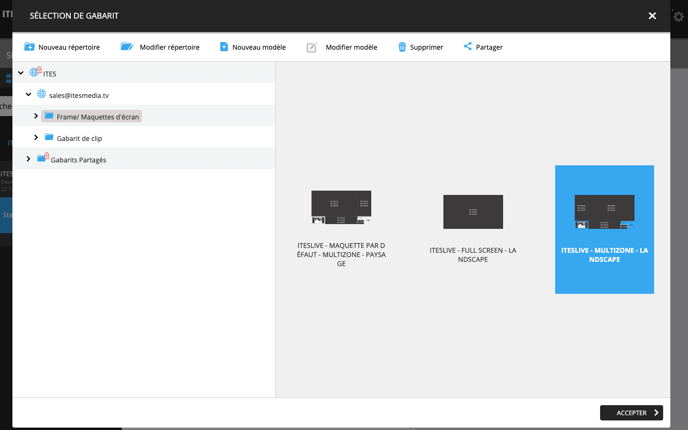
Caution: The only screen frame shown are the ones that match the resolutions in the screen settings. To find out how to change the resolution (orientation) of your screen, click here.
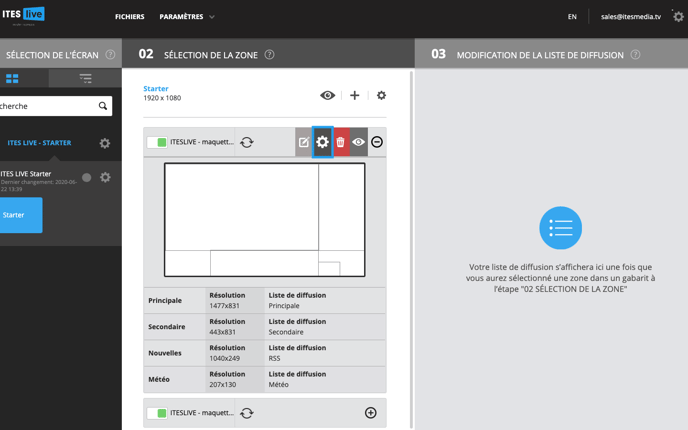
3. Define the template language
After adding the template, make sure to select the right language. Click the gear icon to access the template settings.
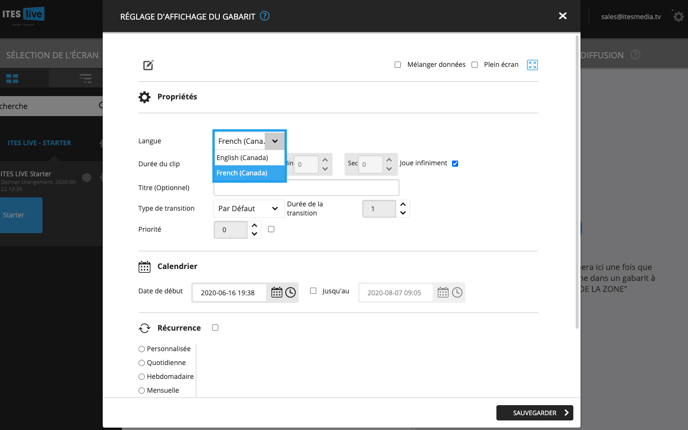
 Then pick the desired language.
Note: If this option isn’t available, it is because you did not configure the language setting when you created your screen frame. See this article to find out how to add a language to an existing template.
4. (Optional) Disable/delete the current template
If you wish to replace an existing template, you need to disable or delete the current selection. To disable a template, click the switch icon. To delete a template, select the trash can icon.
5. (Optional) Configure the other template settings
If you are using only one template, it is best to leave the default settings. To learn more about running different templates based on a programmed playlist or about any other template settings, click here.
6. Assign playlists to your zones
Once your new template has been added, you’ll need to assign playlists to each of your zones.