| Available With |
| Windows Player: Starter, Pro, Premium |
| Web Player: Starter, Pro, Premium LG webOS Signage Player: Starter, Pro, Premium Samsung SMART Signage Platform (SSSP / Tizen) Player: Starter, Pro, Premium Brightsign Player: Starter, Pro, Premium Android Player: Starter, Pro, Premium Linux Player: Starter, Pro, Premium macOS Player: Starter, Pro, Premium |
Note: The screen frame editor uses the same tools as the clip template editor (available with the Pro and Premium version). This article refers specifically to the features of the screen frame editor. If you need further training from one of our instructors, write to your representative or contact sales@itesmedia.tv.
Before starting to create a new screen frame, have a closer look at the available bank of templates, which come in a variety of landscape and portrait options.
Important: Make sure you create a screen frame that matches your screen’s resolution. This resolution has to be same in order for your screen frame to show on screen. To find out how to change the resolution and orientation of your screen, click here.
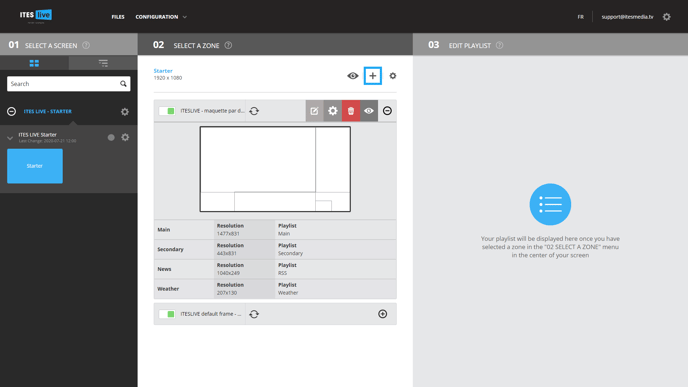
1. Click the “+” at the step “02 Select a Zone”
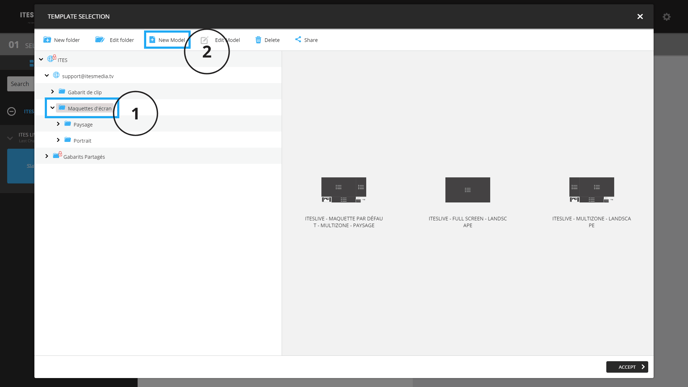
2. Select a folder and click “New template”
In the section on the left, select the folder where you wish to add to the new screen frame. Then click “New Template.”
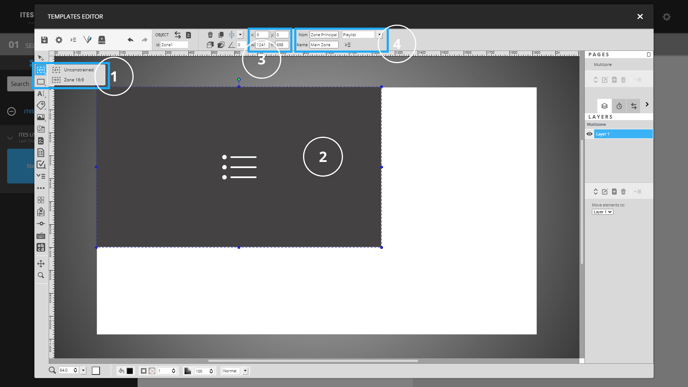
3. Configure the settings of the template.

Type: Make sure the template type is set to “Main Template.”
Dimensions: Make sure the dimensions match your screen resolution.
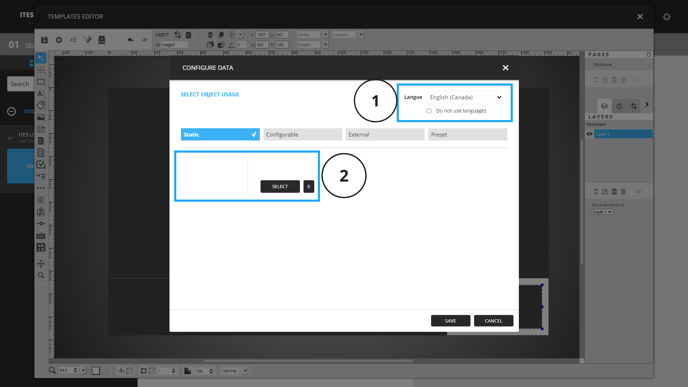
Language: Add the language the coded information (weather information, RSS feed, etc.) should appear in. If you leave this field empty, the default display language will be English.
4. Draw out your zones
To find out more about the zone tool, please refer to this article.
5. (Optional) Insert the date and/or time
To find out more about the date and time tool, please refer to this article.
%20Insert%20the%20date%20andor%20time.png?width=688&name=5.%20(Optional)%20Insert%20the%20date%20andor%20time.png)
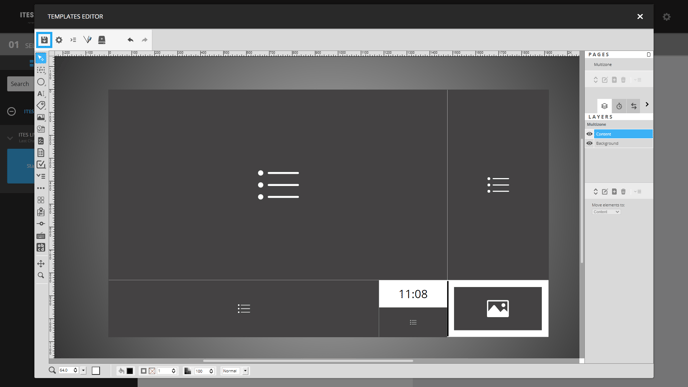
6. (Optional) Insert an image
To find out more about the image tool, please refer to this article.
%20Insert%20an%20image.png?width=688&name=6.%20(Optional)%20Insert%20an%20image.png)
Double-click the image to configure the content. If you have set up several languages for your screen frame, don’t forget to assign an image to each language.
7. (Optional) Insert shapes
Shapes can be used to create a separation between the zones. To learn more about shapes, please refer to this article.
%20Insert%20shapes.png?width=688&name=7.%20(Optional)%20Insert%20shapes.png)
8. Save
Click the diskette icon at the top left.
9. Add the screen frame to your screen
Once your screen frame has been created, you can add it to your screen. To find out how to add your screen frame to the screen, click here.
10. Assign playlists to your zones
Once your new screen frame has been added, you need to assign playlists to each of your zones.