Learn how to configure the WiFi of the kiosk and some tips to facilitate the handling of the software.
Welcome to your Quick Start Guide. The first part explains how to configure the WiFi of the screen and the second part gives some recommendations to facilitate the handling of the software.
1. Configure the WiFi of the kiosk
Before going to the ITESLIVE software platform, you must configure the screen's WiFi.
2. Configure your profile
In the software, the first step is to configure your preferences and change your password.
3. Select your screen frame
Option A: When you sign into your account for the first time, you will automatically have access to a multizone landscape template. We have also created playlists and assigned them to various zones on the screen. If you wish to keep these items, simply replace our logo with yours.
Option B: If the template provided does not suit your needs (for example if you prefer a full-screen display, you wish to use portrait mode, landscape mode or your screen is not standard resolution), you can:
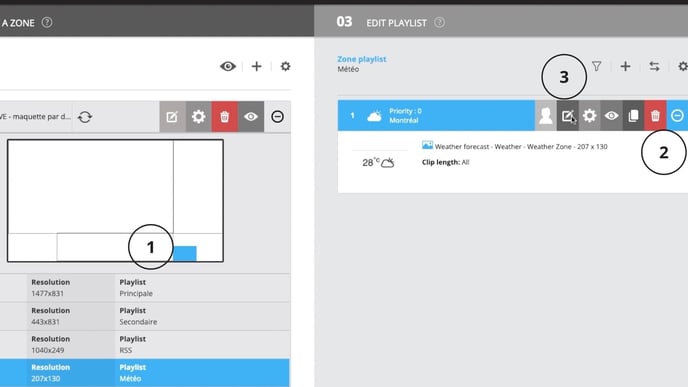
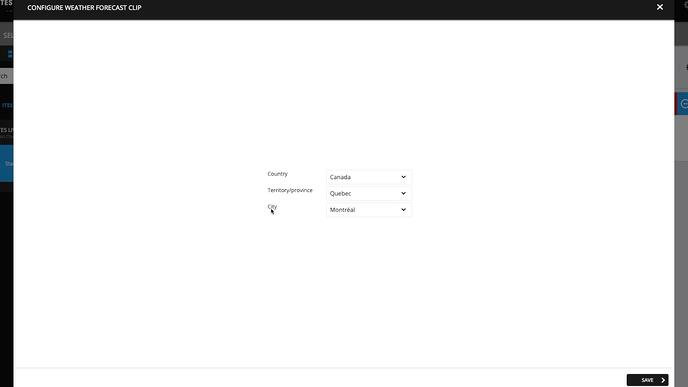
4. Change the desired city for your weather information
When you sign into your account for the first time, the default city for weather information is Montreal. Follow the steps below to change it.
Note: If your city is not listed, contact our team at support@itesmedia.tv.
3.1 Select the zone where you have a weather information clip for which you wish to change the city, than access the weather location tool

3.2 Select the desired city for your weather information

5. Change your playlists
You can now manage the content in the playlists assigned to the various zones of screen frame. There are many types of content you can add.
- How to add the COVID-19 public health images that come with the system to a playlist
- How to add an image to a playlist
- How to add a YouTube video to a playlist
- How to add a Vimeo video to a playlist
- How to display a website in a playlist
- How to add weather information to a playlist
- How to add an RSS feed to a playlist
